Examples of images for sketching, tips for beginners
Those who are just learning to draw need to know a few secrets that will make the drawing more accurate.
Tips for beginners:
- To avoid smearing the graphite of a simple pencil, you need to place a sheet of clean paper under your hand.
You can use round objects to draw circles
- When creating a sketch of circles and ovals, you can trace round objects or tablespoons by placing them on the paper.
- When coloring the body of the chicken, it is important not to go beyond the lines of the eyes, especially if they are supposed to be white. To prevent this from happening, paint should be applied around each eye and wait until it dries. After this you can start coloring.
- If the paints take a long time to dry, you can blow on the drawing with a hairdryer.
- When painting the long fingers of chickens with paints, the brush should be pressed at the base and raised closer to the end of the finger, then the line will smoothly change thickness.
- To show the direction of feather growth, you need a hard-bristled brush and very thick paint. Then you will get clear strokes.
- You need to outline a picture painted with paints only after it has completely dried.
The main rule of drawing is not to be upset if the drawing does not turn out beautiful the first time. You can always take a new sheet of paper and try to draw the picture again.
Drawing chickens will help children develop their thinking and prepare their hands for writing. Parents should conduct classes with their child, explaining during the drawing process who chickens are, where they come from and how they grow. You can choose a picture for sketching from the options presented in the article.
What you need for drawing
It is advisable to choose paints in natural shades. The table lists the main paint colors and additional tools that may be needed for painting, as well as their purpose.
| Simple pencil | It is needed to create a sketch. For a colorless drawing you will need 3 pencils of different hardness with marks: T2, TM, M2. |
| Eraser | Needed to remove excess pencil lines |
| Yellow paint | You need it to paint the body of a chicken. |
| Orange paint | For detailing and coloring the beak |
| Brown paint | Useful for creating shadows, drawing feathers and painting legs. |
| Black paint | It is needed for the design of the eyes and the final stroke. |
| Artistic brushes | Brushes should be of different thicknesses and hardness |
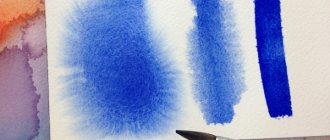
If the chicken will be painted in watercolors, then it is better to give preference to special sheets for watercolors. This paper is thicker than regular landscape paper. It does not deform from moisture. The surface of these sheets is rough, so they absorb excess paint well and do not allow it to spread.
ECD for drawing with a poke for children 5–6 years old with mental retardation “Chicken”
Violetta Noskova
ECD for drawing with a poke for children 5–6 years old with mental retardation “Chicken”
Abstract of the educational activity on visual activity " Chicken "
compensatory group for children 5-6 years old
Goal: to learn to convey in a drawing the features of the appearance of a chicken
— introduce children to the technique of “poking with a dry brush”
;
- expand ideas about poultry (name, appearance features,
methods of movement, sounds made);
— enrich and activate the vocabulary on the topic;
- develop mathematical concepts: above, below;
— cultivate love and caring attitude towards poultry;
- learn to listen carefully to your interlocutor.
- develop visual attention and perception;
- develop speech hearing and phonemic perception;
- develop memory , fine and gross motor skills, coordination of speech with movement.
Materials and equipment: multimedia equipment, presentation “Poultry”
, sheets of white paper, hard brushes, thin soft brushes, gouache, toy
chicken .
Step-by-step instructions for drawing a chicken with a pencil
A chicken (a drawing for young children should not contain too many details) drawn with simple pencils can be more realistic than a picture made with paints. Using thin pencil lines you can show the direction of feather growth, apply shadows and work out small details of the drawing.
Outlines
First you need to make a sketch in pencil marked T2.
Chicken - drawing for children step by step
Algorithm of actions:
- Draw a small circle in the center of the sheet. This is the future head of the chick.
- At the bottom, draw an oval twice as large as the head. Position it at an angle. The top of the figure should be in contact with the outline of the circle below.
- Using thin lines, connect the circle and oval into 1 shape. The point where they meet is the chicken's neck, so the lines should be slightly curved inward.
- Draw a small tail for the chicken, slightly extending beyond the lines of the oval.
- Mark 1 small wing on the side. Its edges can be depicted with a wavy line, imitating the shape of feathers.
- Since the chicken in the picture will be turned half a turn, the other wing should not be drawn completely, it is enough to depict only a small part protruding from behind the breast.
- Draw the bird's legs from below. They should have the shape of an inverted and elongated cone.
- At the bottom, on the thinnest part of the legs, draw hooked toes.
- Draw a triangular beak.
- Add 1 small and round eye. Draw on 2 short eyelashes.
- There is no need to draw on the other side of the eyes. It is enough to indicate the protruding eyelashes, which will show that the chicken has 2 eyes, it’s just not visible.
Use an eraser to erase all additional lines. Remove the connections of the figures inside the neck, erase the lines inside the tail.
Detailing
Details should be drawn with a pencil marked TM.
Chicken - drawing for children step by step
Algorithm of actions:
- Draw the outline of the chick's head and body with a zigzag line, imitating protruding fluff and small feathers.
- Draw a small tuft on the top of the chicken's head.
- Draw the feathers on the wings and tail.
- You need to make several horizontal stripes on the bird’s legs.
- Draw nostrils on the beak.
Using an eraser, remove the contour lines of the head on the crest, and also erase the old contour of the body.
Shadows and highlights
The shadows need to be worked out with a pencil marked M2.
Algorithm of actions:
- Shade the lower part of the body.
- Mark the shadow under the wing.
- Paint the tips of the wings.
- Shade the area under the tail.
- Apply a few strokes to the front of the neck.
- Mark the shadow under the crest.
- Carefully blend all applied strokes with your fingers.
- Use an eraser to remove any graphite that has accidentally smeared behind the contours of the drawing.
- Paint in the chicken's eye and shade its beak.
When applying strokes, there is no need to put pressure on the pencil. Using an eraser with a sharp angle, erase some of the graphite inside the eye to create a highlight. Also remove a thin layer of graphite from the top of the beak.
Summary of a lesson on drawing with a poke for children of senior preschool age “Chickens”
Gulia Bogdashkina
Summary of a lesson on drawing with a poke for children of senior preschool age “Chickens”
Goal: learn to draw chickens walking in the yard; improve your poke drawing . Form cognitive interest.
Material: landscape sheet, gouache box, small color check sheet,
all painting , paintings of chickens .