Hedgehog for preschool children
The figure of a hedgehog is always drawn in two parts: the head and the body. Their location is marked on a piece of paper using two ovals.
The body template is a large oval drawn horizontally. A smaller oval is depicted vertically, which will become the base for the hedgehog’s head.
There is no point in worrying that the outline of oval shapes is uneven. At the end of the job, the lines will be covered with needles or simply wiped off.
Step by step:
- A sharp muzzle is added to the small oval, and inside it there is a small circle instead of an eye. The pointed part ends in a round spout. Four legs are added at the bottom along the entire body.
- A general outline of the animal’s figure is created. Two ears are completed. The hedgehog's legs resemble curved branches with two processes of different lengths directed in one direction.
- The conditional lines of the sketch are erased. Small antennae are drawn next to the demolition. The eye area is more clearly defined. A trace of glare is left on the pupil.
- Three fingers are formed on the hedgehog's paws.
- The upper contour line of the abdomen is drawn.
- The needles are applied with small teeth tightly adjacent to each other with a slight inclination to the right. If you draw them like stroke sticks, you will get the image of a porcupine.
- The conventional lines are erased from the drawing.
- Shadows add volume to the hedgehog, and the leaves under his feet will make the picture complete.
Romantic hero
To portray a handsome guy in love, use the following simple drawing technique:
- Draw a vertical oval.
- Draw ears on top, paws on bottom.
- In the upper part, mark the eyes and nose with two bold dots.
- In the middle, draw paws in the form of two unfinished ovals and “hand” a heart in them to the cute animal.
- Complete the look along the contour of the oval with needles.
Simple instructions for kids
The drawing lesson does not take much time. If all actions are carried out step by step, then for children a 2-3 minute master class on how to draw a hedgehog will not be tiring.
- An oval is drawn in the center of the sheet.
- The figure is divided by a conventional line into two parts.
- One of the parts is sharpened by a protrusion added to it.
- The oval line adjacent to this protrusion is wiped off. This is how the outline of the hedgehog’s body emerges.
- The sharp tip is rounded off with a large bold dot.
- The features of the animal’s face are drawn: a mouth, an eye and an eyebrow above it.
- Dots are placed on the nose, they symbolize mustaches.
- Small legs are being drawn.
- The spines are first drawn with small teeth inside the second part of the oval, then with large teeth on top of the oval.
- The oval line inside the prickly “hair” is wiped off.
Cartoon hedgehog
The funny hedgehog has become the main character of children's cartoons more than once.
Hedgehog from Smeshariki
It’s understandable that children want to figure out how to draw their cartoon idol—the smart and funny hedgehog from Smeshariki.
- The body of the funny hedgehog from Smeshariki is drawn as a circle.
- A block letter “A” is written inside the circle with a slight slant. Its lines will determine the location of the arms and legs and will make it easier to draw the hero’s face.
It is planned to draw a hedgehog in motion, which means one leg should be drawn raised.
- The position of the hands is noted first.
- The outline of the eyes is drawn.
- The image of the right sole located below differs from the high raised sole of the left foot.
- The contour line of the hedgehog's needles is applied using a herringbone pattern. The upper cone with a downward expansion is a needle on the top of the head. From there the rest of the hedgehog's spines begin to appear.
- The nose is drawn in a triangular shape, two circles represent two eyes. A small ear is drawn on the side.
- A small triangle is drawn on the top of the head under the line of needles. It serves as a guide for where the eyebrows will be located.
- The contours of the arms and legs of the cartoon prickly character are drawn more accurately. In this case, a realistic image is not required, but special attention is paid to drawing the sole of the left foot.
- The work on the design of the nose and mouth is being completed. The teacher's drawing is used as a guide.
- Working on the eyes will complete the image of the hedgehog from Smeshariki. Circles with a large radius are drawn around the eyes. This is how the hero gets points. One scent is added to them to make the accessory look believable. Pupils and highlights appear in the circles of the eyes. Eyebrows are applied in short, wide strips.
- The hedgehog image is ready for coloring.
The first coloring option is to apply shading to the drawing to highlight the shadows. The drawing will be more fun if you use light-colored pencils.
Character from the cartoon "Hedgehog in the Fog"
Not only children, but also adults love the hedgehog from the cartoon “Hedgehog in the Fog.” He remains a favorite of more than one generation. Getting closer to your childhood friend is easy. Just follow the step-by-step lesson on how to draw a hedgehog in the fog.
- A conditional inclined line drawn in the center of the sheet is chosen as a guide when creating the image of a cartoon hedgehog.
- The general contour lines of the character are built around the line.
- Small details are added to the sketch to form the image.
- The eraser removes conditional auxiliary lines.
- The sketch is completed by adding spines and designing a pouch in the hedgehog’s paws.
- The hero of your favorite cartoon is colored with dark pencils.
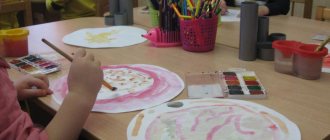
Development of notes for a drawing lesson in the middle group
The drawing lesson includes three stages of working on the topic:
- introductory - up to 3 minutes - the teacher motivates the children to work, that is, updates their knowledge on the topic;
- main - up to 12 minutes - the teacher describes the procedure for completing the task, the children draw, to relieve muscle tension in the middle of the creative process, finger exercises and/or physical education are performed;
- final - up to 3 minutes - the teacher organizes a spontaneous exhibition of works, praises the kids for their drawings, children evaluate their works according to the “like/dislike” criterion and try to say why.
Table: Antonova M.V. Summary of a drawing lesson on the topic “Kitten” in the middle group
| Stage | Content |
| Introductory | Educator: - Guys, a guest came to us today, he asked not to name him. He wants to play the game “Recognize by Voice” with you. Let's try to recognize our guest? I turn on a recording of the cat's voice. A cat appears. Educator: (on behalf of the cat) - Hello, guys! Let's introduce ourselves, my name is Dymok. (Children say their names.) Teacher: (on behalf of the cat) - I came to you today for a reason. I want to ask you for help. My cat friends have a birthday soon. I wanted to please them, to draw them holiday cards with my friends on them. But I have many friends, but little time. Maybe you guys can help me? Educator: - What, guys, should we help Dymka? (Yes, we will help.) Educator: (on behalf of the cat) - Thank you very much for not refusing my request. Educator: - Smokey, but we don’t know what your friends look like. Educator: (on behalf of the cat) - I have photographs of them. Look! I place pictures of cats with different colored fur on the easel. Children look at the “photos”. |
| Basic | Educator: - Guys, go to the tables and choose pictures with pictures of kittens. Children sit at tables and choose coloring pictures. |
| Educator: - Guys, so that the fur of our kittens is fluffy, we will paint with a glue brush. Touch it, what does it feel like? (Hard, solid, rough) Educator: - Guys, look at how we will draw the kittens’ fur. We hold the brush correctly, the handle of the brush should be directed upward, the movements should be jerky. First, we use a poke to draw the shape of the cat along the contour, then, using a poke, we paint over the entire body of the cat. We put a little paint on the brush. When the cat is painted with a soft brush, you can complete the postcard as you wish. It could be: the sun, grass, flowers, sky, butterfly. Do you guys all understand how to draw? Then start drawing. Children draw, the teacher controls the drawing process, helps children in need. | |
| Final | Educator: - Guys, Dymka liked all your cards. And as a farewell, he wants to play the game “Cat and Mice” with you: Children stand in a circle, holding hands. The teacher sits on a chair in the center of the circle with a cat toy. Children walk in a circle and say words. The mice are dancing in a circle, The cat is dozing on the bed - Quiet the mouse, don’t make noise, Don’t wake Vaska the cat! When Vaska the cat wakes up, he will break up the whole round dance! The cat catches up with the children, the children run away to the chairs. |
| Quote from: https://ped-kopilka.ru/blogs/marija-vasilevna-antonova/konspekt-nod-po-risovaniyu-v-srednei-grupe-kotenok.html | |