Preparation for the art lesson “Simple and Golden Testicles” in the middle group
The lesson in question has a simple topic and task. To make it effective, the teacher carries out preliminary work, thinks through the structure of the lesson, and determines what is necessary for the practical part. Of course, taking into account the age and individual characteristics of the children. Educational activities bring positive emotions to children. For a positive creative experience, the child completes tasks that correspond to his abilities.
From a variety of materials and tools, the teacher selects the optimal ones for drawing for children 4–5 years old
Paints and base for painting
- Gouache - for drawing and coloring eggs. Watercolor - for drawing additional elements (nest, straw, grass).
- Medium thickness natural bristle brush. A thin brush will be needed if you intend to decorate testicles or paint other objects.
For painting in the middle group, it is better to use a medium-thick brush and rich paints - gouache - A4 sheet or half size: thick colored paper (office paper is not suitable),
- colored cardboard,
- blank tinted by the teacher (in watercolor),
- sheet with a printed image of a chicken or nest.
Children can draw testicles on a sheet with a picture of the Ryaba hen
Drawing technique
- Preliminary training in drawing an oval shape: children “draw” ovals in the air with a finger or a dry brush,
- chalk on a blackboard.
Pupils of the middle group develop the skill of drawing with a line and the ability to paint with a brush
For the lesson “Simple and Golden Testicles,” classical drawing techniques can be combined with non-traditional techniques. For example, grass or straw is depicted with finger paints. The nest can be depicted using thread printing, and the background can be painted with a foam sponge.
Combination with other types of artistic activities
Incorporating elements of modeling and appliqué into productive creativity in the classroom helps keep children’s attention in the work process. It is proposed to decorate the finished drawing of the testicles with plasticine elements: the sun, blades of grass, pebbles. Using applique, middle preschoolers can depict a nest or imitate the plumage of a chicken.
An ornament of applique details will decorate the pattern “Simple and Golden Testicles”
Multi-level tasks
An individual-personal approach to the lesson “Simple and Golden Testicles” should be implemented by complicating the task for children who actively demonstrate artistic talent:
- ask to draw not two eggs, but five gold and five white,
- give the task to draw a basket or nest for the testicles.
The teacher identifies which of the children can be given a more difficult task, and which needs help.
Place of the lesson “Simple and Golden Testicles” in the drawing card index
According to the art program in the middle group, the topic “Simple and Golden Testicles” is taught at the beginning of the school year. The teacher suggests remembering simple geometric shapes, thinking about which natural objects are oval. During the lesson, knowledge about the world around them expands and speech abilities develop: children answer questions, remember and recite the plot of a fairy tale.
Children 4–5 years old improve their skills in drawing lines and shading silhouettes. At this age, it is recommended to give a basic understanding of composition. Middle-aged preschoolers are unlikely to be interested in drawing two ovals on a piece of paper. Invite the children to create a fairy-tale picture: draw grass, glue a nest, and only then draw eggs in it.
It will be useful and interesting for children to diversify the composition with eggs
Master class on how to draw an Easter egg with a pencil step by step for beginners
The next master class on how to draw an Easter egg with a pencil is also suitable for beginners, including children of primary school age. It uses a similar technique for depicting an Easter egg, which, however, is a little more complicated than the previous version. We are sure that thanks to this master class “How to draw an Easter egg with a pencil step by step for beginners,” anyone will be able to master the image of an Easter egg.
Instructions on how to draw an Easter egg step by step for beginners with a pencil
- We unfold the sheet of paper vertically and, using a ruler and a simple pencil, draw a straight line in the middle.
- Mentally divide the vertical line into three equal parts and mark the points on the straight line with a pencil. Now we draw horizontal lines through these marks: on top - the shortest, in the middle - the longest, and below - a line shorter than the middle one.
- We connect the edges of all the lines together, as shown in the photo. The end result should be a perfectly shaped egg.
- Use an eraser to remove all unnecessary lines inside the egg.
- Now all that remains is to fill the surface of the egg with thematic patterns and add bright colors - the original Easter Easter egg is ready!
Golden egg
We will need:
- Chicken egg
- Leggings or nylon tights (we won’t cook them, so nothing will happen to them)
- Flashlight (any one will do, even on a phone)
First, shine a flashlight on the egg to check its color. The egg should glow.
Tie a knot in the tights, place an egg in them and tie on the other side.
Next we have two
option:
First option
You simply spin the egg non-stop and swirl it for about 2 – 5 (the more the better) minutes.
In this case, you simply swap the whites and yolks.
.
Second option
You still spin the egg for about 2 minutes, but every 5 - 10 seconds you stop the rotation, sharply spreading your arms to the sides.
In this case, the yolk and white will mix
and the whole egg will turn out yellow.
Take the egg out of the tights and check it with a flashlight; it should no longer glow.
If it still glows, then the rotation procedure must be repeated.
Then just hard boil the egg (7 – 10 minutes). After cooking, place in cold water to remove the shell better.
That's all! If you followed the first option, you will get something like this:
And if according to the second, then something like this:
Liked? Subscribe to the channel, rate and share on social media. networks!
Summary of the lesson “Simple and golden testicles” in the middle group
Competent task setting and lesson planning contribute to the successful activities of the teacher and students.
A drawing lesson in the middle group lasts 20 minutes and has a clear structure:
- Organizing time.
- Motivating start to class.
- Practical work.
- Reflection (summarizing, discussion of work).
Showing and discussing drawings is a mandatory stage of the lesson in the middle group.
My daughter loved to draw from an early age. But one day I didn’t find her drawing at an exhibition of works. The group drew on the topic, but my daughter refused (according to the teacher). But to be honest, my daughter has lost interest... Don’t miss the introductory part of the classes, motivate your children - the artist in them will awaken!
Table: examples of a motivating start to a lesson
Video: cartoon based on the fairy tale “Hen Ryaba”
Table: lesson notes on artistic and aesthetic development in the middle group “Simple and golden testicles”
Shaping
Chicken eggs have an oval, slightly elongated shape with one blunt end and the other sharper end. To do this, we need to give our oval an ovoid shape. Below from the middle we draw a circle.
Smoothly trace the outline of the egg.
Erase the extra lines.
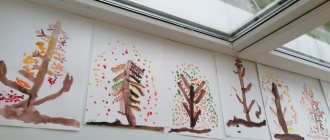
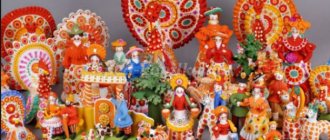
Photo gallery of examples of finished compositions.
A drawing lesson in the middle group “Simple and Golden Testicles” is a rather interesting topic. Despite its apparent simplicity, it makes it possible to consolidate children’s theoretical knowledge about poultry and recall the plot of a familiar fairy tale. A variation on the Easter theme is very exciting and educationally useful. Such productive activities allow you to consolidate the ability to draw narrow lines with a brush and rhythmically apply wide strokes without going beyond the contour of the image. In addition, if children additionally decorate painted eggs, they develop imagination and the ability to harmoniously arrange an image on paper.
- Author: Larisa Morozova
Higher philological education. Experience as a proofreader, editor, website maintenance, teaching experience (first category). Rate this article: (3 votes, average: 5 out of 5)
Tags:
Willow
Shot: ELENA ISCENCO / YouTube
How to draw
Using a wide brush, make a yellow stripe at the top of the leaf and a green stripe in the center. Paint the bottom of the paper with blue gouache. Add white strokes to the background and mix the colors together, blurring the transitions between colors.
Shot: ELENA ISCENCO / YouTube
Use a thin brush to paint a few brown branches. To do this, you need to outline long broken lines. Add small brown buds - they are close to oval in shape.
Shot: ELENA ISCENCO / YouTube
To show willow inflorescences, take white gouache on your index finger. Make a mark over each brown bud. Mix white and black paints on the palette. Using a thin brush, apply a shade to each flower: this will indicate the shadow.
Shot: ELENA ISCENCO / YouTube
To make the willow flowers fluffy, add white and yellow strokes to each one. The shadow on the branches is marked with black paint.
Shot: ELENA ISCENCO / YouTube
Details are in the video:
What other options are there?
Bright holiday drawing:
Here they show how to depict a willow in watercolor:
A simple method suitable for beginners:
Minimalistic watercolor drawing:
If you want to draw a willow in a vase: