Draw mom with a pencil
The easiest option is to draw a portrait using a simple pencil.
First we draw the oval of the face. We make the chin pointed.
We outline the location of the hair, ears and eyebrows. At the bottom of the oval we draw lips and nose.
Let's start drawing the eyes. In shape it resembles an oval, inside of which there is a round pupil.
Then we add the neck and complete the hairstyle. The portrait can be colored with pencils. This will make it colorful and unique.
How to draw mom
March 8, International Women's Day, is approaching, and many people want to please their mother with a touching gift - a portrait. However, drawing a mother beautifully step by step with a pencil is not an easy task even for experienced artists, and for a child it can be quite difficult. I'll show you how to draw a mom easily and without extra effort - just repeat all the steps of this step-by-step lesson. You will need a pencil, an eraser and paper; we will color with any suitable material for this - paints, colored pencils, crayons, felt-tip pens and anything else at all.
Since we are drawing a portrait of a mother for March 8 or Mother's Day for children, we will need to draw the face and shoulders. People have an oval face shape, so let's start drawing by building a base like this. I leave the top open, that's where we'll draw the hairstyle. You may not succeed the first time, but it doesn’t matter - just use the eraser and correct mistakes as you go.
Now we need to draw mom’s neck. These will be two smooth lines, you should get something like this.
Next we need to draw the shoulders so that the portrait of the mother looks pleasant and organic. Now, we have the base ready and it begins to resemble a person.
Now we need to beautifully draw mom’s face. I always start drawing faces from the eyes, and my mother’s portrait for March 8th will be no exception. We draw two almond-shaped shapes, and a little higher - the lines of the eyebrows. Here it is especially important to remember what kind of eyes your mother has and try to imitate their shape.
Just below I draw a neat nose in the form of just two lines. Look, it's very easy to draw, but at the same time such a nose looks natural. A little lower I draw the lips and a light line above the chin.
We correct the contours a little - do not be afraid to correct the portrait of your mother on March 8th with a pencil if you want it to turn out beautifully. Here I draw the folds above the eyes, the iris and pupils, as well as the eyelashes. If your mommy has moles, birthmarks or other features on her face, be sure to reflect them!
All that's left to do is draw mom's hair and ears. We draw the ears at approximately the same level as the eyes, and the hairstyle will be the same as your mother’s. My mom has short hair with little bangs, so that's how I draw.
Next you need to draw the clothes. I draw a neat collar, you can draw your mother’s favorite sweater, top, top of the dress. You can add other details - for example, mother’s beautiful beads, earrings and other jewelry that she really likes.
If your mom has a different hairstyle - for example, long hair, a high ponytail, a bob or something else - draw with a pencil exactly how it looks. For example, you might end up with something like this.
And now our portrait of our mother needs to be colored step by step! I paint mommy's skin beige and add some blush to her cheeks. Hair is a pleasant brown shade. My mother’s eyes are special - one is green, the other is green with a brown spot, I also reflect this in my drawing so that the portrait for March 8th is more recognizable. I don't forget to make the shadows an orange tone on the skin. I paint my clothes green to match my eyes.
So, I showed you how a child can draw his mother beautifully for March 8 or Mother’s Day. If you decide to draw a picture of your mother and you succeed, be sure to share the result in the comments, I’m very interested to see. If you have any problems, you can also ask for help in the comments.
"Portrait of my mother." Summary of a drawing lesson in the senior group
Lyudmila Dzhurmiy
"Portrait of my mother." Summary of a drawing lesson in the senior group
Lesson notes for the senior group
on the topic " Portrait of my mother "
Continue to introduce children to the genre of fine art - portraiture .
To develop children’s ability to convey characteristic facial features and maintain proportions.
Reinforce watercolor painting .
Evoke in children an emotional attitude towards the image of their mother .
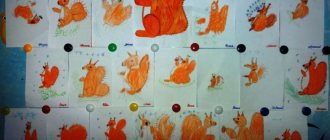
Tools: easel for the teacher, album sheets, watercolor paints, white gouache, paint brushes, palette, oilcloths, reproductions of paintings, photographs of mothers, tables of the sequence of drawing a portrait , musical accompaniment - audio recording with the song “Mom”
Methods: Artistic language, conversation, questions, drawing .
Preliminary work: design of the photo exhibition “My Mommy”
, reading works about mother - S. Marshak
“The Tale of a Stupid Mouse”
, S. Mikhalkov
“What do you have?”
, B. Emelyanov
“Mom’s Hands”
, introducing children to the genre of
portraiture , looking at portraits of artists and their own reflection. Conversation on the topic “
Different mothers are needed , different mothers are important . ”
Summary of a drawing lesson in a senior mixed-age group on the topic “Portrait of my mother”
Lyudmila Kopitsa
Summary of a drawing lesson in a senior mixed-age group on the topic “Portrait of my mother”
Goals and objectives: to consolidate children’s knowledge about the portrait genre. Cultivate a feeling of love and respect for the mother through communication with works of art. Make children want to draw a portrait of their mother, to convey in the drawing some features of her appearance (eye color, hair color). Learn to position parts of the face correctly. Strengthen the techniques of painting with paints using the entire brush and its tip. Cultivating love for family members.
Materials and equipment: sheet of paper, pencils, watercolors, gouache, palette. Thick and thin brushes, glasses for water, napkins, an audio recording of the song “Mom, the first word.”.
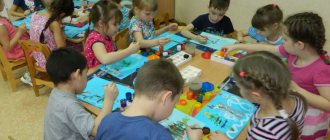
Progress of the lesson:
Guess the riddle: If you see one of us looking from the picture, Or a prince in an old cloak, or some sort of steeplejack, A pilot or a ballerina, or Kolka, your neighbor.
The painting must be called... (portrait) Educator: What types of portraits are there?
-Portraits are also distinguished by size, for example miniature.
Educator: Place your hand on your forehead. A person's eyes are located below the forehead, in the middle of the face. What shape are they? (oval with sharp corners).
The teacher draws an oval with chalk on the board and his eyes in the middle, explaining that the distance between the eyes is small, no more than one eye. Inside the eye there is a colored circle and a small pupil.
Educator: What kind of eyes does your mother Lera have?
Lera: Brown eyes.
Educator: Your mother is brown-eyed! And your Sasha?
Sasha: Mom is blue-eyed. Educator: What kind of eyes does your mother Vera have?
Vera: My mother has gray eyes.
Educator: What is above the eyes? (brows).
These are arcuate stripes.
Educator : But a person’s nose is the same color as his face. Therefore, you need to draw only the tip of the nose in the middle of the distance from the eyes to the end of the face. But from the tip of the nose to the end of the face there are lips. Educator: Children, look at each other. You see that the upper lip is different in shape from the lower. There are, as it were, two waves on the upper lip, and one on the lower lip (draw lips). Place your hand on your chin.
- Now tell me where the eyes are located? (in the middle of the face).
- The tip of the nose? (in the middle from the eyes to the end of the face).
- Lips? (midway from the tip of the nose to the end of the face).
— You will draw a full-length portrait of your mother – head, neck, shoulders. Don’t forget that the neck is narrower than the face, and the shoulders are wider than the head (I show it in the portrait).
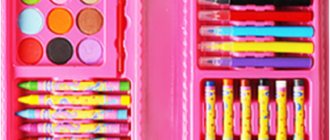
Portrait with colored pencils
You can draw a gift for mom with colored pencils. In addition to them, it is worth preparing a landscape sheet and a black felt-tip pen.
Instructions on how to draw a mother step by step:
- Draw an oval for the head. In the center of the oval we draw the eyes, their shape resembles petals. At the top of the eyes we add arcs - eyelids, and in the center - pupils. Add eyebrows above the eyes.
- The part of the face from the eyes to the chin should be divided in half. Mark the middle with a dot. Up to this point, draw a line for the nose. Add a small wavy line to it below.
- Mark the location of the lips. Draw a wavy line for the upper lip. Draw the central part of the mouth and add the lower lip.
- It remains to add a few details. Under the chin we draw the neck and shoulders. At the top of the head we draw hair.
- The sketch is ready and you can move on to coloring. It's worth starting with the skin. To do this, it is preferable to choose colors that are as close as possible to natural shades.
- We highlight eyebrows and eyelashes with black color. We paint over the pupils. Using a thin black pencil, draw long eyelashes from the outer corners of the eyes. Paint over the lips.
- Then we move on to the hair. We draw long strokes from the roots of the hair. To depict them, it is better to take pastel pencils or a simple one, but with a very soft lead.
- You can add a dress if you wish. To do this, just draw a line for the neckline and paint it with the color you like. You can decorate the portrait by drawing beads or earrings.
The portrait is ready. To make it memorable, use your mother's facial features.