Self-analysis of the teacher
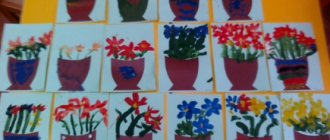
On March 18, 2016, I conducted direct educational activities with children of the middle group on an application on the topic: “Tulips - spring flowers.”
The NOD lasted 21 minutes, 6 children were present.
The purpose of the GCD was the following: the formation of the environmental perception of children 4–5 years old through artistic creativity.
Tasks:
- develop children’s ideas about spring flowers;
- introduce children to the parts of flowers;
- recall the gluing technique; cutting along the contour;
- get joy from your own creativity.
Preliminary work.
In preparation for the GCD, I did the following work: prepared a lesson summary, looked at spring flowers, introduced children to the names of spring flowers, looked at the parts of a flower for the lesson.
GCD move.
During my educational activities:
• Techniques were used to attract and focus children's attention: a flower vase.
• Methodological techniques were used, such as: introductory conversation, explanations; questions for children; reminder of how to perform actions; answer completion; assessment of the implementation of actions; use of clarity; Physical education is moving.
• During the lesson, I tried to carry out individual work when I asked questions on this topic, and also reinforced the material with choral answers.
• I noted the good emotional mood of the children, as I tried to make this activity interesting.
• We managed to fit into the limited time of the lesson, since everything was thought out in advance.
During the GCD, I used a change in types of activities: at the beginning of the lesson, the children were on the carpet, then they studied at the tables, physical exercises were carried out. just a minute.
Summing up the GCD.
• When summing up the lesson, I thanked all the children for an interesting and exciting activity and also asked the children whether they liked the activity or not.
Thus, as a result of the direct educational activities, the set goal was achieved, because all the tasks were successfully completed, the children really liked this form of educational activity, and they willingly got involved in the application activities.
Author: Marina Nikolaevna Duginova, teacher at MBDOU CRR kindergarten No. 51 “Rodnichok”, Azov district, Kagalnik village, Rostov region, Russia.
The article is published in the author's edition
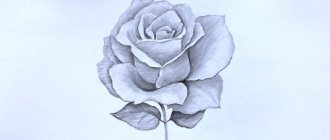
OOD abstract on application in the middle group “Beautiful Flower”
Finger gymnastics “Castle”
There's a lock on the door,
Who could open it?
They pulled, twisted,
They knocked and opened it!
- So the magic gates of a fairyland have opened ! Well, let's go!
(Children go through the gate closer to the screen)
- Here we are greeted by a multi-colored rainbow, and here comes the bright sun! Let's go towards the sun, it will definitely lead us to the magical palace!
(Children are just about to take their first steps towards the sun when alarming music sounds and the color picture of the magical land of beautiful speech turns black and white)
II. Main part.
(A voice is heard from the projector screen)
- What are these children?
Voice:
“Hello, our dear guys! Residents of a fairyland are writing to you ! Evil wizards bewitched our sun and scattered its rays and it became dark in this beautiful country ! Everything we have: houses, fields, forests, paths, and rivers, everything is left without light and will soon perish! Help us disenchant our country , and we will thank you for it!”
- Guys, look, without the sun with its warm rays, in the multi-colored country of Beautiful Speech it has become dull and ugly! The sun is completely sad! (The teacher points to the subject board on which there is an image of a sad sun without rays) Guys, let's help the sun! To disenchant the rays you need to complete tasks! Let's help the residents of this fabulous country ?
-Yes, we will help!
-Then quickly sit down on the chairs!
(The teacher reads out the tasks written on the rays and, having completed the tasks, attaches the rays to the sun. All rays are scattered throughout the group )
Task I: Here comes the first ray of light, listen to the task: “Call me kindly”
(The teacher, throwing the ball to the child, calls the word, and he calls it affectionately)
Example words: Monkey, hippopotamus, dog, bull, boar, badger, beetle, etc.
- Well done guys, you did a wonderful job with your first task! What is the second task?
Task II: “Video” We need to watch the video, and then answer the questions, get ready.
(The teacher plays a video about spring)
-What time of year were you talking about?
-About spring
-What signs of spring do you know?
-In spring, the snow melts, streams flow, the sun shines brighter, birds fly in, the first flowers appear.
-What spring months do you know?
-March April May
III task: “Animals in spring”
-Well done! And the third ray asks us about what animals wake up in the spring?
-In spring, the bear, badger, and hedgehog wake up.
-That's right, I know one very interesting hedgehog. Let's listen to a story about him. And for this we will need our massage balls, our faithful friends for the development of fine motor skills .
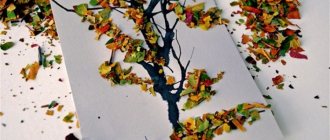
Autumn bouquet
To create a small flower collage for a school exhibition, you will need cardboard of a certain color, natural dried plants, a pencil and paper for sketching a sketch, scissors, tweezers, transparent glue, and brushes.
You can use a variety of plants that have been dried either in small bunches or individually, while preserving the stems.
Application execution sequence:
- cover the cardboard with fabric in autumn colors (it is advisable to use knitwear);
- for the bouquet, select non-voluminous specimens;
- Decorate the collected bouquet with floral ribbon;
- place the composition on the base, make two holes on the sides, and use wire to tie the product to the base;
- you can put flowers in a vase cut out of thick colored paper (as an option, use a piece of strong embossed wallpaper) and glued on top of the stems;
- Use beads, bows, small dried leaves and flowers as decoration.
Among other exhibits, a similar painting - an applique will take its rightful place.
The Internet contains a large number of photos of compositions of this style, as well as catalogs dedicated to various stylistic features of the applique. Therefore, suitable samples can be selected.
Types of applications
Paper is most often associated with this occupation. However, there are several criteria by which the types of this needlework are classified. These signs are:
- form;
- color;
- subject;
- application area;
- purpose;
- material;
- performance technique;
- base type;
- fastening method;
- style.
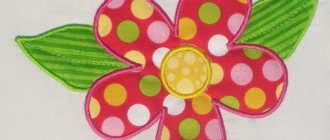
Flowers using the applique technique are the most popular components. This article will help those who want to start making high-quality paintings on the topic: “Flowers”.
Master class: simple flower
Simple instructions for children will help you make a cute applique that can serve as a gift card.
We take the following materials:
- Cardboard, you need to take colored one;
- Colored paper;
- Scissors;
- Glue;
- Pencil;
Work progress:
- From paper of different colors you need to cut out five blue circles, one yellow circle (stamen), two medium-sized green circles and one stripe.
- Blue circles (petals) bend their edges inward.
- A round yellow stamen is glued to a cardboard base, with a stem attached to it.
- The petals are glued around the stamen, then the leaves.
The simple flower applique is ready!
Master class: flowers on a stem
This beginner's tutorial will help you make cute flowers on a stem, which are prepared according to a simple pattern.
The following materials need to be prepared:
- Thick paper of any color;
- Green corrugated paper;
- Wire;
- Scissors;
- Glue;
Work progress:
- You need to cut a circle out of paper and fold it three times. The wide part of the resulting triangle is rounded off with scissors.
- The circle unfolds and the workpiece is glued together.
- The wire must be bent so that on one side it resembles a hook. It needs to be covered with green corrugated paper.
- The stem is inserted into the center of the flower, with the hook inward, it should also be wrapped in green paper.
This is an incredibly simple and accessible scheme that even a child can handle.
Master class: flower garlands
You can make stunning flower garlands from ordinary paper that can decorate any occasion.
The following materials should be used:
- Corrugated paper in different colors
- Scissors
- fishing line
- Glue
Work progress:
- Rectangles are cut out of corrugated paper and folded into a stack five times.
- The size of the rectangles determines what size the flowers will be.
- Each stack needs to be collected into an accordion in the middle, secured with a paper ring, and the edges of the petals should be folded up; they must first be rounded.
- The finished flowers are strung on a fishing line, the garland is ready.
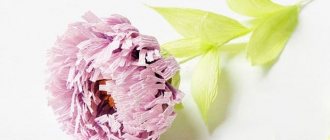
Master class: pink chrysanthemums
Chrysanthemum is a very unusual and delicate flower that can be turned into an applique.
First, the materials are prepared.
- Colored paper;
- Pink corrugated paper;
- Green and yellow felt-tip pen;
- Scissors;
- Glue;
Work progress:
- From pink paper you need to cut strips five centimeters wide along the entire length. The strips need to be folded several times.
- Pointed petals are cut out on the folded strips; for this you need to use scissors.
- The strips are straightened, glue is applied along the entire length at the bottom of the strip, and the strip is rolled into a tight roll. The petals bend outward.
- To make the flower voluminous, you need to twist the petals with scissors, draw a yellow stamen inside the flower using a point-by-point movement of a felt-tip pen.
- A vase is cut out of decorated or any colored paper. It needs to be glued to the base.
- Chrysanthemums are glued above the vase; the more flowers, the more magnificent the bouquet. Leaves are cut out of green paper and glued around the flowers and along the edge of the vase.
This step-by-step instruction on how to make a flower applique will be an excellent assistant in this matter.