Self-analysis of the teacher
On March 18, 2016, I conducted direct educational activities with children of the middle group on an application on the topic: “Tulips - spring flowers.”
The NOD lasted 21 minutes, 6 children were present.
The purpose of the GCD was the following: the formation of the environmental perception of children 4–5 years old through artistic creativity.
Tasks:
- develop children’s ideas about spring flowers;
- introduce children to the parts of flowers;
- recall the gluing technique; cutting along the contour;
- get joy from your own creativity.
Preliminary work.
In preparation for the GCD, I did the following work: prepared a lesson summary, looked at spring flowers, introduced children to the names of spring flowers, looked at the parts of a flower for the lesson.
GCD move.
During my educational activities:
• Techniques were used to attract and focus children's attention: a flower vase.
• Methodological techniques were used, such as: introductory conversation, explanations; questions for children; reminder of how to perform actions; answer completion; assessment of the implementation of actions; use of clarity; Physical education is moving.
• During the lesson, I tried to carry out individual work when I asked questions on this topic, and also reinforced the material with choral answers.
• I noted the good emotional mood of the children, as I tried to make this activity interesting.
• We managed to fit into the limited time of the lesson, since everything was thought out in advance.
During the GCD, I used a change in types of activities: at the beginning of the lesson, the children were on the carpet, then they studied at the tables, physical exercises were carried out. just a minute.
Summing up the GCD.
• When summing up the lesson, I thanked all the children for an interesting and exciting activity and also asked the children whether they liked the activity or not.
Thus, as a result of the direct educational activities, the set goal was achieved, because all the tasks were successfully completed, the children really liked this form of educational activity, and they willingly got involved in the application activities.
Author: Marina Nikolaevna Duginova, teacher at MBDOU CRR kindergarten No. 51 “Rodnichok”, Azov district, Kagalnik village, Rostov region, Russia.
The article is published in the author's edition
Corrugated paper aster
- Secrets of builders: working with couplings
DIY New Year's crafts - 9 best options
- Crafts from stones for the little ones - learning colors
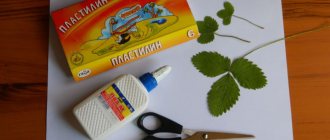
You will need: corrugated paper of purple, yellow, green and light green, scissors, wire, glue gun, pencil, ruler, watercolor paints, brush.
Master Class
- Prepare a strip of purple corrugated paper 4 cm wide.
- Tint one edge of the strip with purple paint and set aside to dry.
- Fold the strip several times.
- Make cuts along the unpainted edge. The first blank is ready.
- Make the second blank in the same way, only take a purple strip 6 cm wide.
- Prepare a strip of yellow paper 3 cm wide.
- Fold the yellow strip several times and make cuts.
- Wrap the wire with a light green piece of corrugated paper and secure with glue. This will be the stem.
- Wrap a yellow blank around the end of the stem - these will be the stamens.
- Twist the ends inside the purple piece, which is 4 cm wide, using a pencil.
- Step back from the base of the stamens and glue the petals.
- Take a 6cm wide purple blank and wrap it around the bud as shown in the photo.
- Twist the ends of the petals and straighten the middle.
- Cut out 6 sepals from green paper, then glue them on.
- Cut 6 long leaves of different sizes from light green paper and glue them to the stem.
The corrugated paper aster is ready! You will find even more flowers HERE.
I recommend watching this video!
Note! Plasticine craft for Easter: master class with step-by-step photos
Making a spring panel with willow from plasticine
The basis of the craft is plasticine. Production time is one hour. Take: a sheet of A4 colored cardboard, a piece of cotton wool, a pencil.
Let's get started:
Draw a vase on a piece of cardboard with twigs placed in the water peeking out. Tear off a piece from a block of blue plasticine (mix blue and white), roll into flagella and twist them in a circle onto a third of the container. Next, finish it with blue plasticine. Make long sausages from brown plasticine and place them on the sheet following the outline of the branches. Twist lumps of cotton wool, wrap the lower part of them with brown plasticine and attach the pussy willows to the twigs.
Applications from other available materials
Sometimes the most unexpected materials are suitable for applique animals. For example, to imitate the wool of a lamb, you can stick pasta “horns” on paper, and it will look like it’s alive. Rabbit skin can be made from white or gray threads. You just need to choose thicker threads, for example wool.
To make an applique of a hedgehog, it is appropriate to make its body from buckwheat glued to paper. And the body of a chicken or a bear is made of millet.
A very convenient material for applique animals is plasticine. It is easy to process, painted in different colors, and it is also a favorite material for children for various crafts. Small pieces of plasticine are simply kneaded in your hands and applied to the base drawing for applique until the entire picture of the animal is painted in the desired color. This results in a 3D effect.
Crafts on the theme of autumn for school
Crafts on the theme of autumn for school are in many ways similar to those made in kindergarten. The difference lies largely in whether the child makes them himself or with the help of his parents. Simple crafts are suitable for DIY. The eyes will come to the rescue - they will make any craft more lively and expressive.
With due diligence, these mushrooms are also not difficult for a child to make on their own.
It’s more difficult to do these options yourself, in many ways you will need the help of parents, but joint creativity brings us together.
Such crafts are suitable for competitions and require imagination from the performer. How do you like these ideas?
Photos of crafts on the theme of autumn for the home
It is not at all necessary to make crafts just because they were assigned in kindergarten and school. Many of them can be made simply to decorate your home. These completely unconventional ideas will amaze you with their beauty and give you unique pleasure and lift your autumn mood.
Dry leaf applications don't have to be simple. Sometimes they become real paintings - masterpieces. Here are just a few ideas.
Wreaths have already become a traditional home decoration, and in the autumn they can also be a small work of art.
For those who like to sew or knit, the ideas might be something like this.
If you don’t want to do anything complicated, but need to create an atmosphere, garlands of leaves or fabric of appropriate colors are suitable.
This pumpkin craft is not at all difficult to make - you will need glue and a flexible pipe for extraction. Bend the pipe to create a pumpkin shape and then spray paint it. Add a stalk - a wine cork or a suitable twig, and decorate the craft with leaves.
This miniature will delight the eye for many years. Of course, it is not so easy to make, but the result is amazing.
This kind of fun pampering with photographs will make long autumn evenings truly creative.
Candles will bring comfort on cold evenings:
A few more craft ideas for adults and children
Which crafts did you like the most?
My name is Nadezhda, I am a mother of many children. I love children and am actively involved in their development. At one time, I was looking for a site where all the information on children’s development, ideas for crafts, and poems for memorization would be collected. And also the inspiration that all mothers need, because being a mother is not always easy. Now I know such a site - I created it myself))) “Mom can do anything!” This is not just a website, this is my motto in life.
Crafts on the theme of spring from buttons - rainbow
Preparatory stage: an adult places buttons on the drawing in advance, selects them by color, sequence, and size.
Draw a rainbow on cardboard. child a pheasant, explaining that the first letters of the words correspond to the colors of the rainbow - every hunter wants to know where the pheasant is going . Apply glue along the basting and lay out buttons according to color. When the rainbow hangs like a rocker, glue two white paper clouds to the sides of the seven-color arc.
Instead of an afterword: look at a selection of exhibition works of preschoolers, we hope you will find the ideas embodied by the children useful.
Autumn craft ideas for kindergarten
Let's start with the simplest compositions. It is difficult for kids to make intricate crafts, so appliques made from dry leaves, chestnuts and acorns would be excellent options. Such applications will delight the little ones.
A wreath made of leaves is also a fairly simple children’s garden craft, but no less beautiful for that.
Such a wreath will be an excellent craft if you do not have time to stock up on natural materials. Just cut out the leaves from colored paper; it will be especially chic if you decorate the leaves with paints or gouache.
Very simple crafts for kids - trees with colorful foliage. There are so many options for making them!
All children love hedgehogs and many people associate this animal with autumn. Cute and prickly hedgehogs with an apple or mushroom on their back will delight children. They are made simply: as a rule, the body is made of plasticine, and needles - seeds (or other natural materials) are pressed into it.
Note! Craft magic wand
Children in the older group of kindergarten are no longer so interested in making simple compositions, so we found several more complex options, but making them will not be difficult. For example, a doll with a dress from dry leaves is not difficult to make. You need to take the top half of the doll and place it in the neck of half a plastic bottle. Due to the shape of the bottle, different styles of dresses will be obtained. The leaves are glued in layers and moment crystal glue is used. Of course, girls will like this craft more than boys.
The following crafts are universal, both boys and girls will be delighted with them. Of course, these are already beloved houses made from natural materials. In such a house you can settle fairy fairies or animals, or you can leave them on their own.