Fabric applique “Clown”
In this type of needlework there are many different techniques for performing crafts. In this MK we will consider the technology of making a clown applique from pieces of fabric. It will also not be difficult for children if adults help them understand the step-by-step description of the work. So, in the preparatory group, children were asked to work with an appliqué made of fabric, pieces of which will be glued to a sheet of cardboard. In addition, children's crafts will look bright and funny if the clown himself is painted. Interesting additions will be applique elements made of fabric, threads or other decorative elements. Another option for clown applique is to apply the contours of the design to a fabric base and secure the details using satin stitches. In this master class we offer several interesting ideas. Pictures can be printed on a printer and then cut out as a stencil.
Theme of the week: “My family”
Lesson 21. Palm (Colored paper. Applique from prepared silhouettes of objects)
Program content. Teach children to apply glue to a part and stick it on a sheet; combine appliqué with drawing. Learn to pronounce the words of the nursery rhyme loudly and clearly, accompanying them with actions corresponding to the text. Cultivate compassion and kindness.
Handout. Half a landscape sheet, colored paper, a circle cut out of white paper the size of a little smaller than a child’s palm (without fingers), a simple pencil, felt-tip pens, glue, a glue brush, a rag, an oilcloth lining.
Progress of the lesson
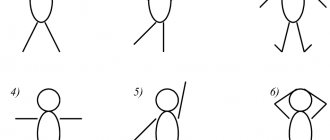
Start your lesson with finger exercises:
This finger is grandpa
This finger is grandma
This finger is daddy
This finger is mommy
This finger is me
That's my whole family!
For the first five lines, each child takes turns taking each finger on one hand, starting with the thumb and ending with the little finger. On the last line of the poem, children clench and unclench their fingers on both hands.
Invite each child to place their hand on a piece of construction paper and trace their palm; cut out the palm yourself.
If you are working with a large group of children, it is better to outline and cut out the palms in advance.
Give the children circles cut out of white paper and invite them to draw a portrait (face) of the child’s favorite family member or even their own portrait on them. The child sticks a palm on a piece of album paper, and in the center of the palm - a circle with a portrait that he has drawn. Be sure to ask each child who he portrayed and why.
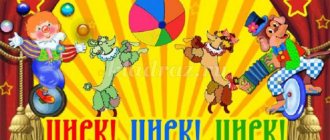
Color applique of a clown made from candy wrappers
Circus is joy, kindness, a lot of positive emotions and good mood. Who is the most fun and funny in the arena? You guessed it - a clown. Children fell in love with this character, and therefore not only in kindergarten you can get into a world where there are jokes and laughter; make a funny clown at home yourself.
Step-by-step photo instructions for the “Clown” applique
The MK presented below is done by children in the senior group of kindergarten as it is a little more complicated than the previous one.
Our funny clown is ready.
Video: Candy Clown
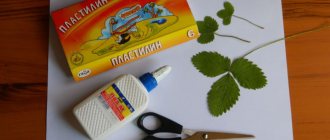
In this lesson we will look at how to make a clown from scrap materials - from candy wrappers. To do this, you need to collect a lot of bright candy wrappers in advance, you will also need free time and desire.
Make a candy clown with care and please your loved ones with a new application, give moments of good mood to everyone who looks at it. So, let's start watching the video.
Theme of the week: “Defender of the Fatherland Day”
Lesson 23. Flying planes (Magazine pages. Collective plot application from prepared silhouettes of objects)
Program content. Teach children to compose a collective plot composition. Strengthen the ability to accompany the words of a poem with movements. Develop precision and coordination of movements.
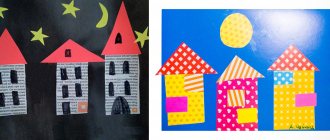
Handout. Half a sheet of whatman paper, on which silhouettes of houses are drawn or pasted below, and clouds and the sun above; an airplane cut out of a magazine page, glue, a glue brush, a rag, an oilcloth lining.
Progress of the lesson
Start the lesson with a physical education session:
The planes began to hum (Rotate your arms in front of your chest with your arms bent at the elbows.)
The planes flew (Arms to the sides, alternately lean left and right.)
They sat quietly in the clearing (Sit down, hands to knees.)
And they flew again. (Go for a run.)
Show the children a piece of whatman paper on which silhouettes of houses are drawn or pasted below, and clouds and the sun above. Give each child an airplane cut out of a magazine page and ask them to glue the flying airplanes onto a large piece of paper.
Thematic selection of gaming material, theme: “Circus”
Goals:
Expand children's knowledge about the circus. Enrich children's vocabulary on this topic. Form a stable idea of color, quantity, size, geometric shapes. Teach children to determine the number of objects by touch, the heaviness and lightness of objects. Continue to teach children to determine their position in space, to understand the concepts of “top”, “bottom”, “on”, “under”, “middle”, “in a circle”, “next to”. Introduce children to an unconventional method of drawing with toothbrushes. Improve the skills of modeling, gluing, cutting with scissors, designing from building materials and planar geometric shapes. Develop memory, fine motor skills, coordination of movements.
Equipment:
Picture-scheme of a circus tent made of geometric shapes, geometric shapes cut out of colored cardboard. Scissors. Blank for cutting “tickets to the circus”. Background picture “circus arena”, color silhouette images of a zebra, monkey, lion, counting sticks. Background for the “clown head” applique, details for gluing: hat, bow, wig. Bags filled with cotton wool, bags filled with stones. “Weights” toys. Buttons in two sizes: red, white, blue, green and yellow. A picture for laying out buttons with the image of a strongman with weights and barbells. Silhouette images of elephants in four sizes. Silhouette color pictures of animals, their shadows drawn on paper, cages for these animals of different sizes. Small toys “horses”, plasticine, feathers, blocks of small building material. Boxes with lids and laces inside. Animal mask caps, a hoop wrapped in red napkins. A silhouette picture of a clown's head in a cap with a collar and clothespins pasted onto cardboard. Large fabric snake exercise toy. Balloons (not inflated), with one and three pebbles inside. Jars of water covered with lids with paint on the inside, paints, brushes, double pourable bottles with stickers of different colors. Background picture with an image of an arena and a magician, toothbrushes, paint. Ball, cube, toy, scarf. Audio recordings: “Circus” (from the film of the same name), “Love the Circus.”
Topic of the week: “Parts of the body and face”
Lesson 20. Assemble a portrait (Magazine paper. Applique from prepared parts of the object)
Program content. Teach children to make a whole from parts. Continue to learn how to navigate the parts of the body. Develop attention.
Demonstration material. Small airplanes made of paper using the origami method (according to the number of children).
Handout. A landscape sheet, a portrait of a person (or an image of an animal) cut from a magazine, cut into several parts, glue, a glue brush, a rag, an oilcloth lining.
Progress of the lesson
Give each child a paper airplane and take one for yourself. Say: “Let’s fly and fly and land on the nose.” (Lower your airplane on your nose.) Let’s fly, fly, sit on your ear (head, arm, stomach, etc.).” (Lower the airplane onto the named part of the body.) Children should repeat your movements.
Place a portrait cut into pieces in front of each child and ask them to assemble it. Ask the children to show where the eyes, nose, mouth, ears, and hair are in the portrait. Then the children must paste the assembled portrait onto a landscape sheet.
The task can be complicated by mixing parts of different portraits.
Progress of the lesson:
Music from the movie "Circus" is playing.
Hello children. Today we are going to the circus.
Children make a circus tent out of geometric shapes. The teacher asks to name the shapes (circle, triangle, square, rectangle) and their color.
Let's put the elephant on a big stand. Put? Now let’s put the lion on a small pedestal. Walk the horse around in a circle. Place the monkey on the swing. Make a ladder out of counting sticks.
Children use scissors to cut tickets along the line.
A clown performs at the circus. He is cheerful and tries to cheer everyone up.
Look, it's a clown. Let's put makeup on him, make him beautiful. Glue on the clown's hair, hat and bow.
Now we will help decorate another clown. Let's make him a beautiful collar from clothespins.
A strongman performs in our circus. He is very strong and can lift enormous weights.
Experiment “Heavy-light”
Hold the bags in your hands and tell which ones are light and which are heavy. Children are offered bags with cotton wool and pebbles.
In this picture, a strongman in a circus lifts heavy weights and a barbell. Organize buttons by color and size.
Dynamic pause “Playing with weights”
Take the weight in your right hand. Lift it up, put it on your shoulder, lower it to the floor. Grab the kettlebell with your left hand. Lift it up, put it on your shoulder, hide it behind your back. Place a weight on the floor in front of you and jump over it.
In the circus, trainers always perform with their trained animals.
Didactic game “Animals in Cages”
After the performance, the animals return to their cages. Help put the animals in cages. Place a tall giraffe in a tall cage, then select suitable cages for the zebra and monkey.
Children arrange cardboard pictures of elephants from largest to smallest.
Didactic game “Find the shadow”
Children attach colored silhouette images of animals to their black silhouette shadows.
Exercise “Trained Animals”
Children, if desired, put on animal hats and follow the teacher-trainer’s commands: stand, sit, lie down, crawl, crawl into a fiery ring-hoop, walk along a bench, climb over an obstacle.
Construction of “Horse Fences” from building material
Children make fences from bars placed on the side edge: low - from one bar, medium - from two bars, high - from three bars laid on top of each other.
Game "Circus Horse"
A saddle is attached to the fly horse toy - a piece of thick fabric on the back and a decoration - a feather is stuck into a piece of plasticine attached to the horse's head. Then the horse jumps over the fences. To jump over a high fence, the horse must jump high.
Didactic exercise “Snake”
Open the box and take out the snake cord. How long is the snake? The snake is long. Pull the string and show how the snake crawls. Place the string snake back into the box and cover with the lid.
Dynamic pause “Performance with a snake”
Children lie down on the “snake” laid out on the floor with their chests and swing their arms and legs, then turn over, lie on their backs, and raise their arms and legs up. Walking on a snake, crawling, jumping over.
Magicians also perform at the circus.
Didactic exercise “What’s in the ball?”
Children are given balls and asked to determine by touch which ball has one pebble and which has many pebbles.
Didactic game “What disappeared?”
Three objects are laid out in front of the children, covered with a scarf, and one object is quietly removed. Children must name this missing item.
Didactic game “Colored water”
The teacher paints the lid of the water jar in advance. After the words “Hocus Pocus!” The jar is shaken and the water becomes colored. Children name the color the water is colored. Then, using a brush and paint, they paint the water in the non-pouring bottle according to the color of the sticker pasted on it.
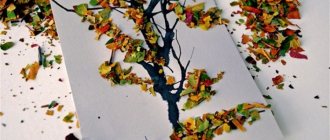
Drawing “Fireworks in the circus arena”
Children draw fireworks with paints using toothbrushes, moving them up and to the sides from the image of the magician.
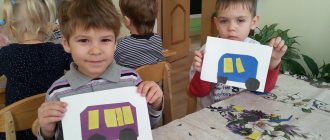
The little one and I did it!
Since our family has an ingrained tradition of remembering everything at the last moment, this case was no exception. My son Vadik told me about the assignment exactly one day before it was due. There was nowhere to go - I had to get to work!
How to make a city layout
We thought about it a little and decided that since time was running out, we would make a road + a couple of buildings + some kind of transport. We decided - we do it.
We took a piece of thick cardboard, cut out a 40 by 30 cm rectangle from it. Then we pasted it on one side with A4 office paper.
Having carefully trimmed the edges, we got a base for the layout, which is ready for painting.
They drew an impromptu road
The next step was to build a high-rise building. I don’t give explicit dimensions, since everything was done by eye...
Before gluing the building together I decorated it
This is what happened after gluing
We cut the back of the building to size, then glued it on and also painted it.