Summary of a modeling lesson in the preparatory group “ABC in Pictures”
V. – Yes, that’s right, but I suggest making the alphabet out of plasticine. Want to?
D. - Yes. Surprise moment. Children, sit correctly so that your back touches the back of the chair, put your feet together.
Stage II – preparatory (7 min.). Goal: to set children up for independent activities, to arouse interest in independent activities. I draw the children’s attention to the alphabet in the pictures and suggest that they name the letters (the children name the letters in alphabetical order).
Q. – Why are some letters depicted in red?
D. – These are vowels.
V. – That’s right, well done. The remaining letters are all blue. Let's make vowels from red plasticine, and the rest are multi-colored (blue, green, light blue, yellow, etc.). Do you agree?
D. - Yes.
V. – But before we start sculpting, we’ll do a physical exercise.
Pinocchio stretched (on his toes, arms to the sides - up, to the sides - down).
Here he bent over and straightened up (bending forward).
He spread his arms to the sides.
Apparently I couldn’t find the key (turn the head to the right - straight, to the left - straight).
To get the key (put your hands down).
You need to stand on your toes (stand on your toes, arms at chest level, extended in front of you).
And wave your arms.
(I suggest choosing a card with a letter). Examination of the sample. I encourage the children to carefully look at the letter patterns on the board.
Stage III – independent – children’s performing activities (15 min.). Goal: to create conditions for independent and creative activity. V. – I would like to remind you that we are making the alphabet for Pinocchio, so try to make the letters neatly and beautifully. So, where do we start sculpting? (children's answers).
Remind the children that we put the letter on a cardboard card. Reminder, observation, individual advice, control. I monitor the children’s posture and make sure that they communicate with each other only on the topic of the lesson; I take care of accuracy in my work.
Stage IV – analysis of children’s work (3 min.). Goal: to stimulate further activity. create an atmosphere of success and create a desire to engage in this activity in the future. (before analyzing the works, verse by S. Yesenin)
V. – Listen to the little quatrains that the letters wrote to themselves when you were sculpting them:
... Frame me easily,
I'm a little portrait
Now I'm learning to read and write,
And soon I will be 7 years old.
V. - Children, bring your work and we will compose the alphabet (composing the alphabet).
V. – What a beautiful and cheerful alphabet we have. Maybe someone wants to tell you about their work? (did you complete the task, is the letter similar to the original, etc.). Comparison, encouragement for introspection. Encourage logical thinking.
How to mold a human head from plasticine. Master Class
Modeling a human head from plasticine tells children 5-6 years old the body proportions.
By taking your child through a step-by-step master class on sculpting a man’s head, you can develop the child’s ability to detail, since the head has many details. If something didn’t work out the first time, plasticine makes it possible to correct all the shortcomings.
Step by step sculpting:
- A ball is rolled out of beige or pale pink plasticine, which is given the shape of a human head and an oval face with a chin and forehead is formed. This is done using techniques of pressing and pulling with the fingers in the right places.
- From the side of the face, symmetrical recesses for the eyes are made with the flat side of a plastic knife.
- A small piece of plasticine is attached to the center of the face, from which the nose is formed. It should start from the bridge of the nose, gradually increasing the tubercle. The junctions between the nose and the face must be smoothed, then the nostrils should be made with a toothpick.
- Next, using a stack of pink plasticine, the lips are drawn.
- The oval whites of the eyes are attached to the eye sockets.
- Blue circles with black pupil dots are molded onto the eyeballs.
- Thin sausages are used to attach the upper and lower eyelids.
- Small oval ears are added to the head.
- Brown eyebrows are applied.
- A set of slightly flattened brown sausages is used to make a hairstyle that covers the crown, temples and back of the head.
- To sculpt an older person, you need to add wrinkles to the face using a stack, and make the hair gray with small strokes of white plasticine.
Compositions for modeling with children in kindergarten on the theme of winter, autumn, spring
Modeling from plasticine for children 5-6 years old should contain compositions from different seasons. This allows children to learn, understand and remember the characteristics and differences of natural seasons.
Below are examples of autumn and winter compositions.
Composition “Autumn”
This master class will show you how to convey the mood and colors of late autumn:
- To depict a leaden sky, you need to mix dark and bright colors. To do this, we combine the following colors of plasticine: gray with black, yellow with purple, blue with black. You will also need a blue piece.
- Using our fingers, we begin to spread yellow-violet plasticine on the paper from the upper corner, and draw a blue stripe below.
- Above the blue color, smear a dirty yellow spot with your finger, stretching it in all directions like the meager rays of the sun.
- Fill the sky completely with a gray-black and blue-black mixture to represent looming clouds.
- Along the bottom of the sky, extend the blue stripe for contrast.
- For the ground, a mixture of brown, white and yellow plasticine is used. This mass must first be kneaded in your hands, then spread on the bottom of the cardboard.
- Completely fill the empty space with this mixture until the blue stripe appears.
- Sculpt dark brown branches and a flat tree trunk, as well as yellow and orange foliage.
- Stick branches and trunk as a tree on the left and a bush on the right. The branches should be inclined to the right, as if they were being bent by a strong wind.
- Stick yellow leaves on the branches and under the tree.
- Press down each leaf with a stack so that a stripe remains in the form of a vein.
- We add orange leaves to the bush, and also go over them in a stack.
- We sculpt additional details: brown stump, beige honey mushrooms, black birds.
- All of them are attached to the picture.
- Add rose hips to the bush.
The autumn composition is ready.
Composition “Bullfinch”
This master class on sculpting a bright three-dimensional composition of a bullfinch on a branch:
- Cover the cardboard with a thin layer of a mixture of white and blue or blue plasticine. Blue and white plasticine should not be mixed until completely homogeneous; it is necessary that marble stains and inclusions remain visible.
- Roll out a long sausage from a brown block, tapering towards one end and widening towards the other end.
- Prepare a lot of thin green threads from plasticine as spruce branch needles.
- Stick a brown branch approximately in the center of the picture, approximately diagonally.
- Next, fragments are torn off from the green threads, bent in half and attached to a branch as Christmas tree needles. This is the only long process in creating a composition.
- The entire branch must be filled with needles.
- You can add more branches below and above the main one, keeping in mind that the central part of the picture should be left for the bullfinch.
- To make a bird, you need to fashion 2 thick cakes: black for the body and red for the breast. Give them the desired shape.
- You will also need one gray wing with 4 thin white stripes.
- Fasten the torso to the chest and attach the wing to it.
- Attach a white eye circle with a black pupil and a triangular yellow beak to the head.
- Attach the bullfinch to the background above the branch.
- Make a brown foot and attach it to the bird and a spruce branch.
The winter composition is ready.
Modeling from plasticine is a good way for preschool children to usefully spend part of their free time.
Article design: Natalie Podolskaya
What you need for the craft
To practice sculpting you will need special tools:
- Modeling board.
- Plastic knife.
- The stack is regular and jagged.
- Toothpicks.
- Pen rod.
- Brush.
- Cardboard for compositions.
For making crafts, regular medium-density plasticine is suitable.
Modeling from plasticine for children 5-6 years old develops fine motor skills and speech
Required colors of plasticine for the presented master classes:
- “Tiger”: two bars of orange plasticine, a little white, black, pink and green;
- “Pizza”: red, burgundy, brown, beige, black, green.
- “Human head”: beige, brown, a little black, pink, blue and white.
- “Dragon”: bright colors of orange, yellow, green, and some black and white.
- “Dinosaur”: 2 bars of green plasticine, a little brown, black and white.
- Composition “Autumn”: gray, black, yellow, purple, blue, light blue, red, orange, beige, brown.
- Composition “Bullfinch”: blue or blue, white, black, red or pink, brown, green.
How to make a dinosaur from plasticine. Master Class
Dinosaurs are unusual animals that lived in ancient times. During the modeling process, the child can be told facts about their life and varieties.
Step-by-step diagram for sculpting a dinosaur:
- Cut off a third of the green block of plasticine and roll it into a ball-shaped dinosaur head. Next, a triangular shape with soft corners is created from the ball.
- For the body you will need a whole block of green plasticine. It must be kneaded thoroughly, then given an oval shape, which should be transformed by stretching into an oblong drop.
- Using a toothpick, both parts are connected together.
- To make massive dinosaur paws, you need 4 green balls of the same size.
- Sausages are rolled out from the balls, then the legs are formed.
- The paws need to be connected to the body; to do this, their edges should be slightly flattened.
- Making a large collar for the dinosaur. To do this, roll out a cake from a piece of green plasticine.
- An arc-shaped strip is cut out of it in a stack, then a zigzag pattern is created along the edge with a jagged stack.
- The collar is glued to the top of the dinosaur's head and the scalloped edge folds back nicely.
- On the head near the collar we attach a pair of beige horns.
- A green horn is glued to the nose.
- Triangular green plates are attached along the back and tail.
- Now you need to make a two-color plate. To do this, roll a piece of brown plasticine into a sausage, which is then wrapped in a thin black cake.
- From the resulting part you need to form a rectangle and cut it into 7-8 strips.
- Stick them on the back of the dinosaur and press it into the body.
- Attach white eyes with black pupils to the head.
- Along the entire surface of the back of the ballpoint pen, the dinosaur skin is given relief.
- In a stack, stripes are drawn along the collar, the line of the mouth and the tips of the paws.
The dinosaur is ready.
How to make animals from plasticine. Master Class
Modeling from plasticine for children 5-6 years old is no longer difficult, since most of the techniques have already been mastered. With the help of step-by-step instructions, a child of this age can easily sculpt a cute figurine of this tiger, consisting of simple parts.
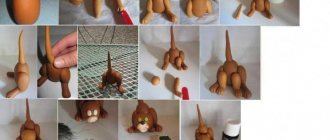
The sequence for creating a tiger is as follows:
- 1/3 of a block of bright orange plasticine is cut off. Both resulting pieces are rolled into balls.
- The small ball will be the tiger's head. From the second ball, part of the plasticine is pulled out into an oblong body.
- Using a toothpick or match, connect the head and body together.
- From the second block of orange plasticine, 1/3 of the part from which the hind legs are made is also cut off. This part must be kneaded and divided into 2 equal pieces, which should be shaped like a cone. Form feet on the wide side of the cone.
- For the front paws, a piece of plasticine is rolled into a sausage, then cut into 2 parts. Paws with thickened feet are made from them.
- Stick the paws to the tiger's body.
- Roll up and stick to the body a long tail made of thin sausage.
- Make small round ears with indentations and attach them to the head.
- Use white cakes and a nose from pink plasticine to create an animal's face.
- The tiger's eyes are made from round cakes of white, green and black, stuck on top of each other. You can add highlights around the edges of the eye.
- Attach a white chest made from a strip of plasticine on which wool is drawn in a stack to the neck.
- White cakes are glued to the hind legs as pads and toes.
- Now you need to create black stripes. A very thin sausage is rolled out of black plasticine, short sections of which are stuck all over the tiger's body. Also, claws on the hind legs are made from them and glued into the indentations of the toe pads made by the stack.
- Using a stack, make cuts to mark the toes of the front paws. 15 Use a toothpick to make dots on the white part of the tiger cub’s face.
The plasticine tiger is ready.
