Modeling is a great way to develop fine motor skills, perseverance, perception, imagination and intelligence. It enriches the baby’s sensory experience and helps in dealing with stress and aggression.
Therefore, it is important to regularly engage in this useful creative activity from an early age.
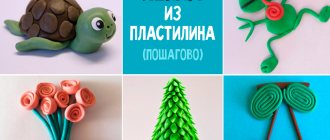
In this article I will talk about how to sculpt with children aged 1–3 years, about materials, techniques and techniques. You can also download templates for modeling lessons with your child.
How to sculpt with kids
Some useful tips for sculpting with kids:
- Start as early as possible. Is your baby almost a year old? - it's time to introduce him to dough or soft mass for modeling. Let him just pinch off pieces or make dents. This is very useful for the baby. In any case, much more useful than learning to “read from the cradle.”
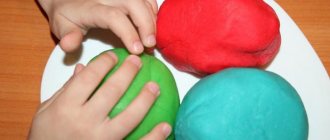
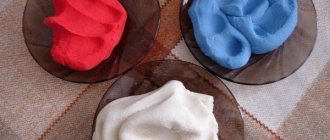
- The younger the child, the softer the material for modeling should be. Start with salt dough or a special modeling compound such as Play Doh.
- Plasticine allows you to do things that cannot be done with dough or mass. Therefore, do not delay your acquaintance with this material. But for starters, also choose the softest one possible, for example, Beam Krokha (Labyrinth, Ozone, My-shop).
- At first, classes can last 5–15 minutes, but over time the duration of the class can be increased.
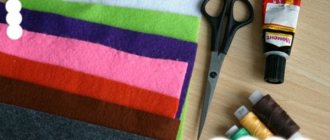
- Prepare materials and tools for sculpting in advance. Remove everything unnecessary from the table.
- Come up with a plot for each lesson, play it out. This way you can keep your child interested in modeling.
- Repeat activities that your child especially liked. But don't forget about diversity.
Store your child's crafts in a special folder, and don't forget to show off your work to guests.
Also, for variety, I recommend using ready-made manuals for classes, which I will write about at the end of the article.
I find most of the ideas for modeling in Elena Yanushko’s book “Sculpting with Young Children” (Labyrinth, Ozone, My-shop).
This manual contains a detailed description of the progress of each of the 153 lessons. This includes what you can say to your child to get him involved in a particular activity.
They are designed for children from 1 year old to at least 3 years old. They do not require complex preparation.
Tasks. Continue to introduce children to types of folk arts and crafts (carpet making). Learn to sculpt a rug from flagella, imitating the weaving technique. Show analogies between methods of creating an image in different types of visual activity. Develop fine motor skills and synchronize the movements of both hands.Preliminary work. Reviewing rugs and rugs. A conversation about fairy-tale carpets (the carpet made by the Frog Princess, the flying carpet, etc.).
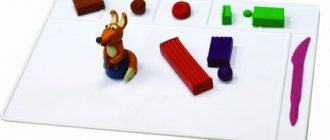
Materials, tools, equipment. Plasticine or salt dough (optional), stacks, napkins, squares or rectangles of colored cardboard, which will be used in class as the basis of the composition.
Recommended teaching aids, literature.
Posters “Spring”, “Seasons”, “Colored landscapes”.
Technological map “Colored rug”.
Contents of the lesson.
The teacher invites the children to sit on the carpet and stroke it with their palms. Then he conducts a short but emotional art criticism conversation.
— Children, what do you think a carpet is and what are carpets for? (The children’s answers are that these are things used for warmth, comfort and beauty.) The art of creating these products is called carpet making (“carpet making”, “carpet making”). The art of carpet weaving has long been known both in Russia and in many other countries of the world (Armenia, Azerbaijan, Ukraine, Moldova, etc.). What material are carpets made from? Usually made of wool, sometimes silk. If sheep are raised in a country, carpets are made from sheep wool. If camels are bred, it is made from camel wool. And if there are no such animals with thick, good hair in this area, people make carpets from fibers and plant stems. Usually the carpets are beautifully decorated with different patterns, which can be used to tell which country they were made in. There are small rugs that can barely fit two feet, and there are huge rugs that can be used to cover the front room of a castle or palace.
And we will try to weave spring rugs. We will weave for real. But our rugs will not be made of wool, not silk, not straw, or even paper, but from plasticine (salt dough) strands.
See how we will do our job. First, roll out the flagella - five to seven of one color and the same number of another. Then we will straighten the flagella in length - lay them out in a row and cut off the extra “tails” in a stack so that all of our “strings” are the same length. The number of “threads” can be divided in half into two “piles” without counting, simply alternating: one here, the other there. After that, we’ll take cardboard of a suitable color and start weaving: first we’ll lay out “threads” of the same color, placing them from top to bottom - like this, at a short distance from each other, and then we’ll take one “thread” of a different color and intertwine it so that it’s beautiful . Once the rug is complete, you can decorate it with patterns of flowers, berries, butterflies, suns, and stars.
The teacher advises making some of the flagella for weaving blue or light blue, as if they were streams, and the other part green, as if they were a verdant bank. At the intersection of these stream banks, you can place yellow coltsfoot flowers - roll out yellow balls, flatten them into flat cakes (disks) and cut them in stacks along the “bank” (edge), as if they were petals.
At the end of the lesson, the teacher invites the children to admire each other’s spring rugs and put them together into one large spring rug. You can look at this carpet from above, as if we were birds or butterflies - flying, fluttering, spinning in the air and looking down at the ground.
After class. Exhibition design for parents.
Modeling with children 1 – 3 years old
What can a child do with plasticine anyway? Below I will talk about the basic techniques and methods of sculpting with children 1 - 3 years old.
At this age there is no question of complex crafts. But you can come up with a huge number of simple activities that will certainly captivate your baby.
You can download and print the basis for all types of crafts listed in the article.
So, while modeling, we teach the baby:
Divide plasticine . You can do this in the following ways:
- pinch off small pieces and feed them to the birds;
- tear off a large piece to feed a large animal;
- Twist the sausage to separate it for the two dogs.
Flatten with your finger, press with your palm. First you make the balls, then the baby himself.
Print, color, cut out or draw the base and have your child:
- make spots on a fly agaric, giraffe, and ladybug;
- put vitamins in a jar, sweets in a plate;
- turn on the lights at the traffic lights;
- attach wheels to a car or locomotive;
- make it snow;
- stick apples to an apple tree, berries to a rowan branch, petals to a flower, seeds to a watermelon, leaves to a tree, balls to a Christmas tree, eyes to a fish or other animal
The child can sculpt elements either in any order or in specific places.
Smear with fingers or palm. Draw a small picture of an animal and ask your child:
- hide the animal, make a den for the bear, etc., by smearing plasticine over a small drawing.
Roll out modeling clay or plasticine with a rolling pin.
Play Doh modeling kits come with embossed rolling pins. Kids love to roll out the mixture and see interesting prints on it.
Make prints with various objects. You can do this with whatever comes to hand. It is advisable to use modeling clay or soft plasticine.
Press various objects into plasticine.
For such activities, we prepare the base in advance - roll out a cake about 3 mm thick in the color we need (green for grass, blue for water, etc.). We offer the baby:
- plant mushrooms or mosaic flowers;
- push pasta in the shape of cars into the plasticine road, turtles into the sand, etc. Make rays for the sun from spaghetti, worms from curled pasta, lay out shells on the sand, then collect them in a bucket, which can be fashioned in advance from plasticine;
- make a path out of beans, make beads, plant potatoes, lay out letters and numbers (closer to 3 years);
- press seeds or buckwheat into a sunflower;
- use beads, buttons, sequins to decorate a plasticine base in the form of a butterfly, fish, Christmas tree, dress;
- Use matches to make a fence for a cow and thorns for a hedgehog.
Roll into balls , large and small. This is how you can make it from plasticine:
- pies, sweets, vitamins, apples, oranges, berries, eggs, buns, snowballs.
Roll out the sausage . When rolling out the sausages, we do:
- stripes for zebra, tiger, bug;
- stairs, fence, sleepers;
- rays of the sun;
- sausage, bananas, dryers, pretzels for the doll;
- worms, snake, snail.
Draw on plasticine in a stack . Roll out the plasticine and show your child how to draw stripes, circles, and patterns on it.
Cut with a plastic knife or scissors. Separate the plasticine by applying the ruler edgewise.
- let the child make a sausage and cut it into pieces, feeding you and the animals;
- Make cookies and geometric figures from a flat piece.
Scrape off the plasticine with a stack or ruler.
- Cover small images of animals and cars with plasticine. And invite your child to find out who is hiding there.
Use a mold for bas-reliefs . Play Doh modeling kits are ideal here, but I'll talk about them below.
Coloring with plasticine.
- Print out a coloring page for little ones or draw a simple picture. Invite your child to color it by smearing the plasticine with his finger.
The main thing is that the base is small, because the child will not have enough patience for a large craft.
Connect plasticine parts together . Simple crafts from plasticine:
- fungus, carrot, apple, tumbler, snowman, rattle, candy;
- beads, grapes, caterpillar made of plasticine balls.
String plasticine onto a wire, match or thin stick:
- caterpillar, beads;
- lollipops, cherries.
Make letters and numbers . Plasticine can be stuck to printed outlines of letters and numbers, or simply sculpted without outlines.
We do all this, of course, by coming up with an interesting plot and playing it out.
Modeling lesson in the second junior group “Baranki for guests”
Victoria Vasilyeva
Modeling lesson in the second junior group “Baranki for guests”
Target:
Teach children to roll out sausages and make
bagels
.
Tasks:
Educational – to help develop the ability to roll a plasticine sausage between the palms in a circular motion; the ability to convey the form of an object, to contribute to the enrichment of vocabulary.
Developmental – promote the development of fine motor skills and attention.
Educational – to promote a caring attitude towards others.
Material:
Plasticine, boards, napkins, a picture of bagels, toys: Teddy bear, squirrel, bunny, hedgehog. tray, plates for bagels.
Preliminary work:
accumulation of vocabulary (words “Hello”, “Please”, “Thank you” and other polite words); modeling of different sausages (large and small, organization of the role-playing game “Guests”.
Educational area:
Artistic and aesthetic development.
Progress of the lesson
1. Organizational point:
Educator:
Guys, come in, look, we have guests today, let's say hello to our guests.
Children:
Hello.
Educator:
Oh guys, we have another guest today: and to get to know him, I’ll read you a nursery rhyme:
Through rubble and ravines
Teddy Bear walks with a clubfoot
He loves bee honey
Yes, he picks raspberries from the branches.
Educator:
Guys, who is this nursery rhyme about?
Children:
About the bear.
Educator:
And here is our Teddy Bear (Shows the Teddy Bear toy).
Bear:
Hello guys, today is my birthday, and to me
guests arrived.
Educator:
And what kind of guests came to Mishka? We'll find out now. (the screen opens).
Educator:
Guys, tell me who came to Mishka’s birthday?
Children:
Squirrel, bunny, hedgehog.
Educator:
Oh bear, the samovar is standing, the guests have gathered, and where is the treat for the guests?
Bear:
Guys, I don’t know what I can treat my guests to.
Educator:
Bear, don’t be upset, we will help you. Guys, please tell me what I can treat my guests to.
Children:
They offer their options.
Educator:
Guys, I suggest you help Mishka prepare delicious bagels for his guests. Tell me, what shape are the bagels?
Children:
children's answers.
Educator:
Right.
2. Main part
Educator:
Before making cookies, let's stretch our fingers.
Finger gymnastics:
We asked our stove
What should we bake (children straighten their arms forward, palms up)
We asked the stove to knead the dough (Clench and unclench fingers)
Roll out the dough with a rolling pin
Rolled out without getting tired (Move your hands back and forth with your palms down)
We are for Mishka on his birthday
Let's prepare some treats (Bake pies).
Educator:
Well done. Our fingers have warmed up, now come in and take your seats at the tables. Bear, sit with us. Look, I have a steering wheel. What shape is my steering wheel?
Modeling from Play Doh
We got the Play Doh modeling kit (Labyrinth, My-shop) when Antoshka turned 2 years old. I should have bought it much earlier!
Modeling became my son’s favorite pastime for several months; he could sculpt 5 times a day!
We had a set called “Cookie Shop” (My-shop). It is ideal for kids.
Much later we bought the “Pizza” (My-shop), which is also for the little ones.
For children aged 1.5 - 2.5 years, it is better to buy simple Play Doh modeling kits, and older children will like all sorts of “Cake Factories”, “Mr. Nibbler”, etc.
Different sets contain different modeling accessories. These can be embossed rolling pins, cutting molds, a syringe, bas-relief shapes and much more. And, of course, the modeling mass itself.
This is one of the most useful purchases for any child.
Junior group. Early childhood, nursery. Children 1-4 years old
Modeling “Berries on a plate” (second junior group)
Modeling “Berries on a plate”
Age group: second junior group Form of joint activity: productive Form of organization: group Means: poster
“Fruits and berries”
, illustrations of bird riddles, poems about fruits, berries. Musical accompaniment of the lesson, sounds of the forest,…
Summary of OOD on modeling in an early age group “Treat for a hedgehog” Objectives: to consolidate the ability to roll a lump of plasticine between the palms with straight and circular movements, to flatten a lump of plasticine between the palms; combine two sculpted forms into one object; develop fine motor skills of the hands, coordinate the movements of the arms and legs, develop...