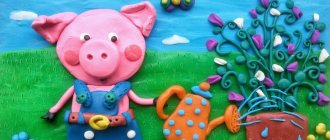
For children of preschool age, you can come up with many entertaining activities, a special place among them is occupied by modeling from plasticine. Thanks to this type of creativity, parents will be able to instill in their child a love of creativity, develop fantasy, imagination, and fine motor skills. In addition, by making figures from plasticine, the baby learns to be independent.
Features of modeling with a child 6-7 years old
At the age of 6-7 years, it is still difficult for a child to think through the course of action and imagine the final result, however, the degree of complexity of the work that he can perform is much higher than for a younger child.
When practicing modeling at the initial stage, it is recommended to provide a clear example. At first, the child will constantly look at the sample, then the time required to remember the details will decrease.
A teacher, when working with first-graders during modeling classes, must approach each student individually, discussing his work and offering to tell others about it. This is how the child develops a desire to achieve better results and be more successful than others.
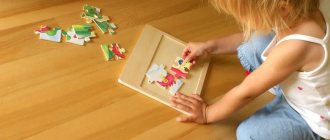
Grade 1 usually completes plasticine crafts step by step with great interest and enthusiasm. It is important to accompany the lesson with a game. This way, creative abilities will be revealed better and easier.
And the most important thing is to take into account the characteristics of each student. Since children enter 1st grade completely different, one child has been excellent at working with plasticine since kindergarten, while another faces difficulties while working.
What are the benefits of modeling
The human psyche continues to remain very poorly understood. Despite many discoveries and recommendations, it is impossible to make an exact statement in this area - you have to act by generalizations.
However, even according to statistics, plastic modeling has a beneficial effect on both the mental state of the child and his mental and neurophysiological development. The brain of a small person develops only if there is interaction with the outside world.
Children of modern civilization are largely protected from the natural world for safety reasons. Therefore, optimizing interaction is the main task of parents. The tactile sensations that a child receives from the tactile nerves are a powerful stimulating factor that provokes the brain to further development.
Expert opinion
Mikhailova Alevtina Petrovna
Child development teacher
Observations show that children who actively touch objects and play with them develop faster and more fully than those who are deprived of tactile sensations.
Modeling with plasticine, clay or dough is a wonderful exercise that triggers mechanisms for improving the child’s nervous system.
Development of coordination and fine motor skills
A newborn baby's nervous system is not yet strong; he makes many chaotic, “false” movements that are not aimed at performing a conscious action.
At the age of one year, movements become meaningful, but coordination has not yet been developed. The child learns to control his body, and his nervous system works out all sorts of combinations.
Modeling classes can significantly accelerate the development of fine motor skills. Fine motor skills are a combination of the muscular, nervous and visual systems for small operations with the fingers and hands.
At the Institute of Physiology of Children and Adolescents, it was proven that the projections of the hands are located near the speech centers, therefore the formation of fine motor skills contributes to the development of speech.
Children who regularly engage in modeling - first under the supervision of adults, and then independently - quickly master the necessary everyday skills: fastening buttons, holding and handling cutlery, holding a pen, pencil or brush, correctly assembling construction sets with small parts.
Development of spatial thinking and imagination
Plasticine is useful not only for babies, but also for older children. The desire to replicate the world around us in drawing or sculpture is already an example of higher nervous activity. With the help of modeling, mental and rational qualities are developed, an indirect, visual understanding of the physics of the real world occurs (thin things bend, fall without support, etc.).
Spatial imagination helps a child better navigate in this world, as well as develop his creative abilities.
What you need for the craft
The materials and tools needed for making crafts with 1st grade students differ little from those needed for other age groups:
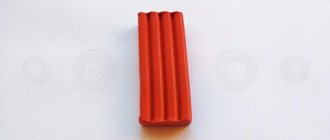
- Plasticine.
- Work board or mat.
- Stacks.
- Paper scissors.
- Rolling pin.
- Molds for repeated production of flat shapes.
- Apron and sleeves.
There are many varieties of plasticine suitable for modeling with children 6-7 years old.
Important! Particular attention should be paid to the composition. The material must not contain substances hazardous to the body.
| A variety of plasticine | What kind of work is it suitable for? | pros | Minuses |
| Paraffin | for most jobs, this type of plasticine is most often used in modeling classes | affordable price, easy to find in stores, made from natural ingredients | quite hard, stains clothes and hands |
| Floating | — | stays on the surface of the water, soft, does not stick, does not stain hands | price |
| Wax | — | soft, flexible, easy to mix different colors, does not stick, easily washed off hands and clothes | price |
| Solidifying | ideal for crafts | plastic, suitable for sculpting figures and figurines that are preserved for a long time | price, not suitable for repeated modeling, hardens quickly |
| Ball | — | does not stick to hands and clothes, large palette of colors, easy to mix with each other | price |
| "Smart" | — | Has different consistencies, stretches easily, tears, can be magnetized, pliable | price |
Stacks are used for cutting plasticine or giving relief. They can be made of wood or plastic. Plastic ones are considered the most convenient and safe for children of any age, including first-graders.
Scissors are used to cut plasticine into pieces when a more even and clear cut is needed, which a stack cannot provide. A rolling pin is needed for rolling out layers. There is a special small rolling pin on sale.
Step-by-step instructions for sculpting a rowan tree
Class 1 plasticine crafts usually include various figures of the world of flora and fauna. This craft is not particularly difficult to make, but children develop fine motor skills and learn shapes of different sizes.
To work you need:
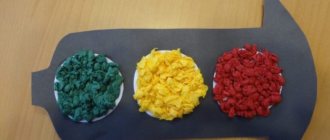
- green, brown and red plasticine;
- stack or scissors for cutting plasticine.
The creation process consists of the following points:
- Form a ball from a small piece of green plasticine.
- Form a cone from brown plasticine, make it slightly curved - this is the trunk of the future tree.
- Connect the ball and cone.
- You need to make small balls from red plasticine, and leaves from green plasticine.
- Then you need to form rowan bunches. To do this, you need to connect the leaves and red balls.
- The next step is to place the resulting bunches on the base made in step 3.
The result was a beautiful and easy-to-make tree.
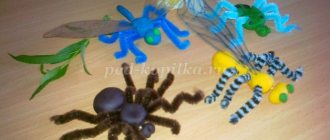
Step-by-step instructions for sculpting a turtle
A first grader will be able to make a cute turtle out of plasticine, despite the fact that it is a little more complicated to make than the previous figure.
So, for work you will need:
- plasticine in brown, green, white and black colors;
- cutting stack or scissors;
- stack with a sharp end.
Step-by-step modeling:
- The first step is to make the necessary preparations:
- 1 ball with a diameter of 4 cm, brown;
- 1 ball with a diameter of 2.5 cm, 2 balls with a diameter of 1.5 cm, 2 balls with a diameter of 1 cm and 1 ball with a diameter of approximately 0.8 cm, green;
- 2 small white balls;
- The 2 smallest ones are black.
- It is necessary to form a shell from a brown ball by cutting off the lower part and flattening it at the edges.
- From the remains you need to make small flattened circles and attach them to the shell.
- The head, paws and tail are made from green balls. After which they are attached to the shell.
- Use your fingers to make small indentations on the head for future eyes.
- To make the eyes, you need to flatten the white balls from step #1 and attach the black balls on top. Then attach to the marked places.
- Using a stick with a sharp end, you need to draw the nose and mouth.
Undersea world
In one craft, children are introduced to all the modeling techniques and discover the secrets that the seabed of the seas and oceans keeps.
- Waves and sand are drawn on a thick sheet or cardboard with wax crayons.
- The background is painted over with watercolors and dried.
- A yellow piece of plasticine is flattened into a cake, and dents are made with the blunt end of a pencil. The first sea plant is ready.
- Mix two colors, for example, blue and green, and roll a long flagellum. Glue to the base from bottom to top in a zigzag pattern.
- Or the sausage is squeezed with fingers on both sides, as is done when making dumplings.
- Another option is to glue green leaves on both sides to a thin sausage. Lines are drawn in a stack - veins. This is how three types of algae are obtained.
- Multi-colored corals look like a flat circle with uneven edges and through holes. A stack and a cocktail straw will help in this matter.
- The starfish consists of simple parts: a round center and 4 rays in the form of thick sausages with sharp ends. Connect them together, level the surface and make indentations with the sharp end of a skewer.
- Two types of shells are made from flagella, twisting them in a spiral and zigzag.
- For the jellyfish, roll 5-6 long sausages, a flat oval and a short flagellum for the body.
- All figures are glued to the background, starting to decorate the background with tall plants and algae.
The underwater world is populated with fish, which are sculpted from individual parts: the body is a circle or oval, the fins and tail are flat figures of arbitrary shape, the eyes are a round mosaic.
Step-by-step instructions for making candies
Making candies from plasticine is an extremely exciting activity. And they look almost like real ones.
To work you need to prepare:
- plasticine - it can be any colors you like, but the most suitable are white, red, yellow, orange;
- cutting stack or scissors;
- matches or wooden sticks.
Crafts from plasticine (grade 1) - step-by-step production of candies
Execution scheme:
- Using colored plasticine, you need to make a base - balls.
- You need to make long and thin ropes from white and orange plasticine, and then twist them together into one rope.
- This structure is then rolled into a spiral shape. The preparation for the first candy is completed.
- Yellow and white plasticine is also rolled out into thin threads and then placed next to each other.
- Afterwards they need to be carefully twisted into a spiral. The second blank is ready.
- You also need to form 2 ropes from red and orange plasticine, only of greater thickness.
- The bundles must be intertwined. The third blank is ready.
- The last step is to put the blanks on matches or wooden sticks.
How to make food for dolls from plasticine?
Soft plasticine is good for creating toy food. It will be boring for the baby to just make balls, but if they are used as decoration for a toy cake, it will be more interesting. You can make various cakes, pasta, sandwiches, pastries and much more with your child, as long as your imagination is enough. You don’t have to throw away the candy boxes, but make your own toy candies for them. Be sure to fit your doll food to the container they will eat it from.
For older children, you can combine the lesson with mathematics, divide the cake into equal parts and study fractions, feed guests and count how many cakes you need to prepare for them.
Below we give you several step-by-step instructions on how to make some food for dolls from plasticine.
Broccoli made from plasticine
Take plasticine in three different shades of green. From the lightest one, make a sausage leg for cabbage, divide it in a stack into several small branches. Take three pieces of plasticine of different shades and press them through a kitchen strainer, and you have broccoli florets. Connect these parts together.
Modeling sausages from plasticine
Prepare sausage-colored plasticine. Make a flat cake out of it, put white stripes on top. Roll the cake, roll it like a sausage between your palms and put it in the refrigerator for a while. You need to cut the sausage using sawing movements, not pushing.
Making ice cream from plasticine
Take a piece of sand-colored plasticine and stamp cells on it, like on waffles. Now make a cone and one or three balls, the same color as you want to make ice cream, you can take different colors. We stick the balls onto the cone to its base, and wrap it with our wafer cake. You can add jam on top by smearing two or three sausages crosswise on the balls, stick small multi-colored pieces and sprinkle with crumbs.
Modeling cheese from plasticine
The cheese is made from yellow plasticine with a small addition of orange. Make a cake, cut out a triangle and press holes in it, it is convenient to make large holes with the back of the pen, and small ones with a writing tip or pencil.
Making a cake from plasticine
Make several plasticine balls of different colors, it is better to take two brown ones for the chocolate layers of the sponge cake, two different berry colors and one of whatever color you want for the icing.
We make chocolate and berry cakes very simply, flatten the ball a little and roll it out into barrels to even them out.
We combine all the cakes into one cake and roll it sideways again to even out all the layers.
We take our icing ball and roll it out as thin as possible, wrap our entire cake in it, cut off the excess edges and smooth it out.
Now we make the cream: roll out the plasticine into a thin and long sausage, fold it in half and twist it. We spread it around the perimeter of our cake.
We cut the cake into pieces and use a toothpick or toothbrush to add porosity to our chocolate layers of the sponge cake. Each piece can also be decorated with fruit beads and topped with glaze.
Bread can be sculpted using sand-colored plasticine. To make a loaf, add toothpick prints to it diagonally.
How to make a watermelon from plasticine?
We take black plasticine and roll several thin sausages. We roll out the red plasticine into a not very thin oval-shaped cake. Place one sausage in the middle and fold the flatbread in half.
Add a couple more sausages and fold them again and repeat this several times. Finally, give it a round shape.
We wrap our watermelon in a white cake, and then in a green one, thus making a peel.
Add lighter colored green stripes.
And cut it. Look how ripe our watermelon turned out!
Step-by-step instructions for sculpting a panda
This craft, despite its apparent complexity, is quite simple to do.
To complete the work you will need:
- plasticine in white and black colors;
- slicing stack or scissors.
Progress:
- Need to do:
- 1 ball of white plasticine - a panda's head;
- 2 balls of black plasticine - panda eyes;
- 2 small white balls.
- Use your fingers to make 2 small indentations on the head base, flatten the black pieces and place them in the indentations.
- Place small white balls in the inner corners of the eyes, and, in turn, attach small black dots to them.
- Make ears from black plasticine. The panda head is ready.
- You need to make a ball out of white plasticine, slightly flattening it at the top and bottom.
- From black plasticine you need to make legs - 2 identical balls, and the upper part of the body - a thick rope in the shape of an arc.
- The last step is to connect all the parts together.
How to sculpt a pony from plasticine?
After watching the My little pony cartoon, your daughter will probably want to make the same pony. Let us help her with this.
- Take plasticine of the desired color, pink, purple, red and blue shades are perfect
- Roll a sausage of the chosen color - this will be the body of the pony
- Pull one side of the sausage up into a cone - this will be the neck
- Roll the ball and stretch it out a little, forming the face of a small horse
- Make droplets out of two small pieces and stick them to the top of the muzzle - these will be the ears
- Use a toothpick to press down the pony's nostrils and mouth.
- Roll four cones from plasticine of the main color, cut off a little plasticine diagonally from the narrow side with a special knife, this is where the legs will be attached to the body
- Tap the wide part of the cones on the board to create horse hooves
- Assemble your figurine. Smooth out the joints
- To make the mane and tail, roll several thin multi-colored sausages, connect them together and cut them, stick them to our pony, bend them a little, imitating the curves
- Don’t forget about the eyes, make them not round, but elongated, in the shape of a leaf
Our pony is ready!
You can make several small horses of different colors and you will have many cartoon characters to play with.
You can make a pony in another way, see step-by-step photos below.
Step-by-step instructions for sculpting a mushroom - fly agaric
Making such a craft is very exciting.
You need to prepare the necessary materials and tools:
- plasticine in white, red and green colors;
- cutting stack or scissors;
- stack with a sharp end;
- stack for making small cuts.
The work is performed in the following sequence:
- You need to make balls of approximately the same size from plasticine of each color.
- Using a white ball, you need to prepare the mushroom stem. To do this, you need to make a shape that resembles the shape of an egg, making the top and bottom slightly flat.
- You need to roll out a thin strip from a green ball, make cuts on it using a stack to make grass, and place it below the previous workpiece.
- A mushroom cap is made from a red ball, then eyes and a smile are drawn on it using a stick with a sharp end.
- Balls of different diameters are made from white plasticine and then flattened. The resulting parts are attached to the cap.
- Now you need to connect the leg and the cap. Ready!
Kitten with a heart
On Valentine's Day, you can give not only valentines, but also original crafts. We recommend that you make a kitten from plasticine step by step according to the photo instructions provided.
Sculpting technique:
- From a blue base, mold a body in the shape of a heart, a tail, and ears.
- Connect these parts and stick stripes of a lighter shade on top, creating a “cat” color.
- Make the muzzle, eyes and nose as shown in the photo.
- Detail the animal's face using a stack.
- All that remains is to attach the paws, the heart is made from a red base.
- The holiday craft is completely ready.
Useful tips
By following the steps from the described master classes, you can easily make excellent crafts with a 6-7 year old child.
Here are some additional tips that will make the sculpting process easier and more interesting:
- To speed up the work with children, you can prepare containers with warm water for them, then place plasticine there for a couple of minutes. This will make the plasticine softer and more pliable.
- It is worth explaining to children that there is no need to throw away the remaining plasticine; later they can make equally wonderful crafts from it.
This is interesting! You can invite the children to collect the remaining plasticine in one container. Afterwards it can be melted and distributed again for work.
- Crafts and play dough can be colored! To do this, you need to sprinkle it with flour, and then prime it with white paint. After drying, you can start painting.
- The most common is paraffin plasticine, but it is worth working with children from time to time with other interesting varieties of plasticine. Ball plasticine will be especially useful. It perfectly develops fine motor skills and massages the baby's palms.
Plasticine is an excellent and, for the most part, affordable material for the comprehensive development of first-graders; thanks to it, many of the most interesting and unusual crafts can be made.
Article design: Natalie Podolskaya