Insects made of plasticine. Master class with step-by-step photos
Every insect is busy, wants its own good and life
Master Class. Modeling insects.
Author: Chepeleva Tatyana Aleksandrovna The material is intended for children of preschool and primary school age, teachers and educators.
Quite recently, on occasion, I purchased a bundle of soft, fluffy wire called “chenille”.
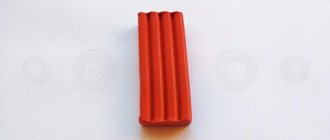
And they also gave me a whole package of paper-based film for laser printers (such as lamination film). So I started thinking, how to use this “wealth”? Materials: chenille, transparent paper-based film for laser printers, plasticine, toothpicks, CD marker, scissors.
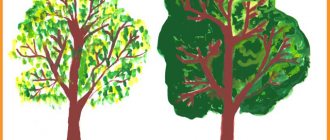
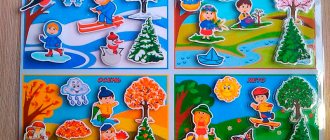
Purpose: making plasticine crafts and toys. Objectives: Show the possibilities of new materials (chenille, transparent film) in modeling. Diversify the technique of working with non-traditional materials in modeling. Improve the skills of modeling, manual labor, and drawing. Clarify and enrich children's knowledge about insects; Form stable ideas about the color, shape, size of the insect proposed as a sample. Introduce children to poems, riddles, and sayings about insects. Develop eye, fine motor skills, speech, attention, thinking. Cultivate interest in the world of insects and nature. Vesna the artist (abbreviated) Vesna Krasna has begun work. She didn't get down to business right away. At first, I thought: what kind of picture should she draw? Here the forest stands in front of her - still gloomy and gloomy like winter. “Let me decorate it in my own way, in spring!” She took thin, delicate brushes. I touched the birch branches with a little greenery, and hung pink and silver earrings on the aspens and poplars. Day by day the picture of spring becomes more and more elegant. Everything comes alive all around. Sensing the warmth, insects and spiders crawl out of various cracks. May beetles buzzed near the birch branches. The first bees and butterflies fly to the flowers. And for each of them, Spring is Red, she came up with an important task. (Georgy Skrebitsky) Today we will sculpt insects. Which ones? Let's consider. No. 1 Dragonfly You see everything, dragonfly - your eyes are big! Your chirping flight is like a helicopter in the sky. During an “emergency” landing, you boldly put out your paws.
- Let's look at her body parts. How many are there, what do they look like?
1. We sculpt the same ones - head, torso, tail. 2. We connect them, for strength, using a toothpick and smearing. 3. Cut the chenille wire into equal parts, according to the number of legs. Draw wings on film. 4. Bend the wire for the legs and cut out the wings. 5. We connect all the parts. 6. Add eyes (ready). But my daughter doesn’t like them: “It doesn’t look like it!” 7. Add plasticine green balls - great eyes!
No. 2 Green beetle (unfortunately, I didn’t see the name) I’ll put the bug in my palm - let it sit there for a little while. Oh oh oh! How he tickles! He wants to get out quickly! (Svetlana Bogdan)
1. Consider a green beetle. 2. Roll 2 balls, a small one for the head, a larger one for the body. We select chenille. The green one is missing, take the blue one. 3. Flatten the ball for the body, forming a similarity. We string the head and body onto a toothpick. Bend the chenille into 6 equal parts and cut. 4. We bend the “legs” like a ladder and stick them into the body. Adding eyes. Ready!
No. 3 Spider – tarantula. There is a spider in the corner, It has woven both a house and a net. Now he’s resting, waiting for Mushka.
- We are considering. We count the number of legs, there are 8 of them. 2 more antennae.
1. Roll large, medium, small balls. 2. We put all 3 on a toothpick sequentially. 3. We cut the smallest one with a knife - we get eyes. 3. We measure, chenille into 8 equal legs and 2 small antennae, cut. 4. We stick the legs into the body. Wow, so similar! No. 4 Fly
An annoying fly. Yuri Entin
The annoying Kruzha Fly is buzzing in your ear. An annoying fly buzzes around your ear. Annoying Fly - No voice, no hearing. No voice, no hearing - Annoying Fly.
1. Daughter Yulia categorically does not want to sculpt a green fly. We agree that there are yellow ones too. We sculpt 3 balls - for the body, head, eyes. We select chenille. 2. Roll out the larger ball into a “dumbbell”, shape the ball-head like a barrel. Secure with a toothpick. Adding eyes. We cut the chenille and bend it. 3. On the film we draw wings as similar as possible. Let's cut them out. 4. We connect all the parts into a single fly.
When the modeling is finished, it is necessary to remember the story of Georgy Skrebitsky “Spring the Artist”. Ask the question: “What important thing did Vesna Krasna come up with for insects?” Let the guys think and express their assumptions.
We recommend watching:
Plasticineography in elementary school. Master class Plasticineography in elementary school Plasticineography in Khokhloma patterns. Bunch of rowan berries Plasticineography for junior schoolchildren Birch grove. Step-by-step instructions with photos
Similar articles:
Calla lilies made of plasticine
Ant from plasticine - modeling insects with children from 6 years old
You can make ants from plasticine with children aged 6 years and older. As you know, ants do not live alone - they are social animals and form entire colonies - anthills. Strict order reigns in anthills. Each ant knows exactly its duties and fulfills them. No matter how small the ant is, it is one of the most powerful inhabitants of our planet. After all, he can lift ten times his own weight! If people had such strength, then two not very large men could easily carry a car from place to place. And a preschool child could carry his tired mom and dad home from a walk without any problems. Ants are also great builders. After all, compared to their size, an anthill is a real skyscraper. When working on this craft, you can use natural materials. And not only to make legs for ants from twigs, and not from plasticine. Create your own small anthill by sketching sticks and straws. And then “populate” it with cheerful and hardworking ants.
Stages of modeling an ant from plasticine
Divide the plasticine block in half. Make an elongated ellipsoidal egg from the half. You can even make one end pointed. Divide the remaining piece in half and form a ball and a short carrot cone.
Connect all three parts to each other.
Roll long black sausages from black plasticine. Make six legs out of them: four short ones and two longer ones. And two short and thin mustaches. Both legs and antennae can be made not only from plasticine, but also from wires or twigs.
Stick the legs to the ant's chest and the antennae to the head.
Make eyes. Cut through the mouth with a stack.
Ant from plasticine - modeling insects with children from 6 years old. Our plasticine ant is ready to hit the road or start working for the benefit of his native anthill! If you mold a dragonfly from plasticine, you can act out Grandfather Krylov’s famous fable “The Dragonfly and the Ant.”
What you need for work
In addition to the plasticine itself and your own fingers, you will also need some tools, such as a modeling board, a special knife, and a roller for rolling out the plasticine. Stacks will also help you in this matter. They are special plastic knives with which you can not only cut the plasticine mass, but also crush it or create grooves and dents of various shapes on the surface. You will also need matches or toothpicks to connect the individual parts together. Among other things, wet wipes will be useful for cleaning your hands while working, as well as a diagram for sculpting animals from plasticine, which explains the whole process step by step, instructions or a master class. Guided by such material, you can easily master the entire process of sculpting an animal, both wild and domestic.
Basic techniques for working with plasticine
Modeling animals from plasticine is a step-by-step process. There are basic shapes that serve as the basis for creating various elements.
These are the ball, cube, pyramid, cake, drop and strip. A cube is formed from a ball by squeezing and pressing it on four sides, and then it can be rolled out using a rolling pin, or left in the shape of a cube, finally aligning the edges with a flat stick. Or, for example, the “drop” shape is also created from a ball. In this case, the round workpiece from one edge begins to be gradually compressed and stretched to the desired size.
Butterflies from plasticine - modeling insects with children from three years old.
A plasticine butterfly is an interesting craft for preschool children. The main difficulty children may have when depicting a butterfly is sculpting the wings. But if you use additional material to create the wings - cardboard - then this problem will be immediately solved. In this form, the craft immediately becomes so simple that it is suitable even for three-year-old children. This is exactly the kind of butterfly we propose to make in the first version. And for children 5-6 years old (senior and preparatory groups of kindergarten) and older, butterflies can be made more complex and interesting. All other options are suitable for this age. We provide templates for cutting out wings from cardboard, but, of course, you can easily draw the wings yourself.
A plasticine butterfly with cardboard wings is a simple craft for children aged three years and older.
Let's make a sausage-cylinder.
Cut out the wings from cardboard in advance. This needs to be done by an adult.
Wings template for a simple craft with children - plasticine butterfly with cardboard wings. Let's decorate the wings with a simple plasticine molding. For example, roll up multi-colored balls and press them, flattening them onto the wings.
Stick the cardboard wings into the plasticine sausage body. In principle, the work can be completed here.
If you want, you can make butterfly antennae from straws, twigs, or chenille wire. The plasticine butterfly is ready.
A plasticine butterfly with cardboard wings is a simple craft for children aged three years and older.
A plasticine butterfly with cardboard wings is a simple craft for children aged five and over.
This model is very similar to the previous one, but we will sculpt the body in more detail. In addition, children will be able to show their imagination and artistic taste by designing wings. Shape the sausage into a cylinder. Roll it in the middle with your finger to make a butterfly “waist”.
Let's roll a round ball. Using your fingers, pull out two small horns - antennae - from plasticine. This is the head of a butterfly.
Let's press the parts together.
Let's take cardboard wing blanks (the template in the previous model) and decorate them with plasticine molding as your imagination dictates.
We stick the finished wings into the plasticine body.
If you want, you can make beautiful antennae from thin plasticine flagella.
A molded plasticine butterfly is a craft for children aged 5 years and older.
This option is primarily decorative. We do not sculpt, but rather draw with plasticine. Such a butterfly is convenient because it can be hung on a ribbon or glued to a group composition. Cut out the silhouette from cardboard.
A molded template for a butterfly made of plasticine - crafts for children aged 5 years and older. We start by creating the body. We make a head from the ball. The two sausages make up the body, and their thin flagella make up the antennae.
Let's decorate the butterfly as your imagination suggests.
We attach a ribbon to the back side with tape - now the plasticine butterfly can be hung.
A molded plasticine butterfly is a craft for children aged 5 years and older.
Plasticine butterfly - sculpting insects with children
You can make a butterfly entirely from plasticine. Below we provide diagrams for sculpting two butterflies.
Sculpting patterns with children using butterflies in their plasticine.
How annoying these insects are, mosquitoes. They seep through any cracks in the summer and persistently try to sneak closer to a person. Most likely, there is not a single person who is not annoyed by mosquitoes. Nevertheless, sculpting insects from plasticine is always interesting. We think that you and your children will not refuse to create your own copy of a mosquito, not paying attention to the fact that sometimes these “squeakers” spoil everyone’s nerves. This work will cause only positive emotions, and the detailed tips given below will simplify the task as much as possible.
1. In addition to plasticine, in this master class we will use very thin wire; without it we will not be able to get very thin legs and proboscis of a mosquito. Although plasticine can be rolled into a thin thread, this material will not support a large load in the form of a torso. As for the shades of plasticine, brown or gray are suitable for sculpting the body, blue, gray or white for creating wings.
2. Immediately divide the brown plasticine into three parts.
3. Form them into parts of different shapes and sizes: head, torso and tail.
4. Connect all the parts together.
5. Use a stack to make longitudinal notches on the tail - this is the easiest way to show the striped pattern.
6. Cut one small piece of wire for the proboscis and six identical, but larger pieces for thin legs.
7. Bend your legs and insert them into the center of your torso.
8. Attach the eye dots and nose.
9. Divide the gray plasticine into two parts and make a drop out of each of them. Apply the design in a stack.
10. Attach the wings to the back and press down lightly.
A mosquito made of plasticine is very similar to its living prototype, but you should not be afraid of it, because it will not fly or bite its sculptor.
It seems to you that there is no benefit from annoying flies
?
Spiders, frogs and birds don’t think so, because flies
are their favorite treat.
Therefore, people have to endure the presence of these unpleasant insects. Invite your child to create a completely harmless fly with his own hands
.
An insect can be molded from plasticine
. And such a copy can be considered useful, because in the process of making it, children and parents will have fun, communicate, and learn something new. If you have difficulty sculpting any complex objects, then you need to have detailed instructions on hand. This is exactly the step-by-step guide to creating a fly that is given in this master class.
For sculpting a fly
select the following:
plasticine of a suitable color - black (gray), blue (white), red;
plastic tool like a spatula;
match (skewer or toothpick).
Plasticine pets
In order to start sculpting animals, you must first decide what kind of animal you want to depict.
Try to clearly imagine the image that will be embodied using plasticine. Children, as a rule, choose pets to sculpt. This is due to the fact that they see them quite often, unlike wild ones. Usually, any animal begins to be sculpted from the head. To create it, you need one large ball for the base and two smaller ones for the ears. Next, the required shape is created from these balls.
Eye placement is also important. They should be positioned so that the animal is looking directly at you. Balls are also prepared for the body, paws and tail, if, of course, there is one. An important point will be the connection of all elements into one whole. You can use matches or toothpicks for this. If you use medium-soft plasticine for modeling, you can subsequently play with these animals, creating various storylines involving pets.
Caterpillars made of plasticine - modeling from plasticine with children from three years old
Plasticine caterpillars are an easy craft to make with kids. Funny caterpillars can become one of your baby's first sculptural masterpieces. We present two different models. Both of them are created using the simplest modeling techniques from plasticine. Even if the balls for the first or the “sausage” for the second caterpillar turn out to be uneven, the work will still be successful and will be decorative. And for kids this will serve as an excellent exercise in working with plasticine. You can make small details - eyes, antennae - yourself or use ready-made options. For example, plastic eyes for soft toys and wires - regular or chenille - for antennae. All caterpillar decorations can be made from plasticine, but this is difficult for small children. Therefore, we recommend using ready-made beads and seed beads.
Plasticine caterpillar - modeling with children from three years old
Let's roll six or more multi-colored balls.
Let's connect the balls together. For convenience, you can use a cardboard base.
We decorate the caterpillar with ready-made beads or seed beads. We make antennae from pieces of wire or toothpicks. The plasticine caterpillar is ready!
Plasticine caterpillar - modeling with children from three years old.
Caterpillar-worm made of plasticine - a craft for children from three years old
Let's make a long carrot cone. With kids, just make a sausage cylinder. If it turns out lumpy, it’s not a problem.
We decorate the caterpillar with ready-made beads. You can make the eyes yourself or use industrial ones. Let's cut the mouth with the stack.
Let's turn the worm into a centipede caterpillar. Cut the cocktail stick into pieces and stick these pieces into the abdomen. From the same sections we will make antennae-horns. The plasticine worm caterpillar is ready! Now you can turn it into a plasticine butterfly!
A caterpillar made from plasticine and cocktail sticks - a craft for children aged three years and older.
Preparing for sculpting
Before you start learning how to make animals from plasticine, you should take care of preparing your workplace. The surface of the table at which modeling will be done should be well lit. In addition, you should protect your workplace from plasticine. It is for such purposes that special boards are used. But if you don’t have one, you can simply cover the table with a piece of oilcloth so as not to get it dirty. For kids, you can stock up on various shaped molds, and then sculpting animals from plasticine will become an even more exciting activity. You can also purchase special gloves for handles so that the plasticine does not rub into the skin during work.