forest house
One of the most interesting and at the same time simple options for a plasticine house is a small forest house . It is very easy to mold, and the result will definitely impress both the child and you.
- Let's make a house. Knead a piece of white plasticine and give it a square shape. This is easy to do: roll the heated plasticine into a ball and gently press each side to the table. Correct uneven areas with your fingers.
- For the roof, take a piece of brown color and knead it with your hand in the same way. Make a three-dimensional triangle according to the size of the white cube.
- The covering for the roof will be small flattened balls. Roll up several of these brown ones and, flattening each one with your fingers, begin laying them out on the roof in rows until both slopes are completely filled.
- Strip the front part of the roof with a stack and use it to give the plasticine a structure characteristic of wood.
- Place the roof on the white cube to form a house.
- The next stage of sculpting the house is finishing. Make eight thin strips of brown along the length of the white cube. Attach two strips of them to each corner. Add another strip where the front of the roof meets the wall.
- From the same color, make a miniature door and window, one or several.
- Give the door the same wooden structure that you previously gave to the roof by drawing a few stripes on it and lightly scratching the smooth surface of the plasticine.
- Mash the green plasticine and mold it into a snake that can fit around the house.
- Attach it to the walls of the house and, using a toothpick or other thin stick, leave a few indentations, giving the plasticine garden the necessary texture. The craft can also be decorated in a winter style if it is done for the New Year. Then use white instead of green.
- Attach the same greenery (snow) under the window.
- From small pieces of red color, build flowers on the greenery around the house.
- By bending a flat rectangle and attaching it above the front door, you can make a miniature canopy.
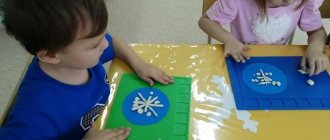
introduce children to decorative sculpture; continue to introduce sculptural paintings (bas-relief, counter-relief, etc.); teach relief sculpting - make a decorative plate, independently think about the shape of its edges; learn to compare different methods of image, to convey a semi-volumetric image using different materials; use stack to finish the mold; introduce objects of decorative and applied art.
Material:
salted dough (mix flour in a bowl, half the amount of salt, a little vegetable oil and water; the dough is kept in a plastic bag for 1 hour in the freezer or overnight in the refrigerator), round plate, stacks, sand molds, samples of decorative plates, stencils, stamps .
Preliminary work:
excursions around the city, during which attention is drawn to the bas-relief images on the walls of buildings, etc.; examination of ceramic dishes; production of drawings-plates with painted patterns; observation of the process of work on the topic “Reliefs”.
Progress of the lesson
The teacher says that decorative sculpture adorns architectural structures, gardens, parks, bridges, etc. Various reliefs, fountains, decorative designs on buildings, dishes and various household items emotionally enrich the life around us.
The teacher invites the children to remember the painted plates, clarify their shapes and patterns, ornaments (this includes plant decorative elements), as well as plot images of people and animals. The dishes are decorated with high and deep relief.
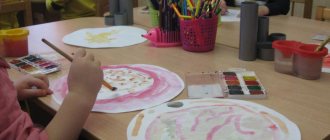
Children are invited to make beautiful plates to decorate the kindergarten. First you need to mold a thick disk and pull off its edges. The next step is shaping the edge. Children can approach its implementation in different ways, let them show their creativity.
Having sculpted the plate, pull back its surface. The pattern is made by molding or in-depth relief. Here we can once again recall that a bas-relief is a stucco painting with a convex image; high relief - with an even more convex image; counter-relief - on the contrary, with a recess into the surface.
The teacher can show a bas-relief image of a fish, butterfly, leaf, etc. on a sand mold. Let your hand feel the convex surface of the mold. The intended drawings can first be scratched, pressed, translated, traced with a stick, a stack, a finger, or a stamp.
After all the plates are ready, decide with the children where to hang them, what to decorate with them (group, locker room, gym, laundry, medical office, etc.).
House with plants
The master class suggests making amazing house with your own hands. There is a small garden near it, and the walls of the house themselves are covered with ivy.
Despite the original picture, it may seem that the house was made by a professional , but in fact there is nothing complicated here, and any child can make such a craft .
- Cut out a disk from cardboard. This will be a clearing for the house.
- In the middle of the clearing, cover up a rectangle of any color except green, the size of the future house. From one side, draw a path of yellow plasticine to the end of the disk. Cover the rest of the space with green - this is grass.
- The house itself is made using cardboard blanks. Make the walls and roof for the house in advance. The two walls should have a pointed end in the shape of a triangle so that there are no gaps between the house and the roof.
- Cover the walls with gray plasticine, drawing bricks on them using a stack. Make doors and windows and attach them to the walls of the house.
- Cover the roof with orange plasticine and draw tiles on it. You can make the roof more original by leaving imprints from a felt-tip pen on it. Thus, it turns out that there will be patterns of small flowers on the roof.
- Attach the walls around the rectangle on the disk and cover the formed house with a roof.
- Make four columns from white, which you will use to stick around the corners of the house, thereby attaching it more securely to the clearing.
- Start sculpting stems and leaves from green plasticine, attaching them to the walls of the house. Throw a long stem down one of the white columns near the front door, and then along the roof.
- Take bright colors and make flowers, decorating empty stems with them. Flowers should be located both along the wall and on the roof.
- Make small balls from brown and gray plasticine and, having flattened them a little, attach them along the diameter of the clearing and use them to mark a path to the entrance.
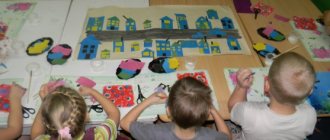
Plasticine town
It’s much more interesting to play not with just one house, but with a whole miniature city . It will be interesting for the child to lead his little dolls through the city streets, take them to the pond and place friends in neighboring houses.
In addition, sculpting an entire city is an exciting activity that a little sculptor will definitely enjoy.
- Take a piece of cardboard or use a special plasticine board.
- Mash a gray piece of plasticine and roll it into a long thick sausage. Place this sausage in the middle of the chosen base and spread it over it, forming a road.
- Using white plasticine, “draw” a pedestrian crossing from thin white stripes and apply road markings.
- Mark the road with thin strips of green plasticine and move on to decorating the upper part of the base.
- Make a sausage of medium thickness from brown plasticine and, flatten it, place it right next to the road. This will be the path.
- Cover the remaining part of the upper half with green.
- Use different colors to decorate your apartment buildings. Place them close to the path.
- Use brown clay to make the roofs and black plasticine to make the small windows.
- Plant plasticine trees along the path itself.
- Cover the other half with green plasticine, leaving a small semicircle at the base of the sheet or board. Fill it with blue plasticine, turning it into a lake.
- Along the main road, place lanterns made of gray (poles) and white (lanterns) plasticine.
- Place made benches and green bushes around the lake, and fill the lake itself with white miniature swans.
- Green the second half of the base by planting lots of trees and bushes.
- If desired, you can put plasticine cars on the road.
Plasticine is an excellent material that promotes the development of creative talent in children. To help your child make a plasticine house, use the master classes described above and, of course, your imagination.
Let your child do most of the details with his own hands and don’t try to take the plasticine away from him to show him how to do it. Let the child use his imagination in such an interesting activity as modeling.
Hut
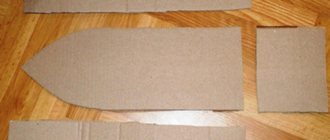
The next version of a house made from plasticine with your own hands is a wooden hut . The process uses not only plasticine, but also cardboard bases, so it’s worth preparing and stocking up on the necessary things in advance.
- Take the brown color and mold it into several thick logs.
- The basis for the house will be an ordinary small cardboard box, for example, a cream jar. Cover all the walls of the future house with the resulting logs.
- Take a sheet of cardboard and cut out a rectangle that, when folded, could cover the house.
- Cover the roof with gray plasticine and paint it with a stack in the form of tiles.
- Cover the house with the resulting roof and seal the gaps with brown plasticine.
- Make two windows from blue. Attach the first, round, to the front side of the roof, and the second, rectangular, to the wall. You can attach shutters to it.
- Make a chimney from orange and attach it to the roof slope.