Chestnut caterpillar
If you drill through holes in the chestnuts in advance, you will get a toy no worse than children's pyramids. Let the child collect them on a wire or thick thread into a flexible and funny caterpillar.
Photo: m.fishki.net
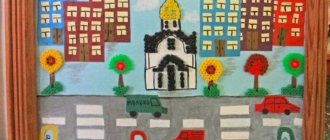
Vegetable crafts for kindergarten: 10 beautiful and easy ideas
Leaves
- Candlestick. This is an applique on glass.
There is no need to wait until autumn to create beautiful patterns from fallen and yellowed leaves. In nature there are colorful leaves: striped, burgundy. A prerequisite is to smooth them out a little using a press. Don't wait for the leaves to dry. It is enough to keep them under a stack of books for 1-2 days. You need: leaves, a jar, PVA glue, degreaser, a brush. How to make an applique:- Treat a clean jar with a degreaser.
- Apply a layer of glue.
- Make a pattern of leaves by gluing them onto the jar. Even a 3-year-old child can do this activity.
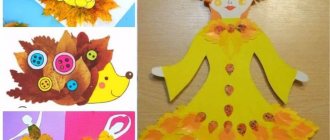
- Applique painting. Anything you want can be made from leaves. After all, to create a picture, you can simply glue them onto paper, or you can cut out any shapes from them. You can even fold the sheets several times to make the pattern three-dimensional. For example, here are pictures
And as a base you can use canvas or a cut of wood, or make an applique on glass inside a photo frame. - Dress - applique. Incredibly beautiful dresses for girls. You can draw or print the silhouette of a girl and make her a beautiful dress from petals, leaves, or whole flowers. Or you can even take your photo and decorate your outfit.
- Postcards. They are usually made in the same way as paintings, but you can improvise. For example, use leaves only as templates.
- Fasten the leaves.
- Place a blank for a postcard on them.
- Holding the pencil almost horizontally, do the shading.
- Draw veins and contours. To do this, you can use different colors of pencils.
- Plate-vase.
To make a plate of autumn leaves with your own hands you will need a little:- colorful “live” leaves or herbarium (maple ones look great)
glue (suitable for decoupage)
- tassel
- scissors
- Bowl
- Clothing decor, hats, a crown of leaves are a great idea for a photo shoot.
We grease the bowl with cream or wrap it in cling film and glue the leaves with PVA glue, then apply a fixing layer of glue on top of the leaves. This is what it should look like:
As you may have guessed, you can take any basic shape, even a balloon.
Children's ornaments made from natural materials
Natural gifts allow you to endlessly create different abstract designs and ornaments. Maximum space for creativity, experimentation and self-expression!
Photo: infourok.ru
DIY winter crafts for kindergarten (50 photos)
Sketch from life - a bird
When going for a walk with your child to the nearest park, take with you a plastic bag and collect colorful leaves that are perfect for creating an applique. You need glue and cardboard.
Attach a linden leaf to a piece of cardboard and draw a line under it with a felt-tip pen, as if a bird had sat on a tree. Slip a rowan branch with leaves under the body of the bird and glue the parts to the base. Attach a button-eye, a leaf-wing to the yellow leaf, draw three-fingered legs and the sparrow is ready to jump on the branch.
You can make a lot of pictures from leaves, choose what you like and implement it. See the video for examples of ideas:
Underwater world made of shells
Painted shells turn into strange fish, crabs and turtles. Add eyes, fins and claws to them and place them in a makeshift aquarium!
Photo: hobobo.ru
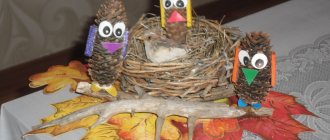
Crafts from pine cones for children: 10 simple and beautiful ideas
Fruits vegetables
Figures and compositions. Summer brings a lot of vegetables and fruits from which you can make a real construction set. There are many options.
I'll tell you about the hedgehog. By the way, such a craft can even decorate a holiday table! And it’s very simple and quick to do.
You need: pear, grapes, toothpicks and 2 cloves (seasoning).
How to do:
- Break off the tail, leaving about 2-3mm.
- Peel the thin part of the pear (a little less than the middle).
- Insert a toothpick into the unpeeled part of the pear. And so fill out this entire part.
- String grapes onto a toothpick.
- Insert cloves like hedgehog eyes.
Crafts made from natural materials for kindergarten – photos and ideas
And when your child tries all these options and ideas, explore our gallery of crafts with him!
Photo: fotovmire.ru
Photo: kukolnik-shop.ru
Photo: mammamia.blog
Photo: knowledge-tree.ru
Photo: ds37zaprudnoe.kinderedu.ru
Photo: mydesigninfo.ru
Photo: viramaina.ru
Photo: podelunchik.ru
Photo: les-tish.ru
Photo: svoimirukamy.com
Photo: melkie.net
Photo: tdconsource.ru
Photo: larecmasterici.ru
Photo: liveinternet.ru
Photo: m.ok.ru
Photo: exxxtreme-club.ru
Photo: vk.com
Photo: casasincreibles.com
Photo: tr.pinterest.com
Photo: art-talant.org
Did you like the post? Subscribe to our channel in Yandex.Zen, it really helps us in our development!
Acorns
- Painting. It is made from acorn caps. First, a picture is drawn, but in such a way that its details do not merge or overlap one another. The outline must be clear. Then the caps are glued along the entire perimeter of the silhouette. You can offer the children to do the second part of the work with their own hands. Or you can make a beautiful frame for a painting, photo or mirror.
- Miniature dishes made from acorns. Looks very nice. I think the girls will be delighted with this craft.
- Decorated acorns. What are they used for? They make excellent Christmas tree decorations. Or, you can make colorful compositions to decorate your home.
How to decorate acorns? To do this, you can use paints, nail polish or glue, which can be used to put white or transparent dots or draw stripes. Which design should you choose? This will completely depend on the desire and skill of the children. After decorating, you will need to carefully thread the hat with a needle and thread. Make a loop out of thread and you can hang it on the Christmas tree.
Penguin
Objectives: To develop practical skills in working with a non-traditional material for construction - a pine cone. Learn to use natural materials in combination with other materials. To promote the development of mental analysis of the sequence of making crafts and the practical implementation of the task.
Material: Pine cones, colored paper - white, black, red, padding polyester, black gouache paint, polystyrene foam or cardboard (for the stand)
Crafts “Autumn Fantasies” for school (grades 1-4)
And now I propose to make a craft according to this master class in the style of modular origami. Wow, I’ve been asked for a long time to show how you can quickly and easily make maple leaves like this out of paper. So take note, because it is with these blanks that you can decorate the interior of a group, class, and even at a gala event, a matinee.
And then please, take it and fantasize. Here's how they decorated it on the Country of Masters website.
The next option, which is loved by younger schoolchildren, is of course the main character - a hedgehog.
In order to create it, you will need everything that you see in the picture below. This is colored paper, a glue stick, a felt-tip pen.
Take brown colored paper and fold it in half. Cut along the fold line with scissors, you will get two rectangles.
Then glue them together to form a stand.
After the glue has dried, draw and make round edges on the workpiece. Cut along the line. Using pink paper, also draw outlines in the form of a semi-oval.
It is also necessary to cut out round-shaped ears and paws from it. Arrange the parts in the correct proportions as shown below and glue to the base. Scatter real dry leaves or cut them out of colored paper.
Now all that remains for the hedgehog to do is make the spines; make cuts along the edge of the brown paper.
Draw the eyes and face. Your fabulous little animal is ready.
Using an accordion, make the work in the shape of trees. Look how original it looks.
Also, one of the favorite characters among children at any time of the year is the sun. I suggest making it this time from a CD. And again the paper will have to be folded like an accordion, in general, look at the instructions in the pictures and create.
What an unrealistically charming sun it turned out to be; my spirits lift when I see it.
And if you don’t have colored paper, then use napkins, although take them in a single color. Cut into small squares and roll each piece into balls.
Draw any still life, in this case the author depicted trees and a river. And sit and painstakingly glue each ball until the whole image is formed.
The next idea is work from cotton swabs, which, as you can see, were initially painted, their heads, in the desired color.
And for those who want to comprehend quilling, or are deeply interested in it, I would like to invite you to consider such a masterpiece.
Here's another fascinating idea, look how cool the author came up with it. Do you want to make it happen? Then let's get down to business. It will turn out to be just a living corner.
And if this is too difficult for you, then take a regular package and follow the photo description.