Types of applications
Before you start learning how to make beautiful appliqués with your own hands, you should understand what types of this technique exist.
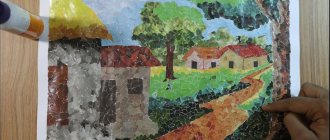
- Mosaic applique - first the contours of the image are drawn, then parts of geometric shapes and different sizes are glued inside it.
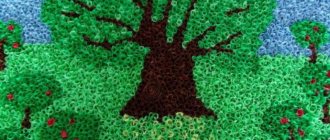
- If you twist colored paper into a spiral, the technique is called quilling.
- For symmetrical applique, before cutting out the part, the paper blank is folded in half.
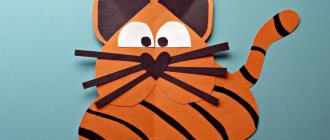
- A multi-layer applique is one that is created from parts of different sizes, small ones are glued onto large ones.
- If you trace the palm and use this figure as a base, you will get a palm applique.
Owl creation technique
- Take cardboard - it will be the base.
- Glue a twig cut from colored paper.
- Now paint the background with paints, you can paint with your fingers.
- Glue clouds, moon and other background elements as you wish.
- Using the templates, trace the outline of the owl on the branch with a pencil.
- Tear off pieces of paper and glue them inside the outline.
- Make a second layer on top of the first.
- You can draw the eyes and beak with felt-tip pens or make them out of colored paper and glue them on.
Firebird
The process of creating such a craft perfectly develops the imagination, because the character is magical and very bright.
- To make the head and body, cut out a ten-centimeter square piece from colored paper.
- Form a square into a triangle and bend along the larger side.
- Now expand the square - it is divided into four sectors.
- To get the body of the bird, glue both edges overlapping.
- The belly is the larger side, and the smaller side is the back.
- To create a chic ponytail, cut nine nine-centimeter strips - curl them or leave them straight.
- Glue three stripes to the back, six will serve as material for making wings also on the back.
- You can also make both the tail and wings using the palm technique.
- You can cut out eyes and other small details from colored paper or draw them.
- Attach the bird to the background on a branch of colored paper, decorate the background by painting it and gluing parts from colored paper.
GCD with children of the senior group in application. Birds on a branch
GCD with children of the senior group on an application on the topic “Birds on a Branch”
Author: Irina Filippovna Yumshanova, teacher of the MBDOU “Savinsky kindergarten”, Savino village, Perm region, Karagay district. Description of the material: I offer you a summary of the GCD for children of the older group (5-6 years old) on the topic “Birds on a Branch.”
This material will be useful to teachers of the senior group. The abstract is aimed at developing artistic and aesthetic perception in children. GCD with children of the senior group on application
“Birds on a branch”
Purpose: Development of artistic and aesthetic perception in children. Objectives: 1. Teach children to work with a stencil and practice silhouette cutting. 2. Develop creative imagination. 3. Cultivate neatness. Materials: Colored paper, bird stencils, foil wood, colored napkins (red, yellow), scissors, glue. Progress of GCD Problem situation Educator: Guys, for the New Year we need to decorate the group’s corridor, but we haven’t figured out how to do it yet. How would you like to decorate the corridor, walls? Children: decorations, tinsel. Educator: Where can I get jewelry? Children: at home, buy in the store. Educator: I suggest you make decorations with your own hands, look, I have a beautiful tree, who would you place on the branches? Children: birds. Educator: of course, we will place wintering birds on the branches. Children examine a specimen of a bullfinch bird. The teacher places a diagram on the magnetic board (the order of the work) Teacher: look, guys, at the diagram and remember the rules for working with a stencil: you need to hold the stencil without moving it, trace two silhouettes of birds (one bird looks to the right, the second to the left), and so that Everything worked out neatly for us, we will do gymnastics for our fingers and prepare them for work. Finger gymnastics “little birds” Little birds Small birds are flying through the forest Seeds are being collected A wild wind has flown in The birds wanted to be carried away The birds are hiding in a hollow It’s dry and warm there (children perform actions in accordance with the words) Educator: choose paper by color, think about what kind the bird you want to make. Let's make a breast for the bird, choose a napkin and make a lump, squeeze it tightly, you get a ball. “One, two, three four You and I made a snowball. Round, strong, very smooth, and not at all sweet.” Children repeat the words after the teacher and roll a ball out of a napkin. Educator: Now look carefully at the diagram again and start making the bird. Calm music sounds. The teacher helps the children and corrects them. Educator: Guys, your eyes are probably tired, they need to rest a little, look. Gymnastics for the eyes The bird flew up (children look up) The bird flew to the right (look to the right) The bird flew to the left (look to the left) And hid on the floor (look at the floor) Educator: What a nimble, brave bird I have, she invites you also play. Physical education lesson “I’m a nimble bird, my name is titmouse I can’t sit still Jump, jump, jump, jump Spun like a top Flew, flew, quickly sat down on the fence” Educator: We’ve rested, let’s finish our work and place the birds on our tree. The children help each other finish the birds, and after finishing the work, I place the birds on a birch branch. Educator: Children, let's count how many birds are on the tree. Children: ten. Educator: Count how many bullfinches and tits there are. Children count. Reflection: Children look, admire the birds, and take them into the corridor to decorate and note that the corridor has become more beautiful, more festive. The teacher reads a poem about a bullfinch or titmouse. Photos for the summary of the educational activity “Birds on a branch”
Children trace the bird using a stencil
Scheme (order of work)
We recommend watching:
Summary of GCD for cognitive development in the senior group. Synopsis of GCD for the senior group of the preschool educational institution. Synopsis of GCD for the senior group. Educational area “Cognition” Abstract of GCD on ecology in the senior group
Similar articles:
Lesson in the senior group. Topic: “Moods and Feelings”
Summary of a lesson on social and communicative development in the senior group according to the Federal State Educational Standard. Topic: "Relatives"
Summary of a lesson on labor education according to the Federal State Educational Standard in the senior group
Summary of a lesson in the senior group on the topic “History of Human Development”
Summary of a lesson on social and communicative development for children of the senior group. Compound
Crafts made from dry leaves
To create a firebird from dry leaves, prepare dry leaves, a glue gun, paint, and a sheet of cardboard.
- For the background, paint cardboard or use colored cardboard.
- Spread the paper and carefully arrange the leaves, and then color them.
- Now dry the leaves. Apply hot glue to the cardboard and glue colorful leaves.
- To do this, there must be an adhesive layer on the cardboard sheet, as well as spot-applied glue on the leaves.
- First, form the shape of a tail, then a larger leaf that stands out in shade - this will be the body of the firebird.
- Paws and eyes can be made from colored paper or cardboard.
- The magic bird is ready!
Aspects of conducting appliqué classes in the preparatory group of a preschool educational institution
Children's independence in making initial parts and working with materials
Preschoolers aged 6–7 years are already quite good at using scissors and glue, and appliqué in the preparatory group is already much more difficult than classes at an earlier age. Artistic images have a great resemblance to real objects: children not only know and imagine what a variety of birds look like, but are also able to recreate them on paper.
In this group, during appliqué classes, plot compositions already take place, which provide for a certain sequence in the arrangement and gluing of parts to the base. First the background of the application, the background, and then the foreground are drawn up. The guys already understand that objects can overlap one another.
Pupils are already harmoniously placing figures on paper, selecting the proportions of objects according to the format of the base. Children are able to create compositions not only on the usual A4 sheet of paper, but also on other forms (a strip of paper, round and square bases).
In the preparatory group, children improve the basic types of cutting: cutting paper strictly along the fold line, as well as visually, rounding the corners of a square or rectangle, achieving round and oval shapes, cutting out symmetrical shapes from a sheet of paper folded in half. In addition, students can already cut out many identical elements from material folded several times. Such a complex technique as silhouette cutting (along a linear contour) is being taught, while the child must keep in memory a complete image of the object and ensure that its proportions are correct.
As for the immediate preparation for the lesson, the teacher can offer the parts he has cut, but preschoolers of this age are quite capable of cutting them out of paper, fabric and other materials on their own. In addition, preschoolers aged 6–7 years old have access to the tearing technique - they are able to tear pieces of colored paper or napkins themselves, from which they will later make a composition. If dry leaves are used as the main material for the applique (as a rule, these are autumn compositions), then the children will be happy to collect them during a walk.
As for the size of the original parts, they must correspond to the format of the base. The elements should not be too small (exceptions are the eyes and beak of the bird).
The most suitable materials, including for the base
Since in the preparatory group much attention is paid to applique by design (a striking example of this is the theme “Fairytale Bird”), the teacher provides children with a wide selection of paper of various colors and shades (matte and glossy) - this promotes independence and creativity. If the required shades are not available, the paper can be pre-painted. Several guys can do this work on the eve of the application.
Interesting works are obtained by using corrugated or embossed paper. The teacher should not forget that in all cases, be it gluing ready-made forms or cutting them out on their own, the child must have a larger supply of material than is required to complete the work.
As for the background, thicker paper is usually used for it, for example, thin cardboard. Moreover, it does not have to be white.
As for original, unconventional solutions in the choice of material, it could well be dry leaves, dried flowers or fabric. Also, pupils of the preparatory group do an excellent job with straw appliqué: such works look unusually attractive, they shimmer in the sun and fit perfectly into the interior.
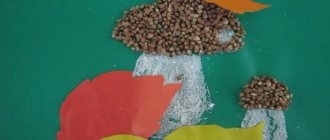
Straw applique
As for crafts made from dry leaves, twigs, flowers, such work, in addition to developing creative abilities, promotes rapprochement with nature and fosters a caring attitude toward it. When applying birds, you can also use the most unexpected, at first glance, natural materials: crushed eggshells, small pebbles and shells, poplar fluff.
You can further decorate the composition, especially if it includes fabric elements, with braid, sequins, and confetti. Figures made from torn napkins or cotton wool have a voluminous effect. Applications made from candy wrappers look bright and festive. The choice in this case is limited only by the teacher’s imagination.
For an application on the theme “Birds” in the preparatory group, you can also use plasticine in the form of small balls that create a mosaic pattern. In this case, the outline of the bird is first drawn with a simple pencil on a cardboard base, then covered with transparent tape. Plasticine pieces are attached directly to the tape - in this case, it is easy to correct the mistake, in addition, such a base can be used several times.
A similar technique occurs when creating applicative compositions from pieces of paper. Each piece is rolled into a ball and glued to the base. Such voluminous applications can be supplemented with drawings using paints, pencils or felt-tip pens. Three-dimensional applications that involve origami elements look original.
As for such a tool as scissors, in the preparatory group they should also be small in size, have rounded ends and be easy to move the child’s fingers - the result of the created shape depends on these parameters. To work, children also need special glue brushes and a stand for them (so that the glue does not flow down, dirtying the work area). Each preschooler must also have a tray for scraps, oilcloth and a cloth for fixing glued forms and removing excess glue.
The relevance of collective compositions within the framework of a given topic and the use of an individual approach
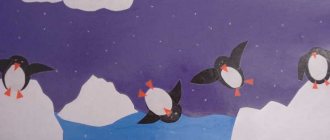
In the preparatory group, collective applications are carried out quite often; the theme “Birds” is especially conducive to such work. These could be options such as “Penguins in Antarctica”, “Bird Canteen”, “Bird Yard”, “Flying Migratory Birds”. The teacher prepares a large-format base (a piece of Whatman paper) in advance, colors it in the appropriate background, and the children fill it in with applique details.
In addition, children can be divided into several subgroups and each can be asked to design their own applique plot. Let us note that children aged 6–7 years are already able to independently distribute work among themselves without the help of a teacher, including determining the sequence of gluing.
In the preparatory group, many children already have clearly expressed abilities for visual arts, so an individual approach will be very appropriate. Thus, gifted children can make more than one bird during class (provided they quickly complete the main work) or supplement their composition with additional details.
Migratory birds
Materials you will need:
- Sheet of cardboard,
- colored paper,
- And also scissors
- Paints and glue.
Operating procedure:
- A piece of cardboard is the sky.
- Color it or get a colored one.
- Cut out clouds from white cardboard and glue them to form a background.
- Draw and cut out the birds and then glue them to the cardboard.
- Draw the details - eyes, feathers, beak, and also add trees and other elements as desired.
Feather birds
Feathers also make great bird crafts! For example, a craft made from a pine cone, paper and feathers will be an excellent interior decoration.
In order to make such a craft, we will need:
- Cone;
- Multi-colored feathers;
- Thick paper for making the head and paws;
- Glue gun.
Before starting work, the pine cone must be dried in the oven for 20-30 minutes. This will get rid of excess moisture and insects inside.
The dried cone can be painted with paints, or you can leave the natural color and texture. We glue the cut out parts of the paws to the bottom of the cone, and also glue the head to the pointed end of the cone. You can glue toy eyes to your head, or you can draw them yourself. Now all that remains is to attach the feathers. We carefully place them on glue. The more feathers there are, the more magnificent the bird’s “hair” will be.
Related article: How to weave baubles from floss threads: patterns and weaving lessons
There is also another way to make a bird from feathers.
We will need:
- 2 sheets of cardboard (white and any color);
- Glue;
- Scissors;
- Feathers.
Cut out the silhouette of a bird from white cardboard. In our case, this is the firebird. The silhouette, starting from the tail, must be covered with feathers. You can stick them on top of each other. Then we glue the cutout with feathers to colored cardboard. The painting can be framed and will be a great decoration for any room in your home!
Chickens
In order to make a craft with the image of funny chickens or other poultry, take a sheet of colored cardboard, cotton pads, a brush with paints, as well as glue and plasticine.
- The entire cotton pad will play the role of the head, as well as the body of the bird; if you separate half of the disc, you will get wings or a tail. Pre-paint them with paints and then glue them to the cardboard.
- All other elements (paws, eyes, beak) can be made from plasticine.
- To create a goose or chicken, you need to make a printout with a picture of a bird, and also stock up on a piece of cotton wool and PVA glue.
- Roll cotton balls to fill the image.
- You can also add colors to your work - paint some elements if necessary, add details.
- This way you will get a bird with plumage, the effect of which is created by cotton wool.
Videos on the topic “Birds” and “Bird Yard”
The video demonstrates a lesson in a preparatory group on the topic “Birds at the feeder”
https://youtube.com/watch?v=iFyrcsgO3Dk
A selection of application ideas on the topic “Birds” for a kindergarten teacher
https://youtube.com/watch?v=bXY3w3cOWe4
Video tutorial - application “Birds in winter”
https://youtube.com/watch?v=DMmXUde6Fm4
The “Birds” theme opens up a lot of opportunities for interesting appliqué activities. It includes many aspects and opportunities for organizing teamwork. The main task of the teacher is to think through appropriate motivation and select a rich developmental environment, which will give preschoolers the opportunity to fully reveal their creative potential.
Cockerel and hen
- Take a white sheet of paper, a brush with paints, images with a pre-printed chicken and cockerel, colored paper, napkins of different colors, and you can’t do without a hole punch, glue and scissors.
- Prepare your future background: for this you need to paint a white sheet of paper and draw on it the background elements that you come up with.
- Illustrate the earth as well as the sky in your work.
- You can use colored paper to create images of a house, fence and other details.
Now cut out the birds.
- You can move on to decorating the characters of the craft - cut out feathers from colored paper, twist lumps from a napkin, a hole punch will be useful for making confetti.
- Glue the resulting plumage, now you can glue the birds to the background.
- If you wish, you can create a large work in a group, which will include an entire poultry yard.
There are many techniques for creating applications with images of birds. Using those presented in this article, you will create unique paintings that will decorate your child’s room, and the process of creating this masterpiece will give him a lot of positive emotions.
Also, all these techniques can be safely used for classes in kindergarten, all of them will develop the imagination of children and teach them to be neat, and will give them experience in running their own small project.
Third option
A more complex method for older children.
Sequencing:
Create an original background on a landscape sheet that will match the theme of the work. In extreme cases, the sky and grass will suffice.
Mark with a pencil where the rest of the elements will be located. Cut out parts of the house from colored sheets and glue them to the base, which should already be dry.
Download a black and white drawing of a chicken and a rooster from the Internet. If you know how, you can draw it by hand on a white sheet. Cut out the silhouette.
Prepare colored elements that will correspond to the sizes and shapes of body parts: wings, comb, body, tail feathers, etc.
Glue the blanks and decorate the top with colored paper pieces.
All this work can be done collectively, entrusting the child with the responsible work of gluing the parts in the right places.
Firebird
A fairy-tale character who looks as fantasy suggests. An ideal composition for beginners.
