Sofa
The simplest sofa model is assembled in just 11 steps. We use a standard 15x15 cm square for it.
Step-by-step instruction:
- We outline the horizontal and vertical axis.
- Fold the bottom edge 1/3.
- Fold the product in half.
- We bend the right and left edges by 1/3. Let's reveal.
- We repeat the technique we used for “House”: straighten the side “pockets” and press.
- Fold the figure along the dotted lines.
- Raise the central lower part.
- We bend it in half.
- Fold the sides.
- We omit the central part from step 7. This is the seat of the sofa.
You can make “soft” origami furniture in another way:
Bed
A bedroom set is an integral part of a modern home. It usually includes a bed and two paired bedside tables. Let's start with the main piece of furniture. The most popular bed model consists of two parts: the body and the mattress.
Step-by-step instruction:
- For the body we use a 15x15 cm square. We outline the central axes.
- Fold the bottom and top edges 1/3.
- And bend it towards the central axis.
- We fully open all the folds, and then assemble the figure with a zigzag in the direction of the arrow.
- We outline the diagonal folds.
- We open the sides from the inside, as shown in the diagram.
- And flatten it.
- We bend the right edge of the workpiece.
- We place the triangular “legs” at right angles to the base of the bed.
- Raise the left side up. This is the headboard.
- We put the bed on legs.
Mattress:
- We outline the vertical axis of the square.
- We bend the right and left edges towards it.
- Let's turn it over again.
- We open all the folds.
- Fold the left side back along the dotted line.
- We fold the right edge in the same way, but forward.
- Bend the figure in half from top to bottom.
- We outline the horizontal axis.
- Fold the top and bottom 1/3.
- We lower the sides at a right angle.
- The mattress is ready. We place it on the base of the bed.
Origami bedside tables are assembled according to the principle of Japanese “masu” boxes. Place them vertically, with the open side inward.
Model No. 2
The second type of bed is made from one sheet. It comes with a blanket and pillow, which makes the model surprisingly realistic and elegant. For the bed you will need a sheet of paper 15x15 cm, as well as a ruler and pencil.
Detailed instructions are in the video tutorial:
For the blanket we use a square of 8x8 cm. It is advisable to take paper with a beautiful contrasting pattern. We will also make a pillow from it, loosely rolling a strip measuring 4x8cm.
Closet
As a rule, dolls have an extensive closet and it needs to be put away somewhere. An origami cabinet is perfect for this purpose.
Such furniture made of wrapping paper looks good. It requires two squares with a side of 21 cm.
Step-by-step instruction:
- We divide the first square in half in two directions.
- Then we bend each part in half again.
- Cut the square in half.
Part 1:
- We bend the top edge towards the middle.
- Let's turn it over again.
- We fold the outer sections in half. Let's reveal.
- Raise the upper part in the direction of the arrow.
- Fold the sides.
- We form the corners of the half-box.
Part 2:
- We bend the second half of the square to the middle.
- Open the fold.
Part 3:
- Divide the square in half.
- And then into four parts lengthwise and crosswise.
- Fold the first section from the top in a zigzag manner.
- We process another square in the same way.
- We connect both blanks along the arrows.
Part 4, bar:
- We bend a strip of thin cardboard 15x1 cm in half, marking the middle. Let's reveal.
- Fold lengthwise.
- We divide the strip into 4 sections.
- Fold in the sides.
General assembly:
All the parts are ready, it's time to connect them together.
Chair
A chair is one of the most popular pieces of furniture. There are several well-known models of varying degrees of complexity. One of them looks like a classic chair with a cover. Therefore, it can be made from paper with a textile print. The model is based on the basic “Pancake” shape.
Step-by-step instruction:
- We outline the central axes of the product.
- Fold all four corners towards the center.
- We make mountain folds along the dotted lines.
- And once again fold the corners towards the center.
- We turn the figure over.
- Open from the inside along the arrows and flatten.
- We lower three sides down and raise one, this is the back of the chair.
The first mini furniture set is ready. It is quite suitable for a small plastic doll. You can additionally glue the furniture using a heat gun, PVA or double-sided tape.
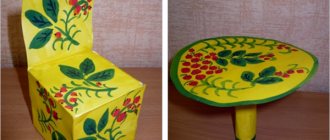
Another option for doll furniture:
