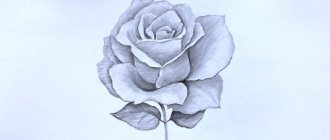
DIY plasticine crafts
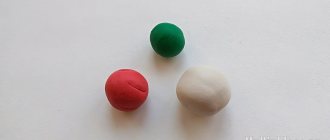
Plasticine is a fairly expensive material.
This is especially felt when you need a lot of it. To save on purchases, it is better to make it yourself. In addition, homemade material will be much more pleasant to the touch, and the process of its preparation itself is entertaining for both children and adults. To make homemade plasticine you will need:
- ¼ cup fine salt;
- ½ cup boiling water;
- 1 tablespoon of odorless vegetable oil;
- 1 cup flour.
First, you need to boil water in a saucepan, then add flour and salt to the boiling water and stir the resulting mass with a spoon. After this, place the resulting dense lump on the table, after sprinkling the countertop with flour. Make a small depression in the resulting mass and pour oil into it. Then knead the resulting dough thoroughly (until smooth).
After this, it can be colored using special dyes (food dyes can be used).
The resulting plasticine can be used immediately or saved. To eliminate the possibility of damage, it is necessary to pack it in ziplock bags. This way it will be stored for quite a long time.
How to make autumn crafts from plasticine
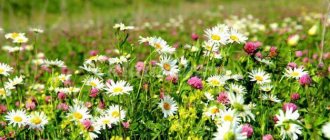
Plasticine modeling for children on the theme of autumn is a great idea for creating crafts for kindergarten or school. It can be made in the form of vegetables, which are abundant at this time of year. Animals storing mushrooms and pine cones for the winter can also be no less interesting. An original idea could be an applique that depicts a forest with shimmering autumn colors. In any case, for the craft you will need to stock up on plastic mass, preferably orange, yellow, red, brown and black, as well as a stack, a toothpick and cardboard.
How to make an autumn applique - birch from plasticine
Initially, prepare a creativity kit, which will include a box of plasticine or individual pieces if you have already worked with this material before. The cardboard for the background can be cut out from the same box or taken separately.
To make an interesting drawing, as if painted in oil, take different pieces: dark ones for the background, yellow ones, white ones for the birch tree. All this can be successfully combined in one application in the future.
Let's start from the top of the drawing. Let's create a dark, impenetrable autumn sky. Apply gray and dark blue plasticine with your fingers, smearing it onto the cardboard. The mass must be very soft so that it is ideally distributed over the surface of the cardboard.
Fill the top part of the picture with light blue, blue, dark blue, gray. Spread gold in one place, showing the meager rays of the sun peeking through behind the lead clouds. Also decorate the second part of the picture (bottom), but with brown and orange colors, showing wet ground covered with dry leaves.
Roll a sausage out of white plasticine. Glue it in the center of the picture, bending it, stretching the lower part with your fingers, showing the slender trunk of the birch. Stick on small black spots.
Make very thin gray sticks and glue them on as tree branches.
Create many small leaves from yellow plasticine.
Glue the leaves to the branches, distributing them evenly. Also add foliage to the base of the tree.
A unique autumn application in the form of a plasticine pattern is ready. Now, dear friends, you know how to make another autumn-themed craft with your children. Subscribe to updates and share information on social networks.
Video content called “” was posted by the author of “Poznavayka” for 3 years. ago, it was already viewed 4,858 times. The video was liked by 55 people and disliked by 3 users.
What applications should I make?
Both kids and children from the younger group can make beautiful applications with their own hands step by step.
To create this autumn craft from plasticine you will need cardboard or thick paper. The process of sculpting such a picture consists of five stages.
- To begin with, you need to roll thin flagella of different lengths from yellow, red and orange plasticine.
- They need to be formed into spirals.
- These small parts are attached to cardboard. The crown of the tree is formed from them. The spirals need to be arranged in a chaotic manner. In this case, the autumn tree will look more natural. Each of the elements needs to be lightly pressed onto the cardboard.
- You need to fashion denser and wider flagella from brown plasticine. They are attached to the bottom of the craft and act as tree trunks. To make the base look neater, it needs to be slightly trimmed with a stack.
- From the remains of yellow, red and orange plasticine you need to form spiral leaves that will fill the space at the bottom of the picture. Some of the colored parts should be made more blurry by pressing them onto the cardboard and slightly smoothing the edges.
You can fill the free space with blue, purple and white details. They are attached to the paper and lightly smeared on it. This landscape looks like a full-fledged postcard.
Maple leaf
This craft for preschoolers can become part of a postcard or a large flower arrangement. To sculpt a colored maple leaf, you need to use white paper, several pieces of light plasticine of different colors and scissors. The technology for creating such crafts is very simple.
- To begin, cut out a maple leaf of the required size from a piece of cardboard.
- Several small parts need to be cut from blocks of plasticine of different colors.
- Each of these pieces needs to be kneaded and laid out on paper in a chaotic manner.
- All these details must be smeared over the surface, carefully mixing the colors. Transitions between different shades should be smooth.
This fall themed maple leaf can be further decorated with black dots to make it look more natural.
Gifts of Autumn
You can also depict a still life consisting of autumn vegetables, fruits and mushrooms on cardboard. The autumn harvest looks bright and impressive. You can see this in the example of a craft depicting a basket of mushrooms. Here are step-by-step instructions for creating it.
- First you need to make the main part of this application - the basket. It needs to be sculpted from a large piece of brown plasticine.
- A flat semicircle is attached to cardboard and decorated using a stack.
- You need to make a handle from orange and brown flagella. It turns out more voluminous.
- Once the basket is ready, you can start sculpting the mushrooms. They are made from plasticine of different colors. Each mushroom consists of a cap and a stem.
- You can place mushrooms in different parts of the application.
Green leaves and small snails will complement the picture. A composition created from fruits and berries will also look beautiful. It can be completely sculpted from plasticine or drawn, and then supplemented with three-dimensional details.
The craft consisting of apples, pears and blue grapes looks beautiful. It is complemented by voluminous green leaves.
Basic techniques for modeling with plasticine
The diverse forms of appliqué elements and crafts require careful thought about execution techniques. This is the task of helping kids master the simplest techniques for creating shapes. The simplest forms of creation in modeling are:
- rolling - circular movement of palms against each other, pressing plasticine, to form a ball;
- rolling - direct movements of the palms against each other, turning the ball into a cylinder;
- flattening - pressing the formed ball between the palms, or to the surface of a table or modeling board;
- pinching – execution of small details on large appliqué figures. This is squeezing a small amount of plasticine (a pinch) with your fingers, usually on the edge of the product;
- smoothing - connecting several elements of a product to each other by rounding the joints with plasticine with your fingers.
What you need to make plasticine crafts
The main element in modeling is plasticine. When working with children, you should choose the right plasticine, since for young children it will be difficult to warm up and roll out rough and dry plasticine, and children will not like this activity. Consider the age of the children. Today, in art shops and stationery stores there is a lot of material for different age categories of children. In addition to plasticine, you will need:
- Stacks are usually plastic knives for cutting plasticine, which are included in plasticine packaging, in a standard shape. If desired, you can purchase stacks of more complex shapes and from a different material: wood or metal.
- modeling board – needed for forming individual elements of crafts, appliques, and cutting plasticine.
- all kinds of improvised means are necessary for decorating and making crafts. These can be: toothpicks, paper clips, pens, buttons, beads, beads, and various objects with good texture to transfer texture to plasticine.
How to sculpt autumn from plasticine
To make autumn from plasticine, you will need the material itself, A-4 cardboard, a board, stacks, pencil, scissors, PVA glue and a ruler. On cardboard you need to draw a circle with a radius of 15 centimeters. From the entire circle you will only need a part from which you will need to glue the cone. Then this cone is covered with plasticine of any color. After this, a ball for the head is molded.
You should prepare plasticine leaves for the Autumn dress. To do this, you need to make a ball, then make an oval out of it, which must be flattened to give the shape of a leaf. Make several leaves and cut veins into them. After this, paste the prepared leaves over the cone (it is advisable to start from the bottom and attach the leaves to the very top).
Next, attach the head to the cone and glue a crown of the same, but smaller, leaves onto it. Then you need to make eyes, a mouth, a nose, two hands and also attach them to the cone.
The main part of the craft at this stage is considered complete. To give the picture a mood, you can use your own creative idea and decorate Autumn with a variety of beads, ribbons, buttons, beads and other small details.
This craft is perfect for presentation at a competition in kindergarten or elementary school.
“Modeling Birch and Christmas Trees”
Summary of educational activities in the middle group
on the topic: “Modeling birch and Christmas trees”
Target:
teach children to describe and compare trees and their benefits; convey in modeling the characteristic structural features of birch and spruce.
Tasks:
Learn to find characteristic features of the external structure of different types of trees; practice using plural nouns; learn to convey the thickness and location of Christmas tree and birch branches in sculpting; develop attention, logical thinking, curiosity, develop fine motor skills; develop the ability to use a stack; cultivate a love for native nature, a desire to learn more about the world around us.
Material:
plasticine white, green; pictures depicting trees of different types and trees of different heights and trunk thicknesses, boards for plasticine, half an A4 sheet for each child, napkins.
Progress of the lesson
Educator:
Guys, when I came to kindergarten, I found a letter. Dunno sent it to us: “Guys, I was walking in the park and saw many, many different trees there. I had fun, it was good to breathe fresh air, look at flying birds, squirrels jumping from branch to branch. I didn’t break branches from the trees, I treat trees with care, because they make the forest so fresh and good. I collected a lot of leaves from different trees, and then I looked at the collected bouquet and realized that I didn’t know which leaf was from which tree. Guys, please help me figure it out."
Educator:
Children, let's help Dunno figure out which tree is where (I show pictures of trees, and the children name them).
Educator:
And now, so that Dunno remembers the trees better, I will read the riddles, and you try to guess them.
I'm standing in the forest on one leg,
Cones on top, bears below,
Green in winter and summer,
The dress is covered in needles, but I call myself .. (Christmas tree).
Not caring about the weather, she walks around in a white sundress, and on one of the warm days May gives her earrings. (Birch)
I crawled out of the little barrel, put down roots and grew up, I became tall and powerful, I am not afraid of thunderstorms or clouds. I feed pigs and squirrels -
It’s okay that my fruit is small. (Oak)
Educator:
You know, children, if only birch trees grow in the forest, then this is a birch grove; if only oaks grow, then it is an oak forest; if only spruce trees grow, then this is a spruce forest; and if it’s pine, then it’s a pine forest.
Educator:
Children, what height are trees? (high, low).
What about thickness? (thick, thin).
What color are the Christmas tree needles?
Educator:
Well done. Do you know this tree?
Educator:
Yes, it's birch. White-trunked, curly, silky - these are the affectionate words used to call birch. Many poems and songs have been written about her. Birch produces tasty and healthy sap. You just have to collect it carefully so as not to damage the tree. In autumn, birch leaves turn yellow and fall off. The fruits of birch are catkins.
Options for modeling from plasticine, autumn theme, photo
Autumn tree made of plasticine and dried oak leaves
Plasticine panel “Autumn”
Plasticine applique “Hedgehog in the autumn forest”
Composition from plasticine “Autumn meadow”
Autumn landscape, plasticineography
Plasticine painting “Golden Autumn”
Let's create a simple small painting on the theme of autumn, using a combined modeling technique throughout the work.
To create a picture you will need materials and tools:
- one sheet of blue cardboard;
- plasticine of several colors: yellow, brown, orange, red, blue and green for the frame;
- stack;
- board for working with plasticine.
Execution:
- From plasticine of yellow, orange, red colors, roll out ropes or long sticks 3-5 mm thick, of different lengths.
- We roll the resulting flagella into a spiral (snail) along the entire length of the bundle. You will get “snails” of different sizes and colors. These are elements of the future tree crown.
- On a sheet of cardboard we form the crown of an autumn tree from the resulting “snails”. Fantasy will help here. You can place larger elements in the center of the crown, and small ones along the edges of the product. Pay attention to the placement of flowers along the crown of the tree, since by getting involved in the process, you may end up with a single-color crown on one side and the other. We fix the elements on the cardboard, slightly pressing each element onto the cardboard.
- Roll out brown plasticine into flagella of approximately the same length. You will need approximately 4-6 bundles, it depends on the volume of the prepared tree crown.
- We form a tree trunk from the bundles. We place the bundles tightly to each other, trimming them with a stack, to create smooth edges. We place the tree trunk under the crown, in the center. We bend the outer strands of the trunk slightly to the sides towards the crown, as if the branches of a tree go into the crown. We trim the bottom of the trunk with a stack.
- Let's roll out a few more strands of different colors: yellow, red, orange. Let's place them at the bottom of the picture, under the tree trunk, in the form of waves, placing them tightly together. These are fallen leaves from a tree.
- From two colors to choose from (we prepared blue and green), we will decorate the frame along the contour of the picture. The frame can be made simply with two colored stripes, or you can twist the strips in the form of a pigtail and also place it along the contour. Press the frame well against the cardboard.
The plasticine painting “Golden Autumn” is ready. You can congratulate her relatives in the coming autumn.
We sculpt a birch tree
Let's look at a step-by-step master class on how to make an autumn birch tree from plasticine.
We will need:
- Glue "Titan";
- Plasticine;
- Modeling board;
- Cardboard;
- Scissors.
Cover about 2/3 of the cardboard with a thin layer of white plasticine. It will be heaven.
Note. To ensure that the plasticine adheres well, first knead it in your hands until soft.
In some places, add touches of different shades of blue, simulating clouds. Cover the remaining part of the cardboard with brown plasticine. This will be the earth.
This is how the background turned out:
Now cut out a birch tree trunk from cardboard. Using black plasticine, make characteristic black inclusions on it. You can download the template. Glue the finished design onto the background.
Roll small flagella from black plasticine. Use them as branches.
Make small droplets from yellow plasticine - foliage blanks, approximately like in the photo.
You can frame the finished result. It turns out such beauty!
Autumn motifs in the works of children
You can make working on a craft interesting for children if you take into account their capabilities. Therefore, I will try to show the works according to age level. I'll start with our work. For the tree, I rolled plasticine balls, and my son flattened it and drew a pattern on the leaves with a knife.
But a caterpillar is several circles gathered together and attached one after the other. To give strength to the structure, place all individual fragments on a toothpick. And, if you want the caterpillar to be flexible, put the balls on a needle and pull it along the thread. When all the parts are assembled, cut the thread at the needle itself, and embed its tip in plasticine.
You can, as this master class shows, make a caterpillar rainbow.
And don’t forget about the design of the face and the paws! By the way, here the circles are simply attached to each other. And this option is also suitable.
Older children want to show their talent more fully. For example, a preparatory group in a kindergarten can start making a real autumn meadow, where mushrooms grow and animals run around.
This is the kind of application we will make too.
- In the middle of the leaf we make a tree trunk. We select the shape and color. For example, birch can be white and slightly curved.
- Branches extend from the trunk.
- To make our tree more like a birch tree, we make “spots” by pressing holes (not through holes) with a small object.
- You can complement the picture with several black spots.
- We tear off the “leaves” from the yellow plasticine and glue them around the branches.
- It's autumn, which means there are also a lot of fallen leaves on the ground.
- Mushrooms grow around. They have a semicircular cap and short legs.
- There is a Christmas tree next to the birch tree. Glue a semicircle at the bottom. We divide this “skirt” into strips with a special knife. And so on for each top ball.
- There must be a hedgehog near the mushrooms. It is made like a droplet, only the nose is slightly turned up.
- Separate the part where the hedgehog has needles and draw many, many stripes.
- The hedgehog is already with the harvest. Glue a small fungus onto its needles.
- The bunny is standing by the Christmas tree. It has a head with long ears, a body, legs and a tail.
- Autumn heavy clouds and flying birds complete the picture.
- Author of the master class
Of course, if it is difficult for the baby to do something from this, you can skip this detail.
Such a picture can be done by children from 3 years old, however, if the child is assiduous. But 4-5 year olds can easily cope with this task.
Of course, it will be much easier if mom helps roll the balls.
MAGAZINE Preschooler.RF
Synopsis of the GCD “Magic Tree”. PlasticineographyMUNICIPAL BUDGETARY PRESCHOOL EDUCATIONAL INSTITUTION "KINDERGARTEN No. 26" , KRASNOYARSK
Educator: Shapurkina Yulia Ruslanovna G. Krasnoyarsk 2021
Goal: Formation of ideas in children of senior preschool age about the non-traditional artistic technique of fine art - plasticineography, through the production of paintings depicting a tree.
Tasks:
Educational:
- give an idea of the properties of plasticine, techniques for working with it, evoke a desire to sculpt
- consolidate the ability to roll out correctly, cut parts into the required number of pieces
- continue to develop the ability to work together
- expand children's understanding of nature, introduce it to its characteristic features
Educational:
- develop children's attention, memory, thinking, creativity, fine motor skills; ability to act in concert
- maintain interest in creative activities.
Educational:
- foster respect for nature, cultivate diligence, accuracy
- instill a love of nature - expand and activate children's vocabulary
Equipment:
sketches and illustrations depicting various trees in autumn; 1/2 sheet of thick blue cardboard; plasticine; plasticine knife, napkin; tablet, sample work, recording of “Seasons - Autumn” by P.I. Tchaikovsky
Preliminary work: a story about the life of trees, reading stories about trees, looking at illustrations of trees. Drawing in your free time the activities of trees and shrubs (paints, gouache, colored pencils.), Observing trees on a walk, looking at illustrations.
GCD move
I. Organizational moment
Educator: Hello, my dears! Today it is cloudy and damp outside, but in our group it is bright and cheerful! And it’s fun from our bright smiles, because every smile is a little sun, which makes you feel warm and good. Therefore, I suggest you smile at each other more often and give others a good mood!
(Children stand in a circle)
We will stand in a circle together, We need to say hello. I say “Hello!” Smile back quickly.
Hello right hand, Hello left hand, Hello friend, hello friend, Hello our entire friendly circle.
Educator: Today, children, we will do... and this is what you will now guess.
In the rain and heat A green and good friend will help us - He will extend dozens of hands to us
And thousands of palms.
Children: tree.
II. Main part.
Progress of the lesson: (the recording of “Seasons - Autumn” by P.I. Tchaikovsky is turned on)
Educator: Children, look how the group has changed, as if we were in some kind of magical forest. Listen to the sounds of the forest, the birds are singing, the leaves are rustling, the trees are talking to each other. This is such a wonderful forest. And so that we don’t get bored in this forest, let’s play the game “Fly, little leaf, to my box .
The teacher asks riddles, a clue, a piece of wood. For each correctly guessed riddle, children are given a picture with the named part of the tree.
Educator: Well done, guys! Now let's put together a tree from pictures and name what it consists of?
Children: Trunk, branches, leaves, root.
Children: A tree consists of roots that are underground, and on the ground we see a trunk and branches on which leaves grow. Trees play a big role in human life: they make the air cleaner, release the oxygen we breathe, so they should be treated with care and care: do not break branches, do not tear leaves, do not harm the tree trunk.
Educator: How else can you depict trees?
Children's answers: Draw.
Educator: Today I invite you to be wizards and create a tree from plasticine.
The teacher tells how to sculpt a tree from this material.
From the plasticine prepared for sculpting the trunk, roll a long sausage with straight movements of your hands - first between your palms, and so that the tail of the sausage does not bend, continue rolling on the board.
Fasten in the center and lightly press several long sausages, this will be the trunk.. We will make leaves with other colors, you need to twist them in a spiral, like a ball, and also attach them around the tree trunk.
Children sit at tables and work with plasticine.
Calm music sounds.
After the children have completed the work, the teacher invites them to stand in a circle.
Physical exercise “The wind is blowing in our faces, the tree is swaying”
Together with the child, we imitate the blowing of the wind, rocking the torso and helping with our hands.
The wind blows in our faces
The wind blows in our faces
The tree swayed.
The wind is quieter, quieter, quieter. (sit down)
The tree is getting higher and higher. (stand up and stretch your arms up)
Hands raised and shook -
These are trees in the forest. (smooth swaying with arms raised up)
They bent their arms, shook their hands -
The wind blows away the dew. (shaking hands in front of you)
Let's wave our hands to the sides, smoothly -
These are the birds flying towards us. (horizontal, simultaneous movements of the arms to the right - left)
We’ll also show you how they sit down -
Wings folded back (2 times)
Educator: This is the kind of leaf fall we got to the music!
III. Lesson summary
Educator: So, our tree is almost ready. But for it to be truly magical, you need to make a wish. Someone has one deepest desire. And if you really want it, it will definitely come true.
Educator: Guys, look at your magic trees, how beautiful they turned out. Everyone got their own magic tree. Let's add a piece of magic to our work!!!
Educator: Guys, let's end our day with a ritual: everyone in turn will say good words to their neighbor and praise him for something. We will do this in order to leave with a joyful feeling.
Educator: Well done, you did a great job, you did a great job.
| Next > |
Plasticineography Autumn for primary school children. Master class with step-by-step photos
DIY plasticine painting. Master class: Autumn palette
Target audience: children 6-9 years old
Purpose: making a painting as a gift
The purpose of the master class: to perform decorative and applied work using the “Plasticine painting” technique.
Tasks:
Learn:
Learn new techniques for working with plasticine (pressing, smearing, etc.)
Develop:
- Develop the emotional sphere, creative thinking, imagination and fantasy.
- Develop fine motor skills.
Educational:
To foster independence, creativity, and aesthetic feelings in children.
Plasticineography is classified as an unconventional art technique; it involves drawing with plasticine on cardboard or any other dense base. The background and characters are depicted not by drawing, but by sculpting, while objects can be more or less convex, semi-volume. Working with plasticine helps the child express emotions, his vision of the world around him and his attitude towards it, form aesthetic taste, develop flexibility, coordination, fine motor skills of the fingers (which in turn contributes to speech development).
The child gradually learns perseverance, patience, accuracy, and the ability to always complete work. When working with plasticine, it is necessary to take into account its properties: softness, plasticity, adhesiveness, ability to soften under the influence of heat, fragility, ability to retain its given shape, water resistance.
Reminder when working with plasticine:
- For the base, it is necessary to use thick cardboard so that it does not deform when performing techniques of pressing, smearing, smoothing, and flattening.
- To work with a three-dimensional form, stacks are needed to highlight the characteristic features of a decorative object. 3. Working with plasticine is labor-intensive and requires effort, so in the process of doing it, children need rest in the form of thematic physical education minutes and warm-ups. 4. There must be a damp cloth for hands on the child’s desk so that he can use it at any time, and after completing the work, first wipe his hands with the napkin, and then wash his hands with soap and water.
Plasticineography develops children's creativity (primarily visual) - after all, with the help of this technique you can create an original, unique image with vivid expressiveness.
Master Class
Early autumn is the most wonderful time of the year! That is why many artists and poets tried to glorify its beauty in their works. We, inspired by the variety of autumn colors, will also create our own picture, which will resemble the artist’s palette. For work we will need the following tools and materials: 1. Plasticine 2. Stacks 3. Thick cardboard 4. Simple pencil 5. Paper napkin
Before starting work, use light strokes to sketch the intended design on thick cardboard with minimal elaboration.
Let's start working with the long shot. We paint the forest using green paint in two shades - light and dark. To do this, apply strokes with your fingers. We use pressing and smearing techniques.
Let's move on to the image of the forest in the foreground. For this we need green and yellow plasticine. To obtain the desired yellow-green shade, we use the technique of infusing one color into another. To do this, we use two methods. The first is to mix the plasticine directly on the base, applying strokes alternately. Second - we take several pieces of plasticine of different colors, knead them, mix them in one ball and draw.
In order to highlight the colors of the autumn forest, we selectively add orange using the same technique.
To draw houses, we take white, red and black plasticine. The roofs of the houses will be as bright as the foliage of the trees. Using black we will emphasize the shape of the houses and give clarity to the contours. To indicate the shadow we use blue and dark gray colors.
Let's draw a road. To depict it, we need a smooth texture of strokes. We use the smoothing technique. We use the following colors: yellow, brown, orange.
On the left and right we paint the ground with yellow and green. To do this, we again use the technique of pouring one color into another. We place the strokes in a certain direction. To emphasize the relief of the earth, highlands and lowlands, we add dark green color in some places.
To fill the sky we use white and blue plasticine. First, cover the entire area with light blue. To make it, you need to mix white and blue plasticine into one ball. Then selectively add dark blue color, smearing it in a circular motion, giving shape to the airy clouds.
Let's move on to a more detailed study of the picture. We return to the forest. To show the structure of tree foliage, it is necessary to make the texture more prominent. To do this, we use stacks to add various strokes and curves. In the right places we add the required color of plasticine, using the techniques of pinching, flattening, pulling and smearing. To add depth to the crown, add black color. We also use a dark color to indicate the shadow of the trees.
Let's draw grass in the foreground. We will need green plasticine in different shades. To depict grass we will use the rolling technique and the slapping technique. On the left is the shadow side, therefore the grass will be darker. On the right is the sunny side, which means that for the grass we use a color that is a shade lighter. Then we apply highlights with white plasticine; to emphasize the autumn season, we add yellow strokes here and there. Use a stack to shape the grass. The picture is ready. The autumn forest, playing with colors, Weaves wreaths from the crowns of trees, Pampering warm days with its sunny caresses. Close-up of the sky.
Close-up of houses.
Close-up of the road.
The technique of drawing with plasticine is fascinating not only for children, but also for adults. Creativity should bring the joy of communication, knowledge, work and relaxation. I wish you creative success!
Step-by-step photo lesson:
Prepare plasticine of the indicated colors for modeling. It is advisable to choose a dense texture - the hardest, inexpensive plasticine that is sold in the store. This is especially true for sculpting the trunk, because otherwise, the tree simply will not hold its shape - the stem will bend under the weight of the crown.
Soften the white plasticine.
Stretch the white plasticine into a long, uneven sausage. To make the tree more stable, you can use a small cream or ketchup lid. Fill the lid with black or brown plasticine, insert a stick or toothpick. And stick a white uneven trunk on top.
Soften green plasticine to create a crown.
Press the green mass into a flat cake. Pressing on the sides with your fingers, give it a characteristic shape.
Treating the entire surface of the green workpiece with the tip of a spatula, make an imitation of leaves. The same should be repeated on the reverse side.
Use a spatula to cut through the top of the trunk.
Insert the crown into the cut and secure with your fingers.
Carefully apply black spots on the trunk in a random order.
So the plasticine birch tree is ready. This slender tree will perfectly complement any composition, for example, a house in the village.
05. 12.2017
Blog of Ekaterina Bogdanova
My dear friends and readers, we have already learned how to make an autumn paper appliqué with an image of a succulent paper so familiar to all of us with our own hands. In this lesson I also want to talk about how to make another craft, just as fabulous and a little sad. An autumn applique awaits us - a birch tree made from plasticine. We will depict on it a lonely tree with yellowed, flying leaves, a gloomy, rainy sky and gray wet earth. Of course, you will immediately have a question about how to put all this together on one application and make it using plasticine. Everything is very simple. We will use an interesting technique called plasticineography, which allows you to paint wonderful paintings, landscapes, still lifes and even portraits, as if using oil paints.
I propose to make the central tree a birch - a delicate and tremulous Russian beauty, which many associate with the homeland and rich nature. If we are talking about a birch tree, then it should have a white thin trunk with black marks, thin branches hanging in clusters almost to the ground, and small leaves.
To work on creating an autumn landscape, prepare:
- cardboard - the most ordinary, waste cardboard, cut from any old unnecessary box;
- plasticine - small pieces of gray, brown, blue, dark blue, dark green, brown colors to create an autumn background;
- white and black plasticine for a birch trunk;
- gray plasticine for thin branches;
- yellow plasticine for autumn yellowed leaves.