You can attract prosperity and good luck into your home in different ways. In the east, it is customary to make origami birds out of paper, which are hung as amulets at the head of the bed. It is believed that they drive away evil spirits, help strengthen ties between family members, and improve the atmosphere of the home.
But even if you don’t believe in the sacred symbolism of paper birds, creating them is pleasant and exciting. It is known that the art of origami promotes relaxation and develops spatial and logical thinking. In addition, most “winged” models fold up very simply and do not take much time.
Pigeon
This is an option for those who are just starting to get acquainted with Japanese papermaking techniques. The dove folds in just a few steps. You can make two mirror-symmetrical birds and decorate a Valentine's Day card or wedding invitation with them.
We start with a traditional square. For the Japanese, this figure has a special meaning, symbolizing the structure of the world, the four main elements, the unity of the cosmic and earthly principles. That is why the square is the basis for origami, which is primarily intended for religious rituals.
Algorithm of actions:
We turn a sheet of paper measuring 21x21 cm with one of the vertices towards us. Fold in half, connecting two opposite corners: top and bottom. You should end up with an inverted triangle. We bend the resulting figure in the middle parallel to the base. The blank will resemble a boat standing on its own mast. We turn the model over.
Separate the top layer of the triangle and bend it to form a rhombus. Next, fold the workpiece in half from left to right. Bend the protruding part back. This will be one wing of the dove. We bend the remaining part in the same way. We get the second wing.
Forming the head. We make a reverse inner fold, pressing the middle line of the “torso” fold with a finger almost at the top. We iron the resulting fold well so that it does not diverge.
Now you can write some message on the bird, as was customary among the Japanese aristocracy. Or use as a pendant.
Parrot
An exotic guest from distant tropical countries is more often than other birds made using the origami technique. It can be made in two versions: for children the model will be simple and quite conventional, and for experienced craftsmen it will be very realistic and effective.
The first folding method is quite within the capabilities of elementary school students. Interesting techniques for transforming a piece of paper into a three-dimensional parrot will not only give them aesthetic pleasure, but will also help them master the basics of algebra and geometry.
Assembly diagram:
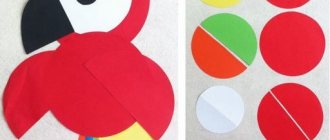
For a motley tropical origami bird, it is best to take a two-color sheet of paper, then the head will turn out to be one shade, and the body will be another.
Step by step description:
- At the base square we outline a diagonal fold.
- Place the figure with the middle line towards you. We bend the sides towards the center.
- The result is a basic “kite” figure. We bend the upper triangle back, as shown in the figure.
- Fold the sides to the middle axis.
- Raise the top layer of the workpiece.
- We bend along the previously outlined folds in the opposite direction, obtaining the basic “Fish” shape.
- We lower the upper triangles down.
- And we return it back, but already folded in half. It looks like a crown.
- We bend the lower peak twice. Then we close both halves of the workpiece, as if “hiding” all the folds inside.
- We turn the resulting model 180°.
- In the place where the head will be, we make a reverse inner fold, as described in the previous master class.
- All that remains is to draw the parrot's eyes and he is ready.
This cute paper pet can't fly, but it sits great on the table. He will make excellent company at breakfast or while working on the computer.
How to make a more complex origami bird is best watched in the video. The master focuses on details that may escape the attention of beginners reading the description. A classic diagram will help to separate the folding stages:
Origami ideas for kids
The origami bird for children is very simple, every child can assemble it.
The diagram looks like this:
- First you need to make a square again, this is the basic shape. The masonry is outlined on it, it is located towards itself.
- The sides of the square also need to be bent towards you, so you get something like a kite.
- To make it into a full-fledged craft, you need to bend the upper triangle, then you need to bend the side parts towards the middle.
- After this, you need to bend the workpiece in the opposite direction, you will get a basic figure using the origami technique, called a fish.
- Starting from it, you need to bend the upper triangles down, then they need to be folded in half and returned back, they should look like small accordions.
- Next, the lower top needs to be bent twice, then the workpiece needs to be turned inside out.
- To form the head, you need to make a small fold on the back side.
- And to add ambience to the craft, it is recommended to draw eyes and a small beak.
Swan
Another type of origami bird that is easy to make with your own hands. The model is elegant and practical. The swan, as a symbol of love, can decorate the table at a paper wedding and during a romantic dinner, and its back will do an excellent job as a holder for place cards or sushi chopsticks.
For this model, it is also recommended to use two-color paper.
Step-by-step description of the process:
Square, side 21 cm (this size is optimal for origami figures), place one of the vertices towards you. You need to start on the side of the paper whose color you want to make the main one. Turn the sheet inside out and mark a diagonal fold. We bend the sides to the resulting center line. Turn the workpiece over.
Now you need to fold the sides again towards the center. Carefully align and smooth the folds. The sharp corner of the pattern should “look” at us. Raise it to the highest point. We bend the edge down, outlining the swan's head.
We fold the body of the bird along the middle line into a “mountain”. We lower the sides of the workpiece down. Straighten the swan's neck and fix it in the position that seems most successful. We slightly spread the “wings” and the bird can proudly “float” across the table.
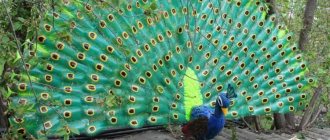
Bird for luck
The Japanese customarily make flying cranes out of paper to make their most cherished wishes come true. And the more birds you get, the happier their creator will be. Russian origamists took the Japanese model as a basis and, slightly modifying it, offered their own version of the “lucky talisman”.
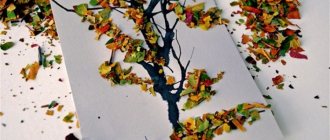
The origami bird of happiness is made by analogy with wooden amulets, which have been made by residents of the Arkhangelsk region and surrounding areas since ancient times. These are toys with an elegant, elongated body and fan-shaped carved wings. They were hung from the ceiling above a child's cradle, in the “red corner” of the room or above the windows. It was believed that birds protect the house and people from evil forces from the outside, and ward off diseases and other troubles.
Indeed, Pomeranian wooden toys and Japanese paper cranes have a lot in common. It is interesting that the authentic “firebirds” of the Russian north were made by cutting thin shavings from solid timber, without the use of glue or other fasteners. The Japanese make their cranes in exactly the same way, exclusively by folding paper.
The “lucky” origami model is best assembled from double-sided single-color paper. This will allow you to better demonstrate its sculptural form and openwork elements.
From a rectangular sheet of A4 format, cut out a square with a side of 15 cm. We will subsequently make wings and a tail from the scraps. We mark a diagonal fold on the square and bend the sides of the workpiece to it. We get the basic “kite” shape.
We fold the upper part of the figure to the center line in the same way. We have the basic figure “Fish”. “Close” it along the long axis so that all the folds are inside. We straighten it again, and then lift the longer part up. This will be the neck, which, having made a reverse fold, we need to insert into the middle of the body.
Carefully run your finger, or even better, the flat side of the scissors along the folds of the workpiece, otherwise it will open up. We make the bird's head in the traditional way, as if “pushing” the upper part of the neck inward. We cut off the corner of the body where the tail will be attached. We cut the remaining piece of paper from the square into two parts: narrow and wide. We collect both into an “accordion”. From the first we make a tail, from the second we make wings. We cut out a pattern along the edges, as is usually done with New Year's snowflakes.
We insert the assembled wings into the hole cut in advance, and then open the free edges as wide as possible. Glue in the tail. This is the resulting firebird from an origami crane. You can also give the model a magnificent crown, although it is already fabulously good.
Bird using modular origami technique
Modular origami firebird is one of the most popular patterns in this branch of art.
- In order to make beautiful modular origami, you must first prepare a sufficient number of appropriate blanks. It is recommended to use triangles as blanks; they are easy to fold and are ideal for both beginners and advanced craftsmen in this area.
- To correctly fold a triangle from an A4 sheet, you first need to bend the left corner to the middle, then the right, everything that remains on top of the triangle needs to be cut off. This way you will get an even square folded into a triangular piece.
- Initially, you need to decide what colors the firebird will consist of. Or you can do it much simpler and make blanks from white paper, which can then be painted.
Creating the torso
Let's look at how to make an origami bird using modular technology.
- Initially, you need to decide whether the figure will be hollow or solid. In the first case, folding is much more convenient, and you will also need significantly fewer blanks.
- However, in the second case, the figure will be more durable and weighty, which makes it more reliable.
- First, two lines of triangles are laid out; they must be even. After this, three lines are laid out on top of them and glued with glue.
- It is recommended to use instant glue, preferably transparent. It does not leave streaks on the paper that can ruin the appearance of the craft.
- Thus, you need to increase the number of layers until the middle of the craft is reached.
- After this, their number must be gradually reduced by 1 each time.
- As a result, you should get a fairly large and dense oval; it will serve as the body for the firebird.
- The next step is to create the neck, given the fact that it needs to be thin, it is recommended to use a frame to keep it in shape.
- You need to use thick wire as a frame.
- The first layer of blanks is placed on the wire, around which subsequent layers are glued, forming a rounded, thin neck.
- It is also worth paying attention to the fact that the neck should be bent, so the wire must first be bent.
Assembling the neck and head
After the base for the neck is ready, you need to carefully align the pieces around the frame so that it is round.
- At the top of the neck you need to provide a slight bend in the wire. It is needed to securely fasten the head of the firebird.
- The head itself can be made in several ways.
- The photo of the origami bird shows that the head can be schematic, consisting of only 3-4 blanks forming a three-dimensional triangle.
- Or it can consist of a large number of blanks, as a result of which it will be as similar as possible to a real bird.
- In the second case, you will need to align the contours using scissors or a stationery knife to create the desired indentations and lines.
- All that remains is to assemble the wings. The diagram of a paper origami bird shows that the easiest way would again be to use a frame made of thick wire.
- It is necessary to place contours cut from whatman paper or other thick paper on it.
- After this, all that remains is to stick the blanks in the form of triangles on the inside, they will serve as feathers.
At this stage of making the modular figure, all that remains is to paint it and add decorative elements.
Let's fly...
If adults want to fold something beautiful and functional out of paper, it is much more important for children to get an exciting toy. The next model is addressed to young masters, which, unlike other types of origami birds, actually flies, and does not sit on a support or float in a suspended state.
How does she do it? The principle of movement is the same as that of the well-known paper airplanes. The aerodynamic qualities of origami allow you to cover quite large distances, and by making it out of thick paper, you can get not a disposable, but a fairly durable toy.
In appearance, the “flyer” most closely resembles a swallow or swift.
Notes on paper construction in the preparatory group on the topic: “Birds”
Notes on paper construction in the preparatory group on the topic: “Birds”
»
Teacher Pashkova S.I.
Program content:
Learn to make a craft consisting of several parts, combining them to achieve a result.
Strengthen the ability to cut out the silhouette of a bird along the contour, fold the paper like an accordion.
Develop imagination, creativity, fine motor skills, and the ability to enjoy created crafts.
Activate cognitive abilities.
Cultivate a kind attitude towards objects of living nature, a desire to provide all possible assistance.
Material:
Photos of wintering birds, colored paper, cardboard, scissors, fan, feather.
Preliminary work: getting to know the life of wintering birds, reading stories, observing, drawing birds.
Progress of the lesson:
(Children stand in a circle).
- Guys, do you know that each of you has a magic key that opens the door to the heart of any person? These are smiles. Your smiles made the group feel warm and bright, but it was cold outside. What season?
— Winter has come into its own - frosts have frozen the rivers, the ground is covered with snow, migratory birds have long since flown to warmer climes.
- Which ones are left with us? (wintering)
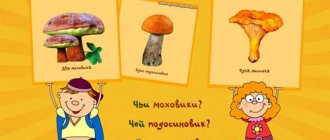
I have prepared a photo exhibition of wintering birds for you and invite you to get acquainted.
-Let's check if you recognize all the birds?
-Well done, now take your seats.
-Here are all the birds sitting in a row
They look at the guys
They want to play with you.
Attention game “Guess which bird flew away”
- Well done, you know wintering birds well and were very attentive.
-Look at what an interesting bird flew to visit us (magnetic). She seems to be floating in the air.
— All people, when they look at birds, think the same thing: “Why don’t they fall? “You probably don’t know either.
Air, although we cannot see it, can hold light objects. Here, for example, are soap bubbles (show). What can you tell us about? (leaves, fluff, snowflakes)
- But will such a feather fall immediately or will it also fly? (show)
-Why didn’t the feather fall? (lung)
-The entire body of birds is covered with such feathers, but this is not the only thing that helps them fly.
-What is this? (fan) Just as I opened the fan now, the birds are spreading their wings. With such wide wings, birds rest on the air and, pushing off from it, fly. And on the ground, the wings are folded so that they do not interfere.
-Today we will make birds with such wings out of paper. First, cut out a bird silhouette from cardboard. Then we fold the wings out of thin paper in an accordion fashion and insert them into the slots that are on the body of your birds.
- Before we start, let's remember how to handle scissors.