On the topic: methodological developments, presentations and notes
“Experiments with paper” second junior group
experiments with paper for children of the younger group, which help children learn the properties of paper and promote the ability to make simple conclusions.
Experiments with paper
Conducting experiments, experiments with paper.
Technological map of experience. Sorceress paper.
Development of cognitive activity of middle group children through experimental activities.
Project "CHILDREN'S EXPERIMENTATION - simple experiments with paper"
PROJECT GOAL: The main goal of experimentation: the development of cognitive activity of preschool children through experimentation with objects and phenomena of the surrounding reality. TASKS.
Summary of direct educational activities in the educational field “cognitive development” (search and experimental activities) on the topic: “Fixikov Laboratory. Experiments with paper" (school preparatory group)
Card index of games and experiments with paper
Help children determine the properties of paper using a variety of techniques: paper comes in different colors, smooth and rough, thin and thick.
Card index of experiments and experiments with paper for preschool children
Studying and consolidating the properties of paper through experiments and experiments.
Source
Preview:
“Card index of experiments with paper”
Completed by teacher: Genzburg N.A.
Now we will find out what kind of paper there is. Pick up the paper that is lying on your tables, touch it.
What can you say about her, what is she like? Paper is very important in the life of every person. Children should read books carefully, not wrinkle or tear the pages, and then they will last a very long time. But we will now find out what properties paper has and for this we will conduct a series of experiments:
Experiment “The paper gets wet” Let’s take a bowl of water and put in it first a napkin, and then a notebook sheet. First the napkin got wet, and then so did the notebook sheet. This means the paper gets wet.
Experience “Paper is torn” Try to tear a plastic bag with your hands, and now the paper, and we succeeded. This means the paper tears well.
Experiment “Paper is wrinkled” Try to crumple a piece of fabric and a piece of paper with your hand. The fabric straightened out, but the paper remained wrinkled. So it wrinkles well.
Experiment “Traces remain on the paper” Now take a cotton swab, dip it in vegetable oil and run it across the paper. Yes, we see a greasy mark on the paper. Traces of oil, dirt, pencil, paint, pen, etc. remain on the paper.
“The paper is burning” experiment And now I will take a lump of crumpled paper and show you a very dangerous experiment. I'll set this wad of paper on fire. The paper burned very quickly. This means that it burns, and this threatens a fire, so children should not take matches.
Experiment “Paper makes sounds” Let's take pieces of paper from the table and perform the movements “Washing clothes”. The paper rustles and creaks. This means she can make sounds.
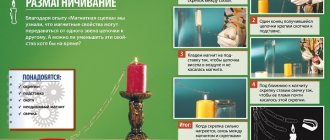
Experiment “Experiment with paper and a glass of water”
- Have your child fill the glass with water. Do not fill the glass completely, leave some air. Ask your child to sketch a glass of water, noting where the water is and where the air is.
- Next, cut out a paper square slightly larger than the top edge of the glass. Let the child write down his hypothesis in a notebook about what will happen to the water in the glass and the paper upside down.
- Help your child cover the glass with a square, press it tightly with his hand and turn it over very carefully. Hold the paper with your hand for a while - then slowly release it.
Have your child draw a picture of an upside down glass and label it as water, air, and paper. What's happening? Ask your child why he thinks this is happening? Let him write down in his notebook whether his hypothesis was correct and what happened to the glass. Try to do this experiment with a different type of paper and a different glass, or heat the water, what will change? Conclusion: The explanation for this fact is quite simple: the air presses on the “lid” from the bottom up with greater force than the water in the glass.
Experiment “Paper Capillarity”
A strip is cut from a napkin. Its width should be three or four centimeters. Along the entire width of the strip, in one row, you need to draw squares or circles (optional) of different colors. The glass should be filled halfway with water. One end of the painted strip should be hooked onto the edge of the glass, and the other end should be lowered into the water. Then you just need to observe. The water rises up the strip and “paints a picture.” This is an illustration of the capillary effect. Due to the porous structure of the napkin (it is made of cellulose), the liquid easily rises up and blurs the design.
Experience “Study of paper cutting properties”
Let your child use scissors to cut the sheets of paper one at a time. (cardboard; writing paper; plain printer paper; colored paper of your favorite color; napkins; notebook; landscape sheet; safety scissors). Are there any differences when cutting? Which paper was easier to cut? More difficult?
Conclusion: It was easiest to cut the thinnest paper, and the most difficult to cut was the thickest.
"Paper Bridge" experience
Have your child place two glasses next to each other and place a piece of paper on top. We have a bridge.
Let's check if our bridge can withstand light objects. First, formulate a hypothesis about whether the bridge will support a small car and write it down in a notebook. Have your child place a small car on the sheet. What's happening? Why did the bridge collapse? Write down the result of the first experiment in a notebook. Is the result different from your hypothesis? What are you thinking now? Ask your child these questions. Now ask your researcher to conduct a second experiment. Have your tester fold the second sheet into an accordion shape. Formulate a hypothesis again and write it down in your notebook. Repeat the experiment.
Experiment “How to transfer peas using a sheet of paper”
Listen to all options. It’s interesting when there are suggestions to fold the sheet into an envelope, make a “cap” out of the sheet, raise the corners of the sheet, fold the piece of paper like an accordion, or simply bend it in half. Let the children move the peas from point A to point B in different ways. The one with the most peas left at the finish line wins.
Conclusion: Which transfer method left the most peas? Which method was the most original? Which way did the children speak most often?
Experience “Making a paper lantern”
- We will use several colored leaves. Let the child choose the color for the future flashlight. Lanterns made from paper in contrasting colors look the brightest.
- Prepare two sheets of colored paper. Have your child use safety scissors to cut out two different colored rectangles. The first measures 7x13 cm, and the second - 9.5x13 cm. The smaller rectangle will become the inner cylinder, and the larger one will become its bright decoration.
- Making a cylinder: Help your child roll the rectangle into a tube and seal the edges with glue.
- Decorate the cylinder: fold the paper in half along the longer side. Using a pencil and a ruler, draw lines for future cuts every 0.5 cm. Do not draw 1 cm to the edge. Let your little student cut the sheet along the lines, also not reaching 1 cm to the edge. Count how many stripes you have.
- Connecting: Help your child glue the cut paper to the cylinder.
- Making a handle for a flashlight: to do this, cut out a thin strip with your child and glue it to the top of the cylinder.
- Your flashlight is ready!
Experience "The best tool for writing letters with ink"
- Dip a nail in ink or food coloring. Take a nail in your hands and draw a straight line on the sheet from right to left. When you reach the edge, start drawing a new line, now from left to right. Continue until you reach the bottom of the page. Was it easy to use a nail as a writing object?
- Repeat the same steps, but this time use a toothpick to apply the ink or food coloring.
- Cut the drinking straw at an angle. Repeat the same process.
- Repeat the same process using a fountain pen.
- Now, using each of the above accessories, try drawing circles. Record your observations.
"Secret Drawing" Experience
- Help the children measure out 14 tablespoons of baking soda and 4 tablespoons of water. Mix and create a "secret mixture".
- Prepare the sheets and have students dip a cotton ball into the mixture.
- Let the children draw their own invisible pictures or write a message. Let the “secret paint” dry completely.
- Then use watercolor paints and apply them over the entire area of the sheet to reveal the secret designs!
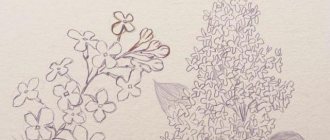
Experiment “Coloring paper with coffee”
- Drawing coffee on paper is a fun activity. Place two teaspoons of ground coffee in a bowl and mix with water. Leave it for a while. The longer the grounds remain in the water, the darker the “paint” will be. Fresh coffee grounds help bring out different shades of color
- Let the child draw any picture he wishes. It could be a house, an animal or something abstract. Then you need to outline the drawing with a white pastel pencil. Press down firmly on the pencil and draw the lines your child made. The wax contained in pastel pencils will resist the effects of coffee and preserve the drawing.
- Using a brush, apply coffee “paint” to the entire surface of the sheet. It's okay if grains of coffee on paper are noticeable.
- Leave the drawing for a while until it dries.
- Let your child re-paint the pattern on the parts of the painting that he wants to make darker. Explain to your student that applying paint over the painted areas will create a darker shade.
- Strain the remaining coffee "color". Then the child must apply the thickener to the surface of the drawing using his fingers.
- Lay the sheet on a horizontal surface until it dries. It's okay if the coffee grounds fall off in some places. Now you have a nice grainy design with the image underneath the top layer!
We took different sheets of paper and noticed that it was mostly smooth. Smoothness characterizes the condition of the paper surface and determines its appearance - rough paper, as a rule, is unattractive in appearance (with the exception of velvet)
Smoothness is important for writing papers, for printing papers, and also when gluing paper.
As a result of the experiment, we took two sheets of paper: thick and thin, put it on the picture and saw that the thin paper showed through the picture. The property of thin paper is translucency. Transparency is used in medicine, drawing, and architecture.
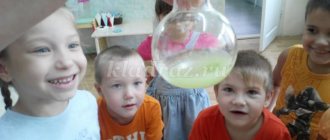
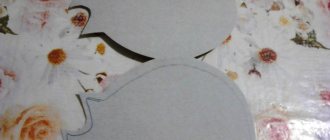
Experience "Flowers on the Water"
We cut out flowers from paper and bend their petals, lower the flowers into the water and watch: the flowers bloom before our eyes.
This happens because paper is porous and water penetrates into the smallest empty spaces between the fibers and fills them. The paper swells, the folds straighten out, and the flower blooms.