The benefits of an unconventional drawing method
Despite the fact that the presented method of drawing is classified as unconventional methods, this technique appeared and was used a very long time ago. It was forgotten for a long period of time, but after that it was revived in modern times. Nowadays it is used not only by children of different age categories, but also by famous artists. The benefits of this unconventional method are as follows:
- This technology is great for younger children, since even a small child’s hand can crumple an ordinary piece of paper. Children really enjoy the process of preparing to draw;
- excellent development of such important characteristics as imagination and fantasy, since prints often come out blurry and sometimes not as expected;
- Any child in the senior group can handle preparing materials for drawing, but preschoolers need help from teachers;
- the ability to get a fairly interesting picture due to smooth transitions.
Through the use of this method, children learn to form their own unique and original images, and they are also better able to remember unknown colors.
How to draw lilac? Tips for beginning artists:
Flowering lilac bushes decorate courtyards, summer cottages and parks in late spring, spreading a subtle and delicate aroma around them. When lilacs bloom, it seems that even the air is filled with its wonderful mood.
Fragrant and fluffy inflorescences, consisting of tightly fitting small flowers, never cease to amaze with their beauty. Poets have always praised the “lilac beauty” in their poems. Quite a lot of artists have depicted this spring flower.
We will tell you how to draw lilacs simply and beautifully. Let's try?
How to draw lilac: step by step for beginners
- Be patient, and the amazing world of art will open before you.
- Today you will “touch” a very popular topic in painting and also learn how to draw a lilac with a pencil.
- Initially, you need to create the shape or base of the lilac branch.
Next, draw flowers, leaves and other details.
Next, we will tell you how to draw a lilac with a pencil step by step. For beginner children, you can simplify this technique:
- Step 1. Mark the future shape of the inflorescence in the center of your leaf. It should somewhat resemble a triangle. Draw several large leaves from it below. And from under them there should be a thin stem peeking out.
- Step 2. Give your leaves a shape: outline with a smooth, curved line and draw a sharp tip, indicating the axis. Draw the stem, or rather the branch itself. Outline the inflorescence with a barely noticeable but very sinuous outline without corners.
- Step 3. Inside the main shape, draw small flowers with four petals and a quadrangular middle. Perhaps there is a flower with five petals lost somewhere.
- Step 4. Continue filling in the empty spaces with small flowers. Their density and location may vary. It is necessary to draw characteristic veins on the lilac leaves.
- Step 5. Do shading in the voids and on the leaves between the flowers.
What do you need?
To work you will need:
- A thick white sheet of paper (from a regular notebook or landscape paper to designer parchment).
- A well-sharpened simple pencil.
- Eraser.
- Any convenient work surface: folder, table, book.
- Colour pencils.
Drawing a “May flower”
Now you will learn how to draw a lilac step by step. For beginners, this will be easiest to do with a pencil. This lesson is quite easy, even a child can handle it.
List of required materials
To implement such a process, you need to prepare the following materials:
- album;
- small containers for paint - you can take special sets designed for painting or plastic containers. Their number should correspond to the number of colors used;
- paints - the best option would be watercolor, as it allows you to get smooth transitions and dissolves well upon contact with water;
- napkins or soft paper.
When drawing, you should not use newspaper as a paper, as it will print typographic elements.
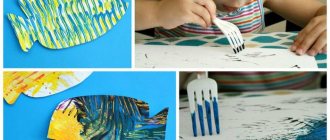
Drawing technique using crumpled paper for kindergarten children
Due to the fact that the amount of materials required for drawing is minimal, this technique can be used not only by schoolchildren, but also by the junior preparatory group in kindergarten. The drawing technique itself consists of several stages.
- A couple of sheets of paper should be crumpled into lumps.
- The main color that will act as the background needs to be lightly marked on paper.
- Dip a crumpled piece of paper into a container containing paint of a certain color and press it against the surface of the sheet for a short amount of time.
- Carry out the work until the desired image is obtained.
- If necessary, you can supplement the drawing with contours using brushes and paints.
This activity will appeal not only to children, but also to adults.
Master class on drawing lilacs
Among the images that are very effective using the technique of drawing with crumpled paper, lilacs stand out. Drawing lilacs with crumpled paper will consist of several stages.
- First you need to prepare the paper. The best option for younger children is A4 format.
- Take gouache or watercolor in the following colors: blue, purple, yellow, white, black and green. To draw lilacs, it is preferable to use gouache.
- To draw the future background, it is recommended to take a fairly hard and flat brush.
- To achieve a careful design of small details, you will need a thin brush.
- Prepare crumpled paper, water and a palette for drawing.
- Use a brush to paint the background. In order to avoid sharp transitions and get a blurry effect, it is recommended to use more water.
- Next, you can begin the process of drawing the vase.
- Using a thin brush, paint the branches in black, on which the inflorescences will be placed in the future.
- Dip a lump of crumpled paper into purple paint and begin to form lilac flowers.
- By using crumpled paper, also add a small amount of white.
- If you wish, you can add an additional element such as green leaves to the drawing. This can be done either with a brush or with the same crumpled paper.
As a result of completing all of the above simple steps, you will receive a gorgeous bouquet of lilacs.
Flowers
Drawing flowers using the crumpled paper technique is very easy.
- First, you should crumple the paper until you get medium-sized lumps.
- Pre-draw the stems using a black pencil or felt-tip pen before creating the main image.
- Complete the drawing with small branches with leaves.
- In a vessel containing the required color, you need to dip lumps of paper.
- Pressing lumps of paper to the surface of the sheet, form the core of the future flower and petals.
If you carry out all the steps carefully, you will get a beautiful flower.
Dandelion
Drawing a dandelion is the simplest task that even a preschooler can handle. Obtaining an image will consist of the following steps.
- Using a fairly wide brush, paint a background with green grass and blue sky. If desired, you can add white clouds.
- Use green to draw a thin dandelion stem.
- Prepare yellow and white paint, as well as pre-crumpled paper.
- Dip a small piece of paper into the paint.
- Carefully apply the paper to the stems and the bright, fluffy dandelions are ready.
Scenery
Drawing a landscape using the crumpled paper technique is a fun activity for children aged 5 years and a little older. Therefore, it is suitable for drawing with crumpled paper in the middle group. This is an opportunity to depict any time of the year, both summer and winter. But it is the winter landscape that will be interesting and simple.
- Draw the sky using a hard and thick brush, making transitions from dark to light shades.
- On the first layer draw white snow, which will be the lightest.
- Crumple pieces of paper, dip them in white paint, and create small clouds of the desired size in the sky.
- Carefully draw the horizon line using a brush.
- Also draw the contours of the Christmas trees using a thin brush.
- Create snowy silhouettes of Christmas trees using lumps of paper. This process must be approached carefully and carefully.
- Large clumps are used for large trees, and small ones for miniature Christmas trees.
As a result of carefully completing all the steps, you will receive a winter landscape that the child will like, both visually and in terms of creating a masterpiece of fine art with his own hands.
Master class on drawing lilacs
Painting lilac flowers with just one brush is an impossible task for a child. With crumpled paper you can get an image of inflorescences much faster and easier.
Master Class:
- Sketch twigs and leaves in the shape of hearts on paper with a pencil. Mark the inflorescences.
- Using a brush and brown paint, draw a twig, and green leaves.
- Crumple up a small piece of paper and dip it into a container of blue paint. Make several prints where the inflorescence should be located.
- Take new crumpled paper and purple paint. Make prints over the blue prints.
- The last thing you need to do is make prints with white paint. This way the flowers will look three-dimensional and realistic.
Children's works:
Crumpled paper is one of the most accessible non-traditional drawing media. It replaces a brush perfectly. The tracks are intricate, unique, and chaotic, which is what attracts the attention of viewers. By using your imagination, you can create a chiaroscuro, textured image. This type of unconventional drawing is useful for both young and experienced artists. Happy creativity!