Crow – modeling with step-by-step MK
We attach the head to the oval and smooth out the transition. We sculpt wings from two pieces of plasticine and cut through the feathers. We attach them to the back of the bird and add a tail. We sculpt a large beak, black paws with claws and eyes.
Crane step by step - sculpting migratory birds in the senior group
We make a small mound from green plasticine. We stick a white and a red piece onto an oval of gray plasticine. Using a stack we show the bird's plumage. We attach two gray wings and a neck on top. We also show feathers. We glue on the eyes, beak and comb. We place the crane on one leg. For strength, the leg can be made from a skewer covered with plasticine. You can create a composition from different plastic plants around the bird.
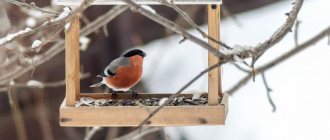
Bullfinch - making winter birds with your own hands
First of all, it is necessary to sculpt the body, which smoothly flows into the head. Next, add a yellow spot to the bird's breasts. We make white spots under the eyes and insert beads. We attach a green layer of plasticine to the back. Attach the blue-gray wings. Add a gray tail and paws.
A simple bird - modeling in the preparatory group
First, let's sculpt a simple bird out of plasticine. Roll a blue ball. We form the body in the shape of a droplet and bend the tail up. Connecting the head and body. We sculpt wings from two balls and use scissors to make 2 cuts on each. We also cut the tail. Add wings, beady eyes and yellow legs and beak. Creating such a bird is perfect for middle school children.
Parrot - step-by-step modeling scheme for the older group
Making such a beautiful bird is not as difficult as it seems. First we will form the body. We attach white spots in the eye area and a crocheted beak. For the tail we will alternate blue and red plasticine. We create a relief using a stack. We'll make the wings in a similar way, but use red, yellow, green and blue. Add claws.
Stork step by step - modeling a bird in the senior group
We sculpt a body from a white ball and attach the neck and head. We make white and black wings and show feathers on them. Attach the bird's tail and wings. Legs can be made from ordinary matches. To do this, we attach matches to the body using balls. We add membranes at the bottom. All that remains is to make a nose in the shape of a carrot and eyes from beads.
Peacock step by step for children - how to make an exotic bird
We form a body with a long neck. Add the head and eyes. Attach a small orange beak. From black flagella and blue balls we will make a crest for a peacock. The most interesting moment has come - creating the bird's tail. We sculpt six oblong feathers of light green color, and 3 dark green ones. For each feather we add three ovals of different colors. We press out the veins on the feathers. At the base of the tail we stick small balls and the tail itself. We press the balls with a match. All that remains is to install the peacock in the nest, or on a green ball with flowers. Ready!
Owl - sculpt with your own hands
Let's make a realistic owl step by step. We form the body of the owl and attach the head. We smooth out the transition between the head and body well. Add light brown circles and yellow eyes with black pupils. We glue the beak and eyebrows. From small pieces of black, white and brown material we sculpt plumage for the bird. We decorate the owl's wings in a similar way. Attach the embossed tail and small paws.
DIY sparrow step by step
Connect a large and a small ball. Smooth out the transition and form a long tail. Let's make a light yellow spot on the bird's belly and eyes. We attach yellow and black stripes to the brown wings. We create a relief using a stack. We attach the eyes, beak, paws and wings to the sparrow. The craft for the older group is ready.
Penguin - step-by-step modeling in the middle group
The pattern for sculpting a penguin is quite simple and suitable for children, for example, 2nd grade. We form the body of a bird from light plasticine. Attach the eyes and beak. We make two cuts on the paws. Stick on the wings and you're done.
