A little history
History indicates that the development of wood studies led to its application on the most unexpected subjects, which included:
- furniture;
- chests;
- sled;
- utensils used indoors.
Most often there was a symbolic character, and the background tones were: green, blue and sometimes black. Particularly popular were and are drawings with specific themes, showing people and animals.
After World War I, art fell into decline, forcing specialists to look for other sources of income. The revival of the popularity of the direction is associated with the name of I.I. Oveshkov, who opened the workshop to the public.
It organized the training of appropriate personnel, which resulted in an increase in those able to process the source code. Involving a new generation in recreating images develops a sense of belonging to the culture of their country and develops artistic thinking on different levels.
Teaching children in kindergarten and primary school
For kindergarten (senior group), painting a board is one of the ways to teach a child fine art and understand it at a certain level. It is preferable to start practice on paper, as it can be used as a sketch that can be transferred to a harder material.
You just need to prepare your brushes and a few spreads from your notebook (for blanks) to get started. Consider aspects:
- paper should be taken in a format close to A4 (in albums or Whatman paper of appropriate size), and for children from five years old, the best option would be to use also less dense sheets for sketches, from which the whole idea will be transferred finally;
- You will need three brushes to get the best result: core brush, squirrel brush and flute brush. The latter is a flat brush used for small strokes that cannot be made with more substantial varieties;
- masters use oil paints in their work, and in art classes for preschoolers (fifth grade can also use templates for training) it is better to teach with gouache. The standard set includes twelve colors, of which you need to take only eight: white, cherry, bright blue, scarlet, yellow, dark green and red. The last 3 must be mixed, and the remaining ones can be used separately.
At a younger age, decorative drawing is easier to demonstrate to teachers step by step (for beginner adults, a similar method of work is also suitable) in the following sequence:
- sketch the diagram in natural size. Minor details are noted that will be carried over to the final version.
- Highlighting the center of the mosaic and the features that will be applied in each section;
- drawing each fragment thoroughly using the specified tools;
- coating the board with varnish - entrust this phase to those who are older.
Educators and teachers need to control the process at the stage of transferring the plan onto the plane in order to prevent paint from flowing out where it is needed, and to eliminate minor errors faster.
The two main sections of the illustration procedure, underpainting and animation, are performed with different brushes (in the case of floristry, shadows are also drawn between them). First you need to paint the background in an even layer, and then start adding details.
The finished product should be dried before varnishing with a transparent product that protects against fading, burnout and dampness.
Application "Gorodets salt shaker" for children 5 - 7 years old. Templates. Master class with step-by-step photos
Application “Gorodets salt shaker” for children of the senior preparatory group of a preschool educational institution.
Step-by-step instructions with photos Author: Ramzaeva Irina Vasilievna, teacher at MADOU kindergarten No. 64 in Balakovo, Saratov region. Description: I offer you application material for children of senior preschool age on the topic “Gorodets Salt Shaker”. This master class will be useful for educators and parents when studying the topic of Russian folk crafts. Purpose: applique from colored paper of a wooden salt shaker with a Gorodets pattern. Goal: To develop children’s ability to create applicative patterns based on Gorodets painting. Objectives: To ensure the consolidation of children’s knowledge about Gorodets painting as a type of folk decorative and applied art. Arouse interest in the manufacture of household items decorated with Gorodets patterns. Strengthen the ability to cut circles of different sizes and flowers along the contour; teach children to fold the sheet like an accordion carefully so that the corners connect to each other; teach how to transfer a template onto a sheet of colored paper. Develop children's creative abilities and spatial thinking. Cultivate accuracy in work, perseverance, and the desire to complete the work started. Materials and tools needed for work: colored paper, scissors, glue - pencil, simple pencil, marker or felt-tip pen, ready-made silhouettes of a salt shaker.
Progress
In blue bathings, in red buds, large and small green leaves They brought a casket from the city....
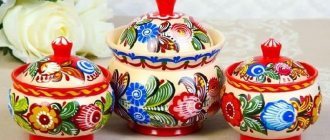
(Gorodets). In the city of Gorodets they make beautiful things that are needed in the household. These are kitchen boards, salt shakers, bread bins, spice boxes, etc. They are decorated with floral patterns (roses, roses, daisies, leaves), magical birds, horses. Such elegant things serve not only for storing food, but also decorate the interior of the kitchen. We start by cutting out the templates.
We transfer the templates to colored paper: yellow – salt shaker; green - leaves; for rosan: circle (diameter 5.5 cm) - pink (blue), rosan - white and red (blue), circle (diameter 1.5 cm) - white, circle (diameter 1 cm) - red (blue); for bathing: circle (diameter 3.5 cm) – blue (pink), circle (diameter 1cm) – blue (red), “zhizhka” – white. Cut out the yellow salt shaker.
Cut out a blue circle with a diameter of 5.5 cm for the rose and a pink circle with a diameter of 3.5 cm for the bath, glue: a blue circle at the bottom of the salt shaker, and a pink circle at the top.
We cut out the white and blue roses, and glue them at the bottom of the salt shaker onto the blue circle: first the white rose, and then the blue one.
Cut out and glue onto the blue rose first a white circle with a diameter of 1.5 cm, and then a blue circle with a diameter of 1 cm. We cut out a red circle with a diameter of 1 cm and a white “zhivka”, glue it to the pink circle in the upper part of the salt shaker.
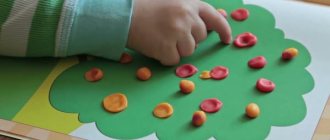
Fold a strip of green paper into an accordion shape (2 pieces), trace a leaf stencil, and cut it out.
We glue green leaves: in the lower part of the salt shaker - three leaves to the right and left of the rose (we start with the middle leaf), then in the upper part of the salt shaker - two leaves to the right and left of the bath. We trace the outline of the salt shaker with a marker.
This is what the finished work looks like. And these are the works of children.
Gorodets patterns, What a joy for the eyes.
Craftswomen are growing up, maybe among us! I. V. Kadukhina Thank you for your attention!
We recommend watching:
About the benefits of using chants Do-it-yourself visual aid for kindergarten “How to set the table.” Master class with step-by-step instructions Teacher and parents: interaction via the Internet Organization of a subject-development environment in a preschool educational institution on the topic: Folk crafts
Similar articles:
Waldorf kindergarten
Adaptation of children in kindergarten
Theater training for little artists: developmental exercises, trainings, scripts
The main plots outlined for the most part
As a rule, they come across works:
- flowers (rosan, daisies, kupavka). Visualized in the form of a symmetrical bouquet, garland, stripe, wreath or diamond;
- birds (swans, peacocks, roosters, pigeons or cuckoos, depending on the author’s purpose);
- The “tree of life” is the personification of nature. These things contain a lot of components (compounds from plants, birds). The draftsman also draws a horse on the left and right, and occasionally lions, leopards and other exotic things.
Professionals also engage in more advanced types, such as plot painting, where there may be miniatures depicting events in real life or literary works.
Both the interior of a residential building and the streets of populated areas are depicted with the maximum possible number of subtleties. Often in such images you can see elements in the manner of domestic animals located at the feet of the owner. Another feature is the presence of vegetation in the winter landscape outside the building.
Similar crafts are usually embodied in a rectangular configuration, and the edges are decorated with ornaments. There are also round variations, installed on a shelf as decorative plates, the patterns on which are located on the edge.
The box is capable of containing on its edge a few outlines with various situations, the central one of which is placed on the lid or front wall (on the side where the structure opens).
Decorations for the New Year: decor ideas and options for decorating a house and apartment for New Year's celebrations (135 photos)- Window decoration - simple ideas and step-by-step descriptions of do-it-yourself window decoration (110 photos and videos)
Diaper cake - a step-by-step description of creating a diaper cake. 115 photos and videos of creating a gift
The description of the life of the peasants reflected the reality of the time period in which the master’s work was carried out as meaningfully as possible. Unusual displays, inscribed in a scene from everyday life, enhance the effect of what they see.
The most important actors are located in the center of the canvas - larger than the rest. Shots of tea parties, feasts, weddings and other events - always with a table where dishes are placed or other secondary objects that reveal the essence of what is happening.
Elements based on folk tales are no less popular and in demand - the plot and characters are recognizable at first sight, and the richness depends only on the imagination of the creator.
Lesson 3. Gorodets painting. Applique (garland of flowers) on a strip
Target.
Learn to look at Gorodets patterns, identify a new composition - a garland of three or five colors.
Make an applique on a strip, highlighting the middle with a large flower, the edges with small flowers, placing leaves between them. Cut out flowers and leaves from paper folded in two or four times, obtaining identical circles and ovals, combine the color and its shade, white and black colors for decoration.
Material.
Items with Gorodets painting, which is based on a composition of three, five colors, illustrations No. 17-20 from the educational visual aid.
Ocher paper measuring 10x27 cm, paper of different colors (red, pink, blue, cyan - to choose from) sizes 5x5 cm, 4x8 cm, 3x6 cm, green paper in two, three strips size 4 ×8 cm, white and black paper measuring 2x8 cm. Scissors, glue, napkins, brushes.
Progress of the lesson.
Exhibition of objects with Gorodets painting and their images.
Having examined all the objects and illustrations, select a composition of three or five colors (garland). Clarify their location: in the middle there is a large flower, at the edges there are one or two small buds, between them there are leaves one or two at a time.
Children choose paper colors for their pattern. Invite them to show with your hand on a piece of paper or flannelgraph how they will arrange the circles: put a large circle in the middle of the strip, small circles of the same color and size along the edges, or two small circles on each side.
The teacher helps the children choose the right paper colors: all the flowers in the pattern should only be blue
68
or only pink or a large flower should be one color, small flowers another.
Find out how to cut a circle (for a flower) from a square or two identical circles from a strip folded in half (to make a square), an oval (for leaves) from a strip folded in half and again in half (into four parts). From small remnants of paper you can cut out small parts (from the corners - an arc, etc.). The teacher shows all these techniques, the children practice cutting.
After this, the guys begin to complete the task: first, they cut out all the details necessary to make the applique, and then lay out the cut out flowers, leaves, and other decorations on the strip, and glue them on.
At the end, all the strips are examined and the brightest, clearest compositions are selected. The teacher invites the children to decorate objects (attach strips to them), show the connection between the object and the decoration, and reads a riddle poem about Gorodets (p. 67).
Lesson 4. Gorodets painting. Drawing a pattern (garland of flowers) on a strip
Target.
Continue to introduce Gorodets painting, recognize familiar elements of the pattern (flowers, leaves) and new color options, revitalizing the pattern with white (“revival”). See the beauty of Gorodets painting.
Learn to make a pattern on a strip, highlighting the middle with a large flower, the edges with two buds, draw leaves between them, decorate them and flowers with “animations”, dashes, and black dots. Compose shades, combine color and shade.
Material.
Items with Gorodets painting, illustrations No. 18, 20 from the educational visual aid.
Paper size 10x21 cm ocher color, gouache, exercise sheet.
Progress of the lesson.
Exhibition of Gorodets objects and their images.
Consider the painting on objects. Select a garland of three flowers: in the middle there is a large flower, at the edges next to it there are two identical buds located close to each other, between them there are leaves (top and bottom).
Compare the decorations of a bud (circle and arc) and a large flower (circle, arc and new elements: small arcs or petal strokes). Note how they are decorated with white (dots, arc, white lines thin as rain). By-
69
look at how the leaves are decorated (dots, dashes, cilia). Clarify the drawing sequence: large flower, small buds, leaves, decorating flowers, leaves, reviving the pattern.
Children make up a shade (to choose from), start drawing with a large flower (circles); The teacher periodically reminds them of the drawing sequence and makes sure that the children bring the pattern to life at the last stage.
In the process of work, children, under the guidance of a teacher, learn to examine their pattern, find gaps in it (what is missing), and determine how it can be supplemented.
At the end of the lesson, the children show their patterns and decorate with them the objects that they looked at together at the beginning of the lesson.
Gorodets patterns, So much joy for the eyes! Craftswomen are growing up, perhaps among us.
Where to start
If you decide to exercise yourself or your son or daughter wants to learn it, it is not necessary to attend any courses. It’s enough to start small - find online lessons in a form convenient for you - this can be a text with illustrations, which shows how the work canvas takes on its own shape.
Other modifications are videos, coloring books, stencils, which allow you to clearly understand everything, and ultimately understand it along the way.
When doing work, it is not advisable to rush, trying to apply shades to the surface as quickly as possible - this will only lead to streaks. Use a pencil to outline the outline, but do not apply pressure.
- Patchwork - technique and master class for sewing stylish and beautiful sewing with your own hands (80 photos)
- Tilda doll - a master class in sewing toys with your own hands. 125 photos of the best toy models
How to make a car out of paper: step-by-step description of how to quickly and easily build a high-quality car (75 photos + video)
Another feature of the operation is the concentration of dark spots on top of light ones. All you have to do is choose the direction in which you are going to create, and therefore you will master Gorodets painting. To improve your skills, you can first select paintings online, and then reproduce your own textures or leitmotifs.
Initially, it is far from perfect, but with constant repetition and honing of the skill, the result will become better, giving the right to trade professionally and on a permanent basis.
“Gorodets salt shaker” lesson plan on applique, modeling (preparatory group)
Application "Gorodets salt shaker"
Goal: To develop children’s skills in creating applicative patterns based on Gorodets painting. Objectives: To ensure that children’s knowledge of Gorodets painting as a type of folk decorative and applied art is consolidated. Arouse interest in the manufacture of household items decorated with Gorodets patterns. Strengthen the ability to cut circles of different sizes and flowers along the contour; teach children to fold the sheet like an accordion carefully so that the corners connect to each other; teach how to transfer a template onto a sheet of colored paper. Develop children's creative abilities and spatial thinking. Cultivate accuracy in work, perseverance, and the desire to complete the work started. Materials and tools needed for work: colored paper, scissors, glue - pencil, pencil, marker or felt-tip pen, ready-made silhouettes of a salt shaker.
Progress
In blue shawls, in red buds, large and small green leaves, they brought a casket from the city.... (Gorodets).In the city of Gorodets they make beautiful things that are needed on the farm. These are kitchen boards, salt shakers, bread bins, spice boxes, etc. They are decorated with floral patterns (roses, roses, daisies, leaves), magical birds, horses. Such elegant things serve not only for storing food, but also decorate the interior of the kitchen.
We begin work by cutting out the templates. We transfer the templates onto colored paper: yellow – salt shaker; green - leaves; for rosan: circle (diameter 5.5 cm) - pink (blue), rosan - white and red (blue), circle (diameter 1.5 cm) - white, circle (diameter 1 cm) - red (blue); for bathing: circle (diameter 3.5 cm) – blue (pink), circle (diameter 1cm) – blue (red), “zhizhka” – white.
Cut out the yellow salt shaker.
Cut out a blue circle with a diameter of 5.5 cm for the rose and a pink circle with a diameter of 3.5 cm for the bath, glue: a blue circle at the bottom of the salt shaker, and a pink circle at the top.
We cut out the white and blue roses, and glue them at the bottom of the salt shaker onto the blue circle: first the white rose, and then the blue one.
Cut out and glue onto the blue rose first a white circle with a diameter of 1.5 cm, and then a blue circle with a diameter of 1 cm.
We cut out a red circle with a diameter of 1 cm and a white “zhivka”, glue it to the pink circle in the upper part of the salt shaker.
Fold a strip of green paper into an accordion shape (2 pieces), trace a leaf stencil, and cut it out.
We glue green leaves: in the lower part of the salt shaker - three leaves to the right and left of the rose (we start with the middle leaf), then in the upper part of the salt shaker - two leaves to the right and left of the bath.
We trace the outline of the salt shaker with a marker.
Gorodets patterns, What a joy for the eyes. Craftswomen are growing up, Maybe among us! And. V. Kadukhina
Gorodet painting – 65 photo examples
- Paper toys - diagrams, ideas and options for making various toys with your own hands (110 photos)
Dymkovo toy - modern collections, their creation and features of making Dymkovo toys (115 photos and videos)
Knitting openwork patterns - diagrams and step-by-step master class on how to knit an openwork pattern quickly and easily (95 photos + video)