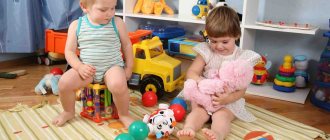
Plasticineography classes are not only an effective method for developing fine motor skills in children, regardless of how old they are, but also allow primary schoolchildren to get rid of physical and mental stress.
Modeling from plasticine can also help a child adapt to kindergarten, becoming a favorite hobby for a growing person, with the help of which he can express the emotions that accumulate during the day, relieving the central nervous system and preventing the occurrence of neuroses.
The benefits of plasticineography
Plasticineography is a creative process during which children create three-dimensional pictures from plasticine , without using classic drawing tools - brushes, paints or pencils. For the working surface, sheets of paper, A3 size or larger, or thick cardboard are usually used.
Plasticineography for children is very useful due to its positive effect on their mental and physical development
Regardless of how old the child is, 2 or 8, the type of arts and crafts in question has a positive effect not only on his mental, but also physical development:
- filling the cognitive needs of children (especially important for children from 2 to 4-5 years old);
- acquiring the ability to navigate in the horizontal plane;
- formation of the creative component of the personality of a growing person (awakening interest in creativity, understanding the algorithm of the creative process, and so on);
- development of fantasy;
- development of fine motor skills of the hands (positively affects the child’s speech and overall development);
- broadening one's horizons;
- increasing the sensitivity of tactile perception;
- expansion of vocabulary (if the child already knows how to speak) or stimulation of speech (if the child does not yet speak due to age or developmental delay);
- instilling perseverance, accuracy, and independence in the child during the work process.
The benefits of using different drawing techniques in classes with children
Kids intuitively strive to diversify their activities, because they have so much to learn, so many things to learn! This is also justified from the point of view of benefits for the development of children. Changing educational and creative activities allows you to train various cognitive skills (memory, speech, thinking), awaken the ability to think outside the box, and imagination.
Drawing is one of the most beloved, accessible, and therefore popular types of creativity among children of all ages. At the same time, there are practically no restrictions in the visual arts: you can draw with pencils, or with your finger on foggy glass, or with sand, or plasticine. The process of developing fine motor skills using any of the listed techniques has its own characteristics. For example, using a pencil or brush prepares the hand for writing, and contact with sand gives a unique tactile sensation and calms the child. Modeling classes teach your fingers to be strong and neat, and most importantly, they give you endless scope for creativity.
Goals and objectives
The goals and objectives of plasticineography classes vary depending on the age of the child and the characteristics of their development.
At the age of 2-3 years
Plasticineography for children 2-3 years old should be aimed at developing fine motor skills. This will help the child not only develop physically correctly, but also stimulate his speech skills.
Adults, when asking children to create pictures from plasticine, should not just give a task, but use various methods to awaken the child’s creative abilities and his interest in the work process (for example, come up with a fairy tale, including in the plot an object that the child will then sculpt.
It could be a flower, an ax or a hat - something consisting of a minimum number of parts and not requiring a lot of time to create).
Since children at an early age are not able to independently come up with a task for plasticineography, and quickly lose interest in the work process if they understand that they are left to their own devices, an adult should set a clear task for them at the beginning of the lesson.
Plasticineography for children 2-3 years old should be easy to perform
Control and assistance from an older friend should be aimed at developing the child’s accuracy, perseverance and concentration on the sequence of actions.
Using plasticineography, you can also teach a child to navigate on paper , each time describing the location of the next part of the object being created. For example, it is important for children 2-3 years old to say where the left side is and where the right is, to prompt and guide their hands to the desired edge of the working surface.
When the young creator begins to better navigate the horizontal plane, the adult should begin to give instructions verbally, giving the child the opportunity to independently determine the place where the next detail of the final image needs to be placed.
4-5-6 years
Plasticineography for children 4-5-6 years old should be aimed at improving skills in working with plasticine. At this age, the younger generation begins to develop an interest in visual arts.
By the age of 6, tasks on plasticine applications can become more complicated.
If parents support their child in a timely manner and take action to unlock his creative potential, they will not only be able to strengthen the psycho-emotional connection with their baby, becoming his support and support, but will also give him the opportunity to try himself in art.
Modeling from plasticine for children 4–6 years old is also useful because it effectively develops the eye and improves hand coordination. This not only makes the child more physically developed, but also has a beneficial effect on the formation of neural connections in his brain.
At this age, children prefer to work collectively, which means that plasticineography for them in this case will be an opportunity to improve their communication skills with other members of society - it will teach them to explain their intentions, prove they are right, or correctly express disagreement.
7-8 years
Plasticineography for children 7-8 years old, its main goal involves instilling in younger schoolchildren new sculpting skills - pressing, smearing, rolling, squeezing out of syringes.
Already possessing the basic ability to create images from plasticine, young creators will be captivated by the process, discovering new facets of their usual form of creativity.
This will help them distract from negative thoughts, get rid of stress and release emotions associated with joining a new team at school, as well as accepting the great responsibility and demands placed on them by teachers and parents.
At the age of 7-8 years, children prefer to work individually. Creating pictures from plasticine will be an effective method for them to develop their imagination, as well as a vivid way of self-expression.
It is not necessary for younger schoolchildren to be given a clear plan of action; it is enough to simply limit them to a theme, for example, “Golden Autumn,” allowing them to independently come up with an idea and the main stages for their further work.
Plasticineography in the context of the implementation of Federal State Educational Standards in preschool educational institutions
Experience as a kindergarten teacher. Plasticine painting in the context of the implementation of Federal State Educational Standards in preschool educational institutions
Updating the content of preschool education involves improving its quality.
Currently, teachers and specialists in the field of early development insist that the development of intellectual and thinking processes must begin with the development of hand movements. This is due to the fact that the development of the hand plays an important role in the formation of the brain, its cognitive abilities, and the formation of speech. This means that in order for a child and his brain to develop, it is necessary to train his hands. The development of fine motor skills is also important because the child’s entire future life will require the use of precise, coordinated movements of the hand and fingers, which are necessary to dress, draw and write, as well as perform many different everyday and educational activities. Undoubtedly, all this requires the teacher to search for more and more new approaches to organizing children's activities. What is plasticineography and what developmental capabilities does this technique have? “Plasticineography” has two semantic roots: “graphy” means to create, depict, and the first half of the word “plasticine” implies the material with the help of which the plan is realized. Plasticineography is classified as an unconventional art technique; it involves drawing with plasticine on cardboard or any other dense base. The background and characters are depicted not by drawing, but by sculpting, while objects can be more or less convex, semi-volume. It is allowed to include additional materials - beads, beads, natural and waste materials. I did not choose this area of activity by chance; children begin modeling from early preschool age, mastering the simplest techniques of working with plasticine. One of the undoubted advantages of plasticineography classes with children of primary preschool age is the integration of subject areas of knowledge. During the work on plasticineography, the cognitive activity of children is realized. Children's vocabulary is enriched in an interesting playful way. Scientists have identified a connection between the active movement of a child’s fingers and the formation of his speech apparatus. In the process of playing out the plot and performing practical actions with plasticine, there is a continuous conversation with the children. Such a playful organization of children’s activities stimulates their speech activity, causes speech imitation, the formation and activation of a vocabulary, and the child’s understanding of the speech of others. In addition, children get acquainted with works of art, poems, riddles, nursery rhymes, and finger games. They develop the first elementary mathematical ideas about counting, size, and magnitude. Develop sensory standards. Sensory development occupies one of the central places in working with children in plasticineography; the development of general sensory abilities occurs: color, shape, size. All this complies with the basic principles of the Federal State Standard. Children develop tactile and thermal senses of their fingers. Pre-school children best become familiar with materials through tactile sensations. The impressions, knowledge, and emotional state of children are realized in visual arts. But the main significance of plasticineography classes is that at the end of training, the child develops hand skill, strengthens hand strength, the movements of both hands become more coordinated, and the movements of the fingers are differentiated. This is facilitated by good muscle load on the fingers. Children develop pincer grasping, i.e. grasping a small object with two fingers or a pinch, they are also able to independently carry out movements in all its qualities: strength, duration, direction, etc. There are several types of non-traditional techniques for working with plasticine: • Direct plasticineography - an image of a molded picture on a horizontal surface. • Reverse plasticine (stained glass) image of a stucco painting from the reverse side of a horizontal surface (with outline indication). • Contour plasticineography - image of an object along the contour, using “flagella”. • Multilayer plasticineography – a three-dimensional image of a molded picture on a horizontal surface, with sequential application of layers. • Modular plasticineography – an image of a molded picture on a horizontal surface using rollers, balls, braids, multilayer disks. • Mosaic plasticine - an image of a molded picture on a horizontal surface using plasticine balls or ball plasticine. In the course of working on this topic, we developed the following recommendations: • Plasticine needs to be softened, some brands of plasticine are very hard, this will make it difficult to work with, which means children will quickly lose interest in activities. But you should not pour boiling water over plasticine; this will make the material too soft and pliable; • The cardboard base can be covered with tape. Over time, unpleasant greasy spots appear on images created from plasticine. Tape will prevent this problem. • To create paintings with a lot of detail, you can use a medical syringe without a needle. A block of plasticine is placed inside the syringe and heated, and then gently squeezed out to form long thin “threads”. For thicker threads, you can use a pastry syringe; • If the work is successful, it makes sense to cover the work with colorless varnish. The plasticine will harden underneath and the product will not only retain its brightness, but will also become even brighter over time. It is easier to store such work because plasticine collects dust well and is difficult to clean; • During work, it is necessary to ensure that the child’s finger does not bend, but remains straight and tense, so that he acts with the pad of his finger and does not scratch the plasticine with his nail; • Well, perhaps the last recommendation: provide your child with the opportunity to experiment. Let the first acquaintance with this technique go according to your plan, but the second meeting will involve a series of trial and errors. Let the child play with the strokes and fantasize about what the resulting curl looks like? From imagination and active interaction with the material, an interesting solution will be born! Thus, we can say with confidence that organizing work using the plasticineography technique allows us to solve a number of tasks of the Federal State Standard:
1. Protecting and strengthening the physical and mental health of children, including their emotional well-being; 2. Formation of a general culture of children’s personality, development of their social, moral, aesthetic, intellectual, and physical qualities.
We recommend watching:
Master class on plasticineography “Snowman in a snowflake” Master class on working with plasticine Summary of GCD in the preparatory group on the topic “Cockerel” Applique Christmas tree made of plasticine for kindergarten
Similar articles:
Plasticineography in the younger group. Summer meadow
Plasticineography in a secondary speech therapy group
Plasticineography in the preparatory group. Grape
Plasticineography in kindergarten on the theme Summer
Plasticineography in kindergarten
General recommendations
Correctly organizing plasticineography classes for children can only be done taking into account the general recommendations:
- The total time for modeling from plasticine should be no more than 30 minutes. (otherwise the child’s attention will be distracted, and productivity will accordingly decrease);
- It is necessary to create pictures from plasticine in a well-lit place, a comfortable environment for the child, excluding the presence of distracting objects nearby, for example, a smartphone, computer, tablet, TV or toys;
- in classes with children 7-8 years old, it is recommended to use thick cardboard, since plain paper will be deformed when using the techniques of smearing, rolling and smoothing plasticine;
- It is recommended to cover the working surface with transparent tape before starting modeling (this will eliminate the possibility of greasy stains and streaks from plasticine);
- In order for the final image to retain its original appearance for as long as possible, it is recommended to cover it with colorless varnish in 2-3 layers;
- During the creative process, not only the basic working tools for plasticine printing, but also wet wipes, a knife or scissors, as well as sheets of thick paper (you can use it to correct the plasticine image) should be within reach of the child.
Materials for work
Proper organization of a lesson in plasticineography requires the presence of a basic set of working tools:
- Thick cardboard or large sheet of paper.
Materials and tools for working with palstiline
Depending on the age and practical skills of a particular child or group of children, on the working surface you can draw the outline of an object, the inside of which will be filled by the child.
- Set of multi-colored plasticine. It is not recommended to provide a child with more than 7-8 colors of plasticine, as this may cause distraction. The need to obtain a shade that is not in the presented set will stimulate the imagination of the young creator, as well as encourage him to experiment by mixing the viscous mass.
- Hand wipes and antiseptic. Necessary for removing plasticine residues from the skin of your hands.
- Stacks. Special small plastic knives designed for working with plasticine.
- Modeling board. On a separate wooden surface, the child will create a specific detail of the object by rolling, cutting, smearing plasticine, which will subsequently be transferred to cardboard or paper used as a base.
- Original image. If a child is given a task to create a specific picture, he should be provided with a final image, demonstrating what he should get as a result of his creative activity.
Drawing with plasticine: basic techniques
A number of techniques are already known to children, because drawing with plasticine is preceded by learning to sculpt.
Kids already know how to:
- roll up;
- roll out;
- flatten;
- pull out;
- give the desired shape to a piece of plasticine.
What skills do children acquire when learning plasticineography?
To draw with plasticine, children will have to learn:
- pinch off;
- smear;
- press in;
- smooth;
- mix colors;
- add texture using stacks.
There are many ways to create an image:
1. Direct . Different colors of plasticine are used. The most popular patterns are vegetables, leaves, mushrooms, and fish. Direct plasticineography is the first acquaintance with unusual drawing. Large and simple shapes are used, which are easy for even kids to work with.
2. Stained glass (reverse) . A drawing is applied to the plexiglass plate with a marker. The resulting contour is filled with plasticine. Reverse plasticineography is very effective. Very often, sour cream lids are used as a base.
3. Mosaic. The figure or design is created with multi-colored plasticine balls. Mosaic plasticineography is very simple. The secret to beautiful drawings is a good selection of colors and accuracy. An example of such a technique is the master class “Cockerel Fish”, the body of which is lined with mosaics.
4. Contour. This method is practiced by older children. The contour is filled with plasticine flagella, which are squeezed out using a syringe. The material must be heated. For this purpose, use either a microwave or hot water. A plasticine sausage is placed in a syringe without a needle and heated along with it.
5. Multi-layered. The material is applied with multi-colored strokes. The painting is created by layering. The result is a three-dimensional image. Like, for example, in a plasticine Easter card.
6. Textured. The convexity of the image varies. Children learn to create high reliefs, bas-reliefs and counter-reliefs. Textured plasticineography is one of the most difficult types, which is why it is taught to children in preparatory groups. Look how we made a fairy tale character - the Gruffalo.
7. Modular. They perform the elements separately using different techniques, and then build a single composition from them. For example, you can create a relief image from flagella, balls and sausages.
Using this technique you can create a wonderful underwater world.
The description is just an example; everyone will have their own fantasy underwater kingdom. See detailed instructions on how to make an underwater world from plasticine here.
To make corals and algae, you can mix colors to achieve beautiful tints. For example, blue, violet, blue, light green and dark green shades are suitable for making underwater plants. Corals and shells are sculpted from pink, yellow, and white plasticine.
When all the parts are ready, they are attached to a painted sheet of paper.
The craft helps you remember what the inhabitants of the underwater world look like and gives you an idea of scale. It uses figures of different shapes, so children will have to remember all the plasticineography techniques they have learned.
When creating a three-dimensional image, children are faced with the concept of measure. If you overload the picture with details, the whole effect will disappear. Instead of a bright and mysterious underwater world penetrated by the sun's rays, you will get a pile of plasticine figures.
The image contains many small and large details, so it will take a lot of patience and perseverance to reproduce all the inhabitants of the seabed.
This work is great for group work in a kindergarten group. Children learn the skills of teamwork, distribution of responsibilities, mutual assistance, and they will achieve excellent results!
Templates for plasticineography
Templates must be appropriate for the age of the students. If in the younger group preference is given to simple forms, then in the older groups complex images are created, with many elements, with different relief.
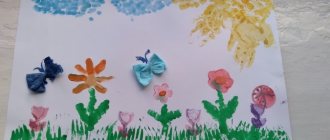
The templates are great for kids to get creative with. At the first stage, the contour is simply filled with plasticine. You can build the work differently and use a template on a sheet already covered with plasticine. A butterfly with a flower is made using this technique.
For this craft, leftover plasticine or old crafts are suitable, because you will need beautiful multi-colored tints.
Small pieces of plasticine need to be smeared on paper, trying to make as thin a layer as possible. Print a template that includes the butterfly outline, stem, three leaves, flower core and petals.
Cut out the printed parts from a plasticine-coated sheet. On white paper, use colored felt-tip pens or wax crayons to draw the earth with strokes. Glue the cut out colorful parts. Sculpt the body of a butterfly from plasticine and create a texture on it using a stack. Using a felt-tip pen, draw antennae for the butterfly and make plasticine eyes.
Pupils of the younger group can also cope with this craft. She teaches how to work with a template and trains the skill of smearing plasticine in an even, thin layer. Cutting out parts from a sheet covered with a layer of plasticine requires care and should not be rushed.
The “recycled” use of plasticine shows that opportunities for creativity can be found in already used objects and seemingly unnecessary items.
Plasticineography methods
Methods of plasticineography in the creativity of a particular child or group of children should be selected taking into account the skills of young creators, as well as their abilities and developmental characteristics.
The most commonly used of them are:
- Strokes. A small amount of plasticine is placed on the pad of the index finger or a special plastic spatula, after which it is applied to the work surface in the right place with sharp, randomly directed movements.
- Plasticine balls. Typically used when placing accents on a flat image (for example, the middle of a flower) or as basic shapes to fill the inner surface of an object schematically depicted on the working plane.
- Flattening the rolled balls. It is not recommended to use a lot of force when flattening the balls. Otherwise, the resulting figure will be deformed, thus losing its clear rounded shape.
- Smearing on the surface. This technique is used to create a background or fill the inside of a figure with colored material.
- Scratching patterns on plasticine. Patterns are created on a flattened piece of plasticine using a special plastic knife or tools with already formed threads.
- Rolling plasticine sausages. You can roll sausages both for placing them on the final image, and for the purpose of using them as a blank.
- Squeezing plasticine out of a syringe. For extrusion, it is recommended to use a special syringe, which allows you not only to easily extrude thin strips of plasticine, but also to remove the remaining working material from the main body of the tool.
Let's get acquainted with the secrets of plasticine technology
What are the secrets of plasticineography? Is it possible to teach them to children? Teachers confidently say that this technique is quite accessible to preschool children, and with the right approach, plasticineography as a means of developing children’s creative abilities can become a serious support for family education. In order not to miss the moment, it would be nice for parents to know when they start creating stucco paintings with their kids. According to experts, such classes can be carried out with children as young as three years old. The main thing when creating pictures from plasticine is to take into account the child’s age and his technical skills, since due to the complexity of the image, interest in creativity may be lost. Therefore, children are first introduced to the simplest techniques of the “ABC of sculpting”:
- Smearing is the most simplified method of plasticine printing, accessible even to the smallest child. The plasticine is smeared with your fingers on the finished smooth base.
- Rolling out is a technique of increasing complexity. It requires certain muscular efforts, since the plasticine is rolled out with direct hand movements in the form of a cylinder or in a circular motion in the form of a ball.
- Flattening and stretching are the most important steps in creating stucco paintings. They are necessary for depicting various decorative and applied shapes, for example, a flat cake, a heart, an oval or an elongated cylinder, a flagellum. To do this, first roll out a ball or sausage, and then squeeze it with your palms, using your fingers to convey various bends, indentations or an elongated tip.
The subjects of paintings for preschoolers at this age can be well-known autumn and summer motifs, for example, “Sun” (we flatten a yellow ball on a blue background, and smear rays around it); “Flowers on the grass” (spread green plasticine on a smooth base, place flattened multi-colored balls on top). In a similar way, “Autumn leaves on the ground”, “Falling snow”, “Hedgehog”, “Multi-colored fireworks”, “Christmas tree garlands” are decoratively depicted. Teachers advise be sure to use rhymes, riddles and short stories about a stucco picture to maintain interest in creativity and encourage the child, for example:
I will make a sky, a sun, a stream from plasticine, I will stick flowers everywhere, I will draw a cornflower. And daisies, forget-me-nots, little buttercups will smile at the sun and enjoy the warm summer!
We made koloboks and flattened them on the sides. It immediately turned out to be a pancake, very soft (plasticine).
Important: working with plasticine is quite a difficult task for fragile children’s fingers. Therefore, firstly, plasticine for plasticine printing must meet the necessary requirements (heat the solid mass in warm water); secondly, while creating a stucco picture, it is necessary to change types of activities, taking breaks to prevent the baby from overtiring.
Technology for older preschoolers
When the simplest methods are mastered by children, they move on to a more complex stage of learning, showing new techniques and a type of plasticineography. This creates a certain system for working on the painting. What plasticineography techniques are typical for this technique?
- Smoothing is a technique necessary to prepare the basis for a future painting. To get a smooth surface, you need to carefully smooth out the layer of plasticine with your fingertips. You can wet your fingers with water, then things will go faster. The work requires certain muscular efforts, so it is only accessible to older preschoolers.
- Pinching is used to create new details in a painting and make it decorative. The preschooler pinches the plasticine with his fingers where it is necessary to decorate the image.
- Smearing, pressing - techniques are necessary for tightly attaching the elements of the picture.
- Sticking - connects one part of the image to another or helps to apply the necessary details to a ready-made drawing or photograph.
- Mixing different colors of plasticine to obtain shades is necessary for painting decoration. Children are taught to knead colored balls in one piece or mix different colors directly in the outline of the picture in the form of neatly overlaying one colored piece on another.
To make plasticine paintings more expressive, it is good to use elements of natural material: leaves, shells, nuts, seeds, small pebbles, bean grains, etc. Beads, seed beads, and small buttons will look beautiful when decorating images.
Important: plasticineography as a means of developing fine motor skills of the hands involves a gradual transition from simple methods of work to more complex ones. Then the preschooler will be able to prepare the composition for a long time without getting tired. And the system of techniques for working with plastic materials that the child has mastered will help new ideas and creative discoveries emerge.
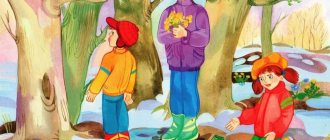
For older preschoolers, the subjects of paintings can be more complex than for children, compositions on themes of the seasons, for example, “It’s snowing,” “Butterflies in the meadow,” “Basket with mushrooms,” “Still life of fruit,” “Vase with wildflowers.” ", "Rainbow and Rain". Children like to create pictures from the lives of animals (“Zoo Inhabitants”, “Hedgehog with Mushrooms”, “Dog Plays with a Ball”, “Kitten and a Ball”), from the lives of people (“Holiday”, “Space”, “Children are making a snow woman” ") or fairy-tale characters. They can make up little funny poems and stories themselves to complement their crafts:
I make a ball, a ball and a penguin from plasticine. And this is a hippopotamus. He has a big belly. Plasticine ears move on the top of the head
Important: Parents! Don’t forget to rejoice with your children in every creative discovery they make. Try to keep crafts for a long time, give them to loved ones and friends to give significance to children's creations.
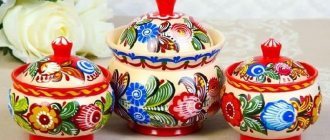
Flowers
The easiest way to make a flower using plasticine printing:
- In the center of a sheet of paper or thick cardboard used, draw the outlines of an open flower (middle and petals).
- Using a small amount of yellow plasticine, rubbed over the middle of the flower, paint the inside area of the bud.
- Grind the red plasticine evenly, covering the inside of the drawn petals with it, without going beyond the middle.
- Twist several sausages from blue plasticine, and then use them to mark the boundaries of the flower. As an alternative to sculpting additional elements to create borders, the simplest rubbing of blue plasticine along the contour of the image using a finger or a special spatula is allowed.
- Cover the image with 2 layers of clear varnish, then let it harden on its own.
- Draw several thin lines from the middle of the flower by rubbing a small amount of plasticine, directing them to different petals.
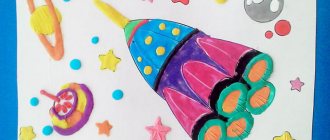
Space
The following option for creating an image of space using plasticine is suitable for children of any age. For children under 3-4 years old, it will become a full-fledged craft, while for older children such a picture will become a background image, implying further refinement of the drawing with details.
Step by step execution:
- Using blue and deep blue plasticine, make multiple strokes over the entire area of the sheet of paper being used so that they look like a single whole.
- Roll small balls from white plasticine. Place them randomly on a blue-blue background, then slightly flatten them with your finger (celestial bodies).
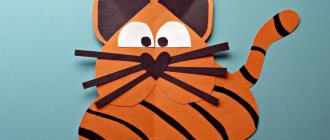
Animals
To create an image of an animal using plasticine, children will need pre-prepared templates. The inner surface of the drawn animal is filled with balls of plasticine (the color of the working material corresponds to the shade of the animal’s skin), placed closely, or painted over by evenly rubbing it or creating numerous strokes.
Classes on creating images for children from 2 to 8 years old using plasticine should be regularly conducted under the supervision of parents or teachers of preschool and school institutions.
Plasticineography helps representatives of the younger generation to reveal their creative potential, develop taste in art, improve physical development, and at the same time normalize the state of their own nervous system, thereby minimizing the occurrence of depressive mood.