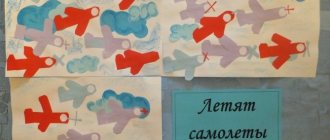
Autumn vytynanki - leaves for windows for kindergarten and school
We use cutting out silhouettes from paper for autumn crafts. You can also make postcards for Teacher's Day. They decorate glass windows, walls, mirrors. Connect to glass using tape. They look very beautiful when hanging from the ceiling on threads.
This is such beauty on the glass of window frames.
Fantasy is limitless and thanks to it such masterpieces appear. They help you see the world better. In rainy weather, when there is heavy rain and slush outside, everyone will feel comfortable in a decorated room. And if the children did it partially or completely with their own hands, it’s doubly nice.
Volume craft for an autumn exhibition in a kindergarten or school
I suggest you pay attention to a very cute inhabitant of the forest. A voluminous hedgehog is performed easily and simply.
We will need:
- colored paper
- pencil
- glue
- scissors
Progress:
Take 2 sheets of black or any other dark paper. Fold them in half together. Let's draw a semicircle at random.
Then we'll cut it out.
Next, take one sheet. It will consist of two equal semicircles. We cut off a strip of about 1 centimeter from one part from the base in a circle. We start carefully from the base a little and then make one part lower in height.
As shown in the photo.
We do the second part as well. To make a ladder.
Then we cut out the needles with scissors.
We place the blanks on top of each other. We glue it with glue.
We'll attach more needles to the side.
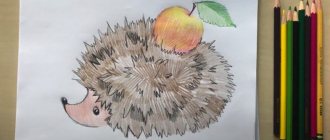
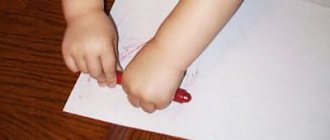
Let's draw a face for the handsome forest creature. Let's cut it out. Let's color it with a felt-tip pen. Let's make an apple or a mushroom out of colored paper so that the forest dweller will come home with a gift.
This is such a handsome guy. You can try it on plain paper first. Children will make this craft with pleasure.
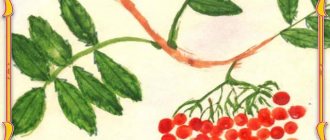
Origami maple leaves (step by step instructions)
Making cute leaves is very easy and simple. The most important thing is to be with the children. Then decorate any room (kindergarten, school or nursery) with your crafts. With step-by-step instructions and photos you can do it very easily and quickly.
Attached is a step-by-step diagram of folding a maple leaf.
We will need:
- 3 square leaves 8.5×8.5 cm
- glue
Progress:
We can make squares of any size.
Let's take one copy. Fold it diagonally. Next, we unfold it to its original state.
Then fold the wings in half towards the middle of the fold.
Turn the craft over at an acute angle downwards.
We remove the resulting tail inside the pocket.
Fold the top corners towards the middle. It turned out to be small triangles. Let's bend them back and put them inside. The result is a figure familiar to us - a rhombus. Bend the top corners down. One piece is ready. Next we’ll make a few more of these blanks. Let's connect them together and secure with glue.
To ensure that the parts keep their shape well, they can be glued onto a dense round base. Don't forget to make a leg. The maple leaf is ready. You can also use them to make a crown for the autumn holiday. Only for this you need to make a rim out of paper and connect everything together.
Crafts with natural materials
Natural materials can also be used to create applications. Most often, they are collected leaves of various trees, which are perfect for such purposes. For crafts, it is important to choose only the most beautiful ones. This will help improve the quality and beauty of the future product.
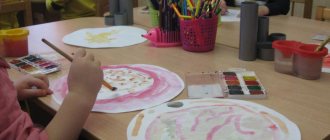
Golden autumn
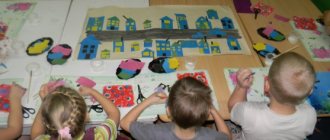
Children need to be taught creative work from a very early age. In kindergarten, for these purposes, various crafts are used from natural material that has been collected and properly dried.
An application on the theme of autumn in the younger group involves the use of multi-colored autumn leaves, which the children themselves chose and brought. It doesn’t matter what size or shape they are. To try to make a beautiful craft, you need to prepare:
- glue and a brush for applying it;
- cardboard or thick paper for the base;
- scissors;
- natural natural materials (leaves, twigs, flowers);
- small decorative elements.
For this craft, it is advisable to collect leaves from different trees. This will not only help make a more beautiful picture, but will also allow educators to teach children to distinguish them from each other.
The golden autumn applique is made following the following sequence of actions:
- First, the children collect the leaves and other natural materials they like.
- Then only the highest quality and most attractive specimens are selected from the total mass. All rotten, dried or damaged leaves are removed and disposed of.
- Selected specimens are laid out on the work surface and dried from excess moisture. It is important not to overdo it, so as not to end up with pieces that are brittle and unsuitable for application.
- After this, a cardboard base is taken and a rectangle of the required size is cut out of it.
- Then the brush is moistened in a jar of glue and the leaves are coated one by one.
- Immediately the image details are attached to the base. This should be done chaotically and in random order.
- The finished composition is transferred to a warm place for the glue to dry completely.
- At the very end, the applique is supplemented with various decorative elements.