On the topic: methodological developments, presentations and notes
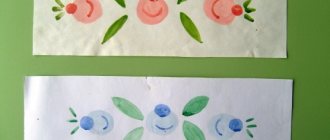
Objectives: Teach children to draw patterns on a semicircle. Show the connection between the ornament and the shape of the item being decorated (the pattern on the umbrella). Systematize ideas about decorative motifs (geometric.
Objectives of the lesson: 1. To develop in children the ability to express their attitude to spring weather through a characteristic detail (in this case, raindrops). 2. To become familiar with the techniques of working with watercolor paints.
Summary of a drawing lesson in the senior group.
Introducing the concept of “northern lights” through drawing using various image techniques.
I bring to your attention a summary of a lesson on rhythm.
Source
Preview:
State budgetary preschool educational institution
kindergarten No. 50 Primorsky district of St. Petersburg
Abstract of GCD on artistic and aesthetic development (drawing) in the preparatory group “Umbrellas”
using research technology
Romanovskaya Anastasia Valerievna
Additional education teacher
GBDOU kindergarten No. 50
Primorsky district of St. Petersburg
Goal: to give scope to children's creativity in the depiction of umbrellas
Educational field: “Artistic and aesthetic development”
-develop imagination and imagination;
— consolidate the ability to draw umbrellas;
- strengthen the ability to mix paints;
- to consolidate children’s knowledge about cold shades;
On the topic: methodological developments, presentations and notes
Acquaintance with A. Fet’s poem “The Swallows Are Missing.”
A lesson using non-traditional drawing techniques for children aged 5-6 years.
Designed for preschool teachers.
Summary of a lesson on Artistic and Aesthetic Development in the senior group Art quiz: “Multi-colored rainbow.”
OOD notes for the senior group.
Lesson notes on artistic and aesthetic development with a linguistic component. Integration of the linguistic component and artistic and aesthetic education using technology.
Source
Origami "Umbrella"
Origami is a complex art in general, but there are patterns that even a child can handle. One of these simple projects is a cute voluminous umbrella.
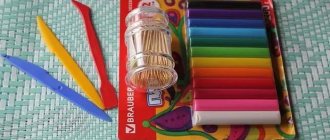
To work, prepare colored paper, scissors and office glue. Pre-cut a square with sides of 15 cm - this will be the dome of the umbrella, and a rectangle 15x5 cm - this will be the rod with the handle. Choose the appropriate paper colors for the blanks.
Instructions for creating origami:
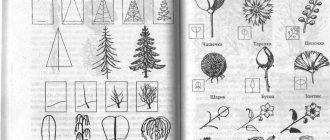
- Bend the square along both diagonals.
- Then fold it in half vertically and horizontally. You will get 4 intersecting folds at the central point: two diagonal, two transverse.
- Turn the square into a diamond. To do this, bend one of the diagonal folds on both sides. You will get a rhombus, the two sides of which are formed by transverse lines in 2 layers.
- Bend the corners of the rhombus towards the center so that the edges formed by the transverse folds meet the intended center line. Do this for all 4 corners, front and back.
- Carefully wrap the resulting 4 narrow triangles inside the rhombus. You will get an umbrella dome with 8 spokes, and between them there are diamonds elongated at the top.
- Trim off the bottom protruding parts of the diamonds.
- Make a small hole in the top of the dome.
- Twist and glue the previously cut rectangle into a narrow tube, insert it into the hole, and secure with glue. Bend the free edge of the tube to form a handle.
The finished umbrella can be decorated by gluing multi-colored circles and stars onto the dome. The upper part of the rod protruding from the dome can be closed by gluing beads and seed beads.
Colored umbrellas
To make a three-dimensional applique, prepare colored paper and decorative cardboard sheets, felt-tip pens, scissors, and office glue. The applique will consist of 3 umbrellas of different colors: the two side ones are two-dimensional, and the central one is three-dimensional.
Instructions for creating an application:
- Take a cardboard sheet of suitable color for the autumn background: blue-gray, ocher, gray, beige.
- Cut out the clouds, they will be two-color and two-layer. First, make larger wavy shapes using dark blue cardstock. Then cut out the same slightly smaller shapes from white paper and glue them onto dark blue cardboard. The result will be clouds with a visual volume effect. Paste them onto the background close to the top edge.
- Choose what color the umbrellas will be, take the appropriate colored paper. Using the templates you drew or found, cut out the corresponding blanks: one each for the right and left umbrellas, and 5 pieces for the central umbrella.
- Set aside the blanks for the side umbrellas for now. Fold the 4 elements for the central umbrella in half.
- Applying glue to the back of the fold of each of the 4 elements, glue them to the 5th piece, placing the fold within the fold. You will get a voluminous umbrella with 10 spokes.
- Glue the three-dimensional umbrella to the center of the background sheet. Glue flat umbrellas on both sides.
- Use felt-tip pens to draw frames and handles. Draw knitting needles for flat umbrellas. You can also paint on autumn leaves and raindrops.