crafts for kindergarten on February 23
iKids on Defender of the Fatherland Day are happy to congratulate the most authoritative people for them - dads and grandfathers. Older brothers or uncles also become suitable candidates for congratulations and gift giving. -yourself crafts for February 23rd in kindergarten Whether it’s a tank made of plasticine or an applique for February 23 , with them a child gives the whole world to a loved one. Usually on Defender of the Fatherland Day, craft competitions are held for kindergarten , including senior and junior groups. Help your preschooler make a February 23rd gift for dad with one of the simple February 23rd kindergarten craft ideas presented in this article. Here you will find many examples of holiday crafts for kindergarten with master classes and simple instructions, ranging from cute cards and appliqués to formidable military equipment made from plasticine and scrap materials. Don’t forget that for young children in the junior group of kindergarten, the craft for February 23 can even be a hand-drawn postcard with the first scribbles, but made with love. Therefore, do not attach too much importance to the appearance of the craft and its variety. A gift doesn't have to be complicated to be special!
Entertainment in a preschool educational institution for children 6-7 years old. “We are the future defenders of the Fatherland.”
Sports festival
"Defenders of the Fatherland"
in the group for 6-7 years.
Conducted by: Rodionova T.P.
Target:
to form in children patriotic qualities, pride and respect for the Russian army.
Tasks:
Educational:
Expand children's horizons through familiarization with military paraphernalia and military professions; activate vocabulary with new adjectives (strong-willed, resourceful, purposeful) Developmental:
Improve coordination of movements, develop dexterity and accuracy in children. Develop children's creativity and performance skills. Educating:
Encourage children, come to the aid of a friend, show support and sympathy.
Equipment (laptop, hoops, balls, skittles, bags, gymnastic sticks, vegetables, fruits). Progress of the event:
The hall is festively decorated.
Children, to the music - “Serve Russia”, enter the hall, performing a ceremonial formation, snake through the center, line up in a semicircle)
Child
Today is the day of our Army, there is no stronger army in the world. Hello defenders of the people! Russian Army... All
.
Hello! (Children read 3-4 poems prepared in advance.) Presenter
. Today we have gathered to celebrate Defender of the Fatherland Day. Probably, there are defenders in every home, in every family - these are grandfathers, older brothers, uncles, and of course your beloved dads!
I would like to wish them health, success in all their endeavors and pride in their children! Our preschool children give everyone present a song: “Brave Soldiers” - “to the right, sing a song!” children walk towards the chairs
,
at the end of the song they sit down. 1 child.
Happy birthday, army!
- says the country. Glorious protector, always be strong! 2child
.
We love our army, it is a great force, fearless in battle, it defeated all its enemies. 3child
.
And we sing songs about her, about valiant campaigns. She preserves our peaceful home, peace and work of peoples. 4child
.
The native army is strong and invincible in battles. She stands indestructibly guarding the Motherland. Child.
Boys dream of growing up quickly, becoming adults, and going to work.
Leading:
And in order to serve with dignity, you need to prepare for this from childhood. After all, a little time will pass, and our boys will grow up and take the place of those who are now guarding our Motherland. And today we will spend this holiday as a war game. All boys and girls, without exception, will participate in it, especially since in our time women also stand guard over the Motherland. So, the military exercises begin!
We will split into two teams,
Our competitions will be judged by a strict but fair jury,
Leading:
Let the jury follow the entire course of the training without a mistake, Whoever turns out to be more friendly will win today!
Teams, greet each other! Host
: So, we begin! First competition –
relay race “The most accurate shooter”.
Shells are flying, the battle is roaring, and it’s not so easy to hit the target! And only the one who really wants it will bring a point to the Team!
Leading
.
We continue our competitions, the next relay race is “Obstacle Course”.
(Climb under the arc, crawl along the bench, run around the stumps).
Leading
.
"Boat sailing" Each team member takes turns sitting in the basin and, pushing off with his arms and legs, “swims” to the “buoy” and then returns back.
Leading:
A fighter needs not only fast legs and a clear head, but also strength!
Let's have a strongman competition.
(Tug of war)
Leading:
Now for a little rest! I suggest you remember what military professions you know!
(Riddles about military professions) The last riddle: They never sleep, At their native border, Our sea, our land, They guard our sky. (border guards)
Leading
: To learn even better about the everyday life of border guards, Let's take a closer look at their service..
Game “Border Guards and Violators”
One team stands in a circle, holding hands.
The border is open for the team: Raise your hands, the second team marches to the music in and out of the circle. On the command “Watch”, lower your hands, those remaining in the circle are considered detained and are sent to the commandant’s office, that is, to the chairs. The soldier must be able to move carefully, but at the same time very quickly
in the trench, our guys will now show us how they can do it.
Relay: “Quickly into the trench.”
As the saying goes:
“War is war, but lunch is on schedule.”
Relay race: “Field kitchen”.
One team cooks borscht, and the other compote.
Well, the hostilities are coming to an end and our soldiers are ready to return home.
Relay race: “Fast armored train.”
The whole team needs to run like a train between the pins and return to their place.
The roles of locomotives will be performed by dads. Leading
: Well done! The children turned out to be worthy of praise and congratulations. It remains to wish that you always remain as cheerful and friendly! And now a declaration of love to our dads!
CHILDREN READ POEMS FOR DADS ON VIDEO.
“OUR ARMY” STEPANOV V., BORDER GUARD ZHAROV A.
Leading:
Well, now, it’s time to sum up the results of our military exercises.
And the floor is given to our jury. Summing up the game
, we are grateful to you guys for science, for the game,
Being resilient and agile doesn’t hurt anyone! “By order of February 23, in commemoration of the successful completion of military exercises, all personnel are awarded well-deserved awards.
Gifts are given to the teams for the group.
Taking photos near the central wall
Making a tank from corrugated cardboard in kindergarten and school
A tank is one of the most common gifts that guys prepare for their dads, grandfathers and friends. Tanks can be of different configurations. This is a great opportunity to learn about the famous T-34 or the powerful Tiger. Moreover, such powerful all-terrain vehicles can be made from paper, socks, toilet paper rolls, and cardboard. It is crafts made from the latter material that we will consider here. Corrugated cardboard is very interesting in creativity.
Almost the entire craft will consist of twisted strips. Since you won’t find them ready-made in stores, you’ll have to work hard to cut them. Let's take blue and green colors for contrast.
A small but powerful tank will be possible even with this number of wheels. Roll four wheels into pucks: two small and two large. We coat them with glue so that in the future they do not press into the side. We also glue them together
Now we need to design the caterpillar track. Also using glue, we go around the wheels with a strip of corrugated cardboard several times.
It turns out like this. Very similar to real tank parts.
Take green cardboard and press the folds with a pen.
Glue the caterpillar tape, stepping back a little from the edges.
If desired, glue on wings with mud flaps and external fuel tanks
We also make the tower out of cardboard. Only here you need to cut the strip so that one side is narrower and the other wider. When rolled into a roll, it will be convex. To make a cannon, we twist the corrugated cardboard not across the accordion, but along it.
There are also such tank configurations
Again, from some material you can not limit yourself to just one type of crafts. Helicopters made of corrugated cardboard can be excellent gifts for February 23
And even a submarine
Look how much you can make from this wonderful material.
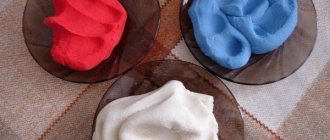
Plasticine airplane for children 5-6 years old in step-by-step instructions
Plasticine is very convenient for crafts. Let's invite the kids to make fast planes out of plasticine for February 23rd. Such gifts are suitable for both very young children 2-3 years old and older ones. Step-by-step instructions will help you quickly make the components for the flying objects, and once you connect them, try with all your might to hold them together. In practice, such airplanes quickly pick up speed and fly high in children's hands.
How to make a military plane from plasticine
Give your children a special delight from modeling from such an interesting and practical material. For a military aircraft, simple plasticine will do. But it is quite hard, so you will have to first knead it in your hands for further comfortable work.
There is also soft or airy plasticine that can be used in crafts for younger children. But domestically produced plasticine makes the figures stronger and more durable. Therefore, we will make a military aircraft from it.
In order to obtain military coloring and smooth transitions at the borders of colors, you need to roll up thin flagella of blue, green and yellow. Then wrap it around the finished part, knead and roll until the desired effect is obtained.
We sculpt the fuselage, wings, propellers and cockpit separately. Afterwards we simply connect the parts together.
By analogy, you can make a fighter like this:
Or a military plane with shells
But children in kindergarten make such crafts.
You can make a plasticine applique as a gift.
Or make the fuselage from a pine cone or an Activia bottle.
If the kids really like helicopters, then offer to make such an aircraft from light plasticine as a gift for dad
And the latest model of an excellent aircraft.
How to make a tank from plasticine
Sculpting a tank from plasticine is very interesting and entertaining. And how much pride increases when the powerful Soviet T-34 tank appears in your hands. What about the guys when they can make such serious equipment themselves? Now we'll look at a few things that will make the tracks and wheels look like the real thing.
First of all, knead the plasticine well so that it becomes softer and more flexible. If you want to achieve a protective color, then we use the same technique as with the plane above. Knead light brown and dark green colors and lightly mix with the main color until we achieve a smooth transition.
First of all, we form the body of the tank. We will proceed from its size with other details so that the proportions are respected. We also immediately make the tank’s turret, slightly narrowing at the front.
Next, we roll 4 small balls, which will later take the place of the running wheels, and ten large ones.
The next step is to flatten all the balls to make wheels 0.5 millimeters thick. In order to make supporting knitting needles and screws from the side, you can either use the edge of a plasticine knife to make cuts from the center or push it with the tip, applying the knife sideways. In the photo you will see different options.
Let's make a caterpillar belt. To do this, we roll out a long strip of black plasticine and make notches at equal distances to simulate the fastening of the track parts. Now we distribute the wheels: two small ones at the edges and five large ones in the middle. Our tank must be powerful and passable! We go around them with a caterpillar belt and repeat all the same steps for the second chassis.
Next we connect it to the body. You can simply press it, but if there are doubts that the structure will withstand further pressure from hands, then insert toothpicks or matches into the body on the sides and fasten the wheels to the protruding tip.
We will make protective tank wings from thin strips to prevent dirt from getting into the tracks. And of course the gun. A simple wooden skewer is suitable for this. Cut it to the required length and coat the entire surface with plasticine. Then we install it in its place and our tank is ready for battle.
Here is another master class in pictures on how to make a tank from plasticine. We make the wheels in the same way as in the first option. Also the caterpillar belt.
We use a cast assembly with an elevation. This will be our KV series tank. His tower is high. We make protective equipment from a contrasting color.
Basic rules for choosing gifts
Whatever gift options are chosen, you need to take into account a number of important rules, these are:
- Versatility . Ideally, the gift should appeal to all children in the group. It must be said that choosing a universal option is quite difficult, and if the children themselves are quite loyal and, as a rule, sincerely happy with any gifts, then it is much more difficult to please their parents. Therefore, it is best to discuss the choice with all parents in the group. Now this is much easier to do; you don’t even need to hold a meeting; the parent committee can create a group on social networks. If it is not possible to reach a consensus, then the opinion of the majority must be taken into account.
- Uniformity . Immediately give up the idea of buying different gifts for your children. Children are still too young, and if you give them different things, then offense will not be avoided. Someone will definitely think that Sasha or Pasha has a better gift, and this will cause tears or even aggression. Therefore, the ideal option is identical gifts.
- Low price . The financial situation of parents in the group may vary. Someone can easily shell out 5,000 for a gift, but for others, even an amount of 200 rubles may seem excessive. Therefore, general gifts must be budget-friendly, and parents will give expensive gifts to their child themselves.
- Focus on development . It is advisable to give preference to educational toys and sets; they will bring more benefits than a set of sweets. But this rule is not necessary to follow; if parents decide to give a sweet gift, then there will be nothing wrong with it.
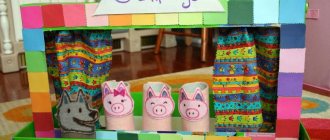
Crafts from matchboxes for February 23rd for children
Matchboxes are a very versatile material. Thanks to their dense construction, they can be used to build incredible structures. And it is from them that we will also collect crafts for February 23rd. Trucks, planes and tanks - matchboxes can do it all.
DIY matchbox tank
Tanks made from matchboxes are very often used in crafts. Let's see how they can be made with one or more boxes.
This option is suitable for the little ones. We remove and put the matches out of sight. We wrap the empty box in green paper and make a tower out of plasticine. A simple cocktail tube can serve as a great cannon.
But this tank is more complicated. You can watch this craft in the video below, but I separately showed how to make the tank itself.
The case consists of two boxes of matches. We measure the required size of paper and wrap the boxes, after gluing them together.
We make a tower from one box, also wrapped in paper.
Cut off the excess and glue on each side
A cannon can be made from a match and painted green. Or use a toothpick, removing the sharp edge. This is a safer option for children.
Now we connect it to the body with glue
For a caterpillar track, the ideal option would be cardboard, where it contains corrugation in the middle for rigidity. To release it, remove the top part of the paper.
Cut a thin strip and paste it on the sides of the tank. You can complement the wheels themselves with black paper or plasticine if desired.
The same master class is already in the video, which shows in detail the steps of making a panel as a substrate for a tank. I created such a craft when I was still in primary school.
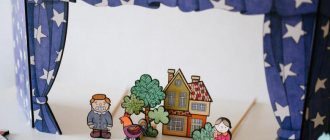
Crafts for February 23 in elementary school with templates
In elementary school from 1st grade to 4th grade, children really love the technology lesson. Previously, this subject was simply called labor. It really is a lot of work to make something with your own hands. And there is a special responsibility when a gift is created. For convenience, the crafts presented here are prepared with templates that you can prepare in advance for the lesson.
Shall we make a cap out of cardboard?
For the craft we will need:
- Colored cardboard
- Glue
- Scissors
Cut out parts from colored cardboard. At first I cut out blue stripes exactly without teeth, like on a visor, so I had to additionally make more tooth strips from white paper to connect the parts. You can immediately cut with them on the first two parts.
The size was based on the head of my nine-year-old daughter. But as it turned out later, our dad showed off perfectly in this cap too. Relative to the A4 sheet, the length of each strip (the side of the cap) was 29.7 centimeters. This also includes allowances for gluing.
So, glue the cardboard to make a circle. Try it on again to see if the cap is too big if it is for a child. If you are making it for dad, then glue it to a minimum at the joints.
As I said above, I didn’t immediately cut it with teeth. I had to supplement it with paper, otherwise there would be nothing to attach the top part to.
We coat all the folds with glue and firmly attach the band to the cut out bottom.
It's the visor's turn. It's easier with this. Here you can immediately glue it to the band.
We bend each clove and wait for the glue to set.
Hurray, hurray, hurray! Our next gift for February 23rd has been completed.
The schemes for the forage are as follows. The band, i.e. the side part. The option with teeth is more convenient
Donyshko. If the cardboard format is A 4, set the compass across the entire width of the sheet, and then add a little from the long edges, making a small oval.
The visor itself. Don't forget about the fastening teeth. Just draw them yourself
And the stars. You can hold a thin sheet of white paper to the computer screen and convert it to the format you need.
The cap can also be made flat on a postcard, supplemented with leaves using the quilling technique.
We made a cap. But there is also a cap that can be made for both the child and the father. Folding it out of paper is as easy as shelling pears.
With these sheet sizes, you can determine the headdress for both a child and an adult.
Following the diagram, fold a sheet of paper.