Materials for work
Are you ready to create? Then it's time to stock up:
- Album sheets,
- Eraser
- Pencils (plain and colored),
- And also with colored pens.
Creating a sketch of a fashion product:
- Draw graceful hangers for clothes. This is where your creation will hang.
- First make sketches with a simple pencil, and after that trace the contours with a black pen.
- Please note that as the hanger transitions into the hook, the lines become thicker.
Knitted products
For needlewomen who know how to work with knitting needles or crochet, it will not be difficult to make an outfit for a doll. For a dress, choose delicate yarn or opt for bright colors.
It all depends on the materials available and the wishes of the girl. Knitting a dress is easy. To do this, use standard patterns for dolls or make them yourself.
Dress picture
Now draw the dress from top to bottom. There is a cutout in the center just below the hangers, the straps go up, and behind the cutout draw the fabric covering the back.
This will make the image more voluminous. Taper the dress towards the waist.
Winx paper dolls with clothes for cutting out: stencil for printing
- The cartoon characters Winx Dolls, who embodied the image of fairy girls saving the world from dark forces, quickly gained popularity among young viewers.
- Tall, long-legged with thick and lush hair - these dolls have become the embodiment of not only beauty, but also courage, because these girls resist the witchcraft of strong and dangerous enemies.
- And only bright wings remind of their true purpose for girls - to build a personal life and win their place in the sun in a fairy-tale land.
- Unusual Winx girls have unusual clothing items. That is why it is so interesting to experiment and come up with new magical images for them.
Winx doll and clothing templates for cutting:
Winx paper dolls for cutting
How to draw a skirt
Now move on to drawing the hem of the dress. You can depict a lush hem, shaped like a bell. The hem will end with a wavy line - this will make the dress seem even more magnificent.
Draw some waves more voluminously by drawing the back side of the fabric. Draw folds from the waistline to the middle of the hem.
The stripes will go towards the bottom, only they will be oriented to the waves of the lower edge of the dress. You can draw a couple of additional folds where you want to give more volume and realism to the image.
Learn to draw an evening dress
This master class is for beginners, so creating a dress is not particularly difficult.
Let's look at the stages of drawing an evening dress:
- It is worth starting from the image of the stamp for placing the outfit. We are talking about a hanger with a small thickening in the middle part. A pencil is used for the sketch, the contours are drawn with a pen. A hook is created in the middle.
- Straps and an elegant bodice are drawn on both sides for a beautiful figure. The back is indicated by curved lines.
- Create a waist. Two strokes are added, they taper closer to the belt line.
- An oval is drawn in the waist area to create a ballroom skirt in a shape similar to a bell.
- To highlight the beauty of the dress, you need to add a curved line. The inner side is marked and beautiful folds are drawn.
- The sketch is ready. You can paint over an evening outfit for a chic girl. At the final stage, it is allowed to add beads, belts and other decorative elements, depending on the author’s imagination.
Now it’s clear to us how easy it is to draw a chic evening dress with your child. This option will help you have a great time doing an interesting activity.
Convert an image to color
- Take a colored pen (for example, purple) and carefully trace the pencil outlines.
- Use colored pencils to color the dress. Use a pink pencil to color the bodice, applying less pressure to the pencil when painting areas on the chest.
- Do not paint the hem completely, make vertical strokes following the lines of the folds.
- Using a lilac pencil, trace the contours of the skirt again, including all the folds, color the back side of the back, which peeks out above the neckline.
- Move on to the decor of the product. A purple pen is perfect for this; draw graceful beads on the dress.
- So, the beautiful ball gown is ready!
Now you know how to draw a dress with a pencil; using the same principle, you can gradually draw a dress of any style, color, for any event.
Simple outfits
It’s easy to make light dresses for dolls with your own hands. All you need to do is sew two rectangular pieces of knitwear, and an elegant, fitted outfit is ready. A fluffy skirt can be achieved if the fabric is gathered a little and carefully sewn to the bodice.
If you need an outfit urgently, you can make a simple dress without needle and thread. To do this you will need stretch fabric that stretches well. It is better to choose materials whose edges do not crumble.
Cut a piece of fabric of the required size. Then you need to put the doll on it and mark the armholes. Holes are cut in these places. The outfit is completed with a matching belt.
Instructions for children
Your child will probably be interested in such leisure activities as drawing a beautiful dress like a princess. In addition, this will make all other drawings where you need to come up with wardrobe elements even more original and lively.
After studying the step-by-step instructions for children, you will learn how to create interesting pictures step by step with a pencil together with your child, how to beautifully draw a dress like a princess, and most importantly, how to draw it simply, spending a minimum amount of time.
Patterns
You can find ready-made options, but it’s better to do it yourself. It's easy to create a template for a doll. With its help you can develop any style.
Do-it-yourself dress patterns for dolls will help you quickly complete the task. For the template you need to take measurements. Then you should draw the main pattern. Based on it, different models are created.
Drawing technique
- Outline the contours of the future product. The triangle is the future skirt, and the rectangle, slightly expanding upward, is an element of the jacket.
- Now you can start drawing out the details of the dress.
- Draw the sleeves in the form of a pair of circles on both sides of the rectangle, draw the folds in the form of waves along the lower edge of the triangle.
- Complete them with lines, and also add a collar for beauty; you can’t do without the image of a beautiful strap.
- Draw the sleeves in more detail, giving them shape and making them pleated.
Additional lines that were necessary to build the composition can be removed with an eraser.
You can depict the character himself by completing the head, arms and legs. Now color the image - you can use colored pencils, pens, and felt-tip pens for this. Your masterpiece is ready! Now the young artist can create his own collection of dresses.
Bride's outfit
A wedding dress for a doll is a little princess's dream. It will require white satin or crepe satin. Puffed sleeves will complement the dress.
White tulle is used not only for a headdress, it will add fluffiness to a skirt. The lower part of the outfit is embroidered with beads and delicate lace is added.
The top of the dress can consist of three parts; bright ribbons are used as straps. With the help of tulle they create a chic frame. To do this, it is folded several times and attached to the neck in several places.
Even more interesting ideas
- First of all, sketch out the blank with a pencil.
- From below it should be triangular in shape, and at the top it will turn into a rectangle.
- Between them, mark the curves - this is the waist. Divide the top of the dress with lines running vertically - there should be three of them.
- This way you will indicate the future folds of the dress.
- Give the contours of the dress irregularities, erase the pencil in the waist area on the left side in order to later place a bow there.
- Now decorate the dress with a beautiful belt with a bow. Draw long tails at the bow, and also add folds to the dress.
- Complete the body; you don’t have to draw all the lines, but do it in the form of a sketch.
- Choose what color your creation will be and then add color. So, the fashionable dress is ready!
“An elegant dress for Katya’s doll” NOD in the first junior group
Berlina Svetlana Pavlovna,
teacher of the highest qualification category
MAU DO "Sorokinsky Child Development Center - Kindergarten No. 1"
Summary of GCD using non-traditional drawing techniques in the first junior group “Elegant dress for Katya’s doll”
Goal: Development of artistic and creative abilities of children through the use of non-traditional drawing techniques.
- learn to make a pattern by placing round and straight lines, dots on the silhouette;
— continue to introduce children to an unconventional method of drawing (with cotton swabs);
- consolidate knowledge of primary colors (red, green, yellow).
- develop fine motor skills, attention, creativity.
— to cultivate interest in drawing, accuracy, and friendly relations with each other.
Materials: Katya doll , samples of elegant dresses dress silhouette , gouache, cotton swabs, a jar of water, a napkin for each child, a recording of the song “Doll” (music by M. Krasev)
Integration of areas: artistic creativity, cognition, socialization, communication, music.
Progress of educational activities
Educator: Hello, guys, I’m very glad to see you, let’s stand in a circle, smile and say hello to our guests.
Children stand in a circle and say the words with the teacher:
Clap-clap-clap! (clap) Hello, legs, stomp, stomp, stomp! (stomp) Hello, cheeks, (stroke your cheeks) Plop-plop-plop! (slap yourself on the cheeks) Chubby cheeks, (stroke your cheeks again) Plop-plop-plop! (slap yourself on the cheeks) Hello, lips, Smack-smack-smack! (or smack your lips rhythmically three times) Hello, teeth, Click-click-click! (or click your teeth rhythmically three times) Hello, my little nose, (touch the tip of your nose) Beep-beep-beep! (press your nose three times) Hello, guests! (stretch your arms forward) Hello! (wave hand above head)
Educator : Now come to me and show me your eyes, how smart and beautiful they are.
Educator : Children, look out the window, who is it looking out from behind the clouds and looking into our window? That's right, it's the sun. It has woken up and is looking into our window. Let's make a big circle, and this will be our beautiful sun.
Our sun woke up, and all our children woke up and stretched sweetly.
The sun is shining from the sky,
Yes, so pure, clear, radiant.
If we could get him,
We would kiss him!
Educator : Children, show me how big you have grown? (Children rise on their toes and stretch.) Now show me how little you were.
From toes to crown.
We will stretch, we will stretch.
We won't stay small.
Educator : Guys, I see you are tired. Let's sit down on the carpet and rest a little.
(There's a knock on the door)
Educator : Someone is knocking on our door, do you hear? I'll go and have a look. The doll Katya came to visit us . Hello, Katya! Children, say hello to the doll Katya.
She came to us in a smart dress,
Katya doll with a white bow !
Play with us together
Dance with us!
Educator : Look how beautiful Katya is. What kind of eyes does the doll have? Tell me, Polya. That's right, the doll has blue eyes. What color are the sponges? (red). Masha, what is the doll wearing? That's right, in a green dress. What's on the doll's legs? That's right, white shoes.
Educator : So we met. Children, Katya came to us for help. Katya is going to a party, but she doesn’t have a beautiful dress. - What to do? How to help? Children's answers. Let's draw her a beautiful dress. Educator: Children, go to the tables and sit down.
Educator: Look how I decorated the dress for Katya (there are multi-colored circles and dots all over the dress, and multi-colored stripes on the sleeves).
Educator: Guys, look, you have white dresses on the table that you will decorate. What do you think you can use to draw with? (children's answers)
Educator: Well done, that's right, but there are no brushes, today we will paint with cotton swabs. There is paint in sockets on your tables. What color is the paint? (Red, yellow, green). Now I will show you how we will draw.
Fashionable long dress
- Draw a triangular shape cutout. From it, draw lines outward and then down. Use one cut line to overlap the other.
- Draw a belt at the waist and draw vertical lines down from both sides of it, slightly expanding the dome of the hem downwards.
- Draw a curved wavy line along the bottom edge of the skirt. Draw folds on the dress - on the skirt, and also above the smaller belt.
- Now you can start coloring your image. Take colored pencils and apply shading, emphasizing the folds.
- To do this, follow the hatching along them. If you wish, you can also draw the outlines with colored pens and markers.
The depiction of dresses perfectly develops taste and imagination, and it is also a very fun activity in which children can be involved. Moreover, you can design dresses in order to sew them later!
Then you will get an exclusive item, and your image will definitely be appreciated. You can also use ready-made paintings as a decorative element - it will look very stylish and modern.
Don’t be afraid to experiment, and then each of your work will be more original than the previous one.
Dress. Coloring by contour lines
Little girls love to play with their favorite dolls, dress them up beautifully, and some of them make their own clothes from different materials. One of the popular pastimes for girls is to draw dresses on paper, carefully cut out and dress up paper princesses. But it will be difficult for a little girl of 3-4 years of age to draw a beautiful dress on her own, and therefore we have placed on this page outline drawings of different dresses for coloring, which can be printed on paper. What tools are most suitable for coloring pictures? It is not advisable to choose felt-tip pens for coloring books, even special ones for children and safe for children. The fact is that in the process of coloring, hand motor skills improve, basic reading and writing skills are laid, and in the future it will be much easier for the child to learn the letters of the alphabet.
And with felt-tip pens, drawing is easy and simple; the child spends virtually no effort, which is useful for the development of sensory abilities. As the very first tool, we recommend choosing a brush for painting with children's gouache (rather than watercolor) paints. And when walking with your girl, be sure to take a few colored crayons with you. Already at 3 years old, a girl can easily learn to hold a pencil with her fingers correctly. But at this age, offer your child the simplest large-sized pictures without detail for coloring. Over time, you can teach your child to paint over areas of the drawing by numbers, so that the child quickly remembers the names of colors from the palette. At 4 years old, a girl can easily paint over a dress shown on a piece of paper. Offer your child different options with outline drawings of dresses for coloring, which are located below. You can expand the images of the dresses by following the links and print them on paper of any size. Choose high-quality children's pencils for coloring pictures. Such instruments are made of soft wood, are easy to sharpen, and the lead does not crumble much and does not break quickly. The shape of colored pencils can also be different. For a small child, it is not advisable to buy pencils that are cylindrical or have a lot of sharp edges. Such instruments will not be comfortable for a child to hold in his hand. The best option for coloring is a pencil with 3 edges, which the baby can hold correctly with the thumb, middle and index fingers. IMPORTANT ! How to teach a child to carefully color outline pictures? One of the important tasks of parents is to teach their child to color pictures without going beyond the outline. There are a huge number of different techniques with which you can teach children to carefully paint over contour drawings. But we want to offer you a very simple and effective way that will allow your child to “feel” the boundaries of the area being painted. So, for this method we will need an unnecessary gel pen and toothpaste. We unscrew the lower part of the handle and insert it into the neck of the tube with paste, fix it with tape. Now take the outline drawing and trace it with a thick line along the contour, evenly squeezing the paste out of the tube. After some time, the toothpaste will dry and the contour line will be hard and clearly visible to the touch. Let the baby run his finger along the contour line and feel the border of the drawing. Now help your child paint over the picture with gouache, without going beyond the volumetric boundaries of the contour (slightly guide the child’s hand with the brush, holding it with your hand). DRESSES. OUTLINE DRAWINGS FOR COLORING WITH COLOR PENCIL OR PAINT ► Click on the link from the list (below) and expand the picture for coloring. ► Click the right mouse button and select from the list: Copy or Print.
OPTION #1: ♦
. OPTION #2: ♦
. OPTION #3: ♦
. OPTION #4: ♦ . OPTION #5: ♦
. OPTION #6: ♦ . OPTION #7: ♦
. OPTION #8: ♦ . OPTION No. 9: ♦ . OPTION #10: ♦ . OPTION No. 11: ♦ . OPTION #12: ♦
. Dear Parents ! Please send us photos of drawings of dresses painted by your daughter! We will definitely publish all children's works on this page. Our email: This e-mail address is being protected from spambots. You need JavaScript enabled to view it
to Home Page
ALSO FIND OUT...
| Comments | Add new | Search |
| Polina - interesting | |2016-04-17 18:46:01 |
3.26 Copyright (C) 2008 Compojoom.com / Copyright (C) 2007 Alain Georgette / Copyright (C) 2006 Frantisek Hliva. All rights reserved."
Related materials:
- My little daughters are 5 years old and I love experimenting with different options for styling braids, twists and curls on their long hair...
">Easy hairstyles for kindergarten for girls 3-5 years old
- A properly executed hairstyle for competitive ballroom dancing is an important element of the aesthetic appearance and unconditionally adds charm to the stage…
">Ballroom and ballroom-sports hairstyles for girls 10-14 years old
- When a girl gets ready for school early in the morning, she is faced with the task of choosing a suitable hairstyle that can be done quickly enough before going out...
“>How to quickly create a beautiful hairstyle for a schoolgirl
- Are you the mother of a beautiful baby aged from one year to seven years? Then you know very well how difficult it is to come up with beautiful hairstyles for…
">How to make a child's hairstyle for a girl from ponytails and braids
- Today in the world of beauty and fashion we can easily find many interesting ideas with original women's and children's hairstyles to choose the perfect one…
“>Learning how to do a beautiful hairstyle for your daughter with your own hands
The following materials:
- Flower coloring pages for girls It’s no secret that for the full and comprehensive development of a small child in preschool age, it is important to organize…
“>Flowers for girls. Pictures for coloring
Previous materials:
- Drawn kitten. Coloring an outline drawingColoring outline drawings with paints or colored pencils is fun and useful for...
">Coloring book. Kitten made from contour lines
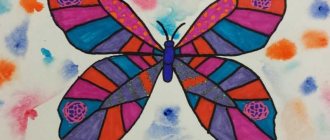
- Children's coloring book. Butterfly in pictures - 12 different options At what age will a child be interested in drawing and how to help your child learn...
“>Coloring children's pictures. Butterflies
- Animals in the pictures for coloring: hare, wolf, fox, bear. Children love to color pictures in different colors and are happy to fill in the blanks...
">Pictures with different animals for coloring pages
- Pictures for coloring from the film “Masha and the Bear” From birth, a child plunges into the world of bright colors. An incredible variety of colors with a huge…
">Masha and the Bear. Pictures for coloring
- Coloring book for girls 5 years old. How to paint by numbers Educational activities with children are the cornerstone in the formation of physical, emotional and…
«>Coloring by numbers for girls
- Children's coloring books for girls (4 years old) Preschool children enjoy plunging into the world of educational games and “under the strict guidance” of adults...
">Coloring pages for little ones
- Coloring pages for girls. Disney Princesses Which coloring pictures are the most popular among girls this year? Our website bebi.lv has compiled its…
“>Disney princesses. Pictures for coloring
- Classes with a 3 year old girl. Coloring pages of simple children's pictures All girls of preschool and primary school age simply love to draw and color...
“>Learning to color pictures at 3 years old
- Coloring pages. Print simple pictures for 3-year-old girls. Your baby has long ago learned to walk independently with small legs, with pleasure...
">Easy coloring pages. Options for little girls
- Print high-quality pictures for coloring. Barbie for girls It's no secret that drawing and coloring pictures of your loved ones...
">Barbie dolls from the cartoon. Color the pictures
- Little ponies. Print out pictures for coloring for free1. FRIENDSHIP IS THE MIRACLE ! THE AMAZING ADVENTURES OF LITTLE PONY IN EQUESTRIA This year is the most...
">Friendship is a miracle. Little ponies in pictures for coloring
- Free monster high coloring pages (download and print) HOW TO BEAUTIFULLY COLOR PICTURES FROM THE POPULAR ANIMATION SERIES FOR GIRLS “MONSTER SCHOOL” (MONST…
“>School of Monsters. Pictures for girls
- Coloring pages for girls. Winx fairies The world of coloring books opens up for a child from early childhood, when the little one has barely learned to pronounce the first words...
">Pictures from the Winx series for coloring pages
| Answer |
Photo of the dress drawing
Modern paper dolls girls with clothes for cutting out
- Paper dolls with clothes to cut out can be very different. There are even animals for which you can choose a set of necessary things. But the traditional and favorite toy is an ordinary beautiful paper doll-girl.
- It is easy for a young housewife to imagine and draw a wardrobe for such a doll, creating different images. This doll is elegant and cute, but, unfortunately, it is not durable. The white flaps on the clothes, which are used to attach them to the doll’s body, can also come off.
- Therefore, it will be difficult for a very little girl to play with a doll cut out of paper, because it cannot be seated, bought or fed.
- No matter how diverse the world of toys is, girls’ interest in the game “Dress up a paper doll” with sets of paper suits, dresses, and shoes will not wane. And if their mothers had to be content with that paper doll for cutting out that was printed in the magazine, today you can download a doll for every taste, and the girl next door certainly won’t have one!
Templates of modern girls dolls and clothes for cutting:
Paper dolls for cutting
Gothic paper doll with clothes to cut out
How to beautifully design fake ballerinas?
The small figurine of the dancer looks beautiful even when alone. But you can make several figures and hang them on a homemade mobile. Its frame is made from thin sticks or wire, tying the first one in the middle. 2 threads are suspended from its ends, each carrying its own yoke. If necessary, you can increase the number of tiers.
After hanging the frame of the mobile, start attaching the ballerinas to it:
- on the free ends of the crossbars;
- to the centers of those carrying the next tiers.
You can make crafts with ballerinas in another way.
Dancing ballerinas
This is a design option for figurines in organza tutus. A thin fishing line is tied to the hand or head of the figure. After this, several figures can be easily hung from the chandelier horns or the cornice above the heating radiator. Air currents will slowly rotate the figures, giving them a resemblance to girls dancing on stage.
The dance can be done in pairs. Take a suitable sheet of paper and fold it in half. Select a template with your hand extended forward and trace it with a pencil so that your fingers fall exactly on the fold. Cut and unfold, put tutus or snowflakes on the girls. So that ballerinas can spin, and the complex figure does not sag, they make a rocker from a thin stick. Its length is equal to the distance between the points at which both templates will be suspended. If everyone has their own hanger, the product will retain its shape.
The stick is hung from the center, like a part of a mobile.
View this post on Instagram
Posted by svetlana kosolapova (@sveta_k2309) Nov 24, 2022 at 5:04 PST
View this post on Instagram
Posted by Floral Decor Workshop (@kvitlina) Dec 14, 2017 at 5:43 PST
@anaisochka
Ballerinas in the form of snowflakes
You need to make a lot of small figures. For each template, put on a skirt made from a snowflake cut out of a napkin. For New Year's Eve, a window decoration made from thin threads or fishing lines suspended on a cornice is suitable. Ballerinas must be attached to them at different heights. You can glue several pieces onto one thread, and make the distance between adjacent threads so that the figures do not touch them.
When such a curtain rotates and sways against the background of dark windows, the effect of falling snowflakes is created.
And you can make an unusual ballerina from the Snow Queen’s retinue using a simple technique:
- Print or cut out your own openwork paper snowflake. Leave its central part intact. Place the product under a flat weight so that it straightens out on the folds.
- Prepare a ballerina figure template.
- Make a thin cut through the center of the flattened snowflake. The length of the cut is equal to the width of the ballerina's waist. Carefully folding the protruding parts, put the snowflake on the dancer.
Thin lace made from napkins looks beautiful. But you need to put on such a snowflake especially carefully.
@mrgt93 @art_tatti
@nastasya_nacta
@master_of_cakes
@5oclock_lipetsk
Garlands with snow ballerinas
For the garland you will need many small figurines with hands connected above the head. You can make both realistic and fictitious human figures. For festive decorations for the New Year, colored silhouettes in the same skirts are suitable. But white or silver figures on the same base also look beautiful.
To create a garland you need:
- figurines of dancers;
- a long strip of tinsel.
When the ballerinas' hands are connected above their heads, a small gap is created. You just need to thread tinsel into it, creating a corps de ballet from identical silhouettes. This garland is easy to hang on a wall or on a Christmas tree.
With a pack of organza
A ballerina's tutu can be made from thin translucent fabric (organza, taffeta, nylon tulle, ribbon for a baby bow, etc.). The figure looks beautiful in a multi-layered tight skirt. To prevent the fabric from sinking under its own weight, you can print a template with a short bundle: it will serve as a support and will be hidden under the fabric.
For a short tutu, it is better to cut out circles from the fabric and cut them in the center with an oval that is slightly larger than the ballerina’s waist. Using a thin thread, sew the skirts along the contour of the oval (it is best to use a seam over the edge). Place the blank on the figurine, carefully pull the thread and tie it. Hide the ends.
A long airy skirt is made from a pattern in the form of a ribbon or semicircle.
It will not puff up, but forms beautiful folds when pulled together. @_handmade_in_ua
@shtoryvpenze @annahim_83