Card index of methods of unconventional drawing in preschool educational institutions
Advanced training course for 340 rubles!
Emotional burnout of teachers. Prevention and ways to overcome
Card index of non-traditional drawing techniques
The material was prepared by the teacher of MBDOU “Kindergarten No. 95” Valentina Sergeevna Karyagina
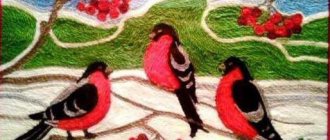
(painting with a hard semi-dry brush)
Sometimes, when drawing animals, we paint over their fur with one solid color. The coat is smooth and sleek. How can you convey the fluffiness of an animal’s fur or the volume of a surface? There are several ways to do this. One of them is using pokes with a hard brush. Particular fluffiness or prickliness is achieved only when using a completely dry brush with a small amount of paint. Therefore, it is very important that the child applies gouache only to the tip of the pile and begins to draw from left to right, leaving no gaps.
Materials: Landscape sheet of paper, simple pencil, gouache, hard and soft brushes, a jar of water, a rag.
1.Draw a contour image of the animal with a simple pencil (for older children, you don’t need to outline the contours of the animals).
2.On a dry, hard brush, pick up just a little gouache of the desired color and, holding the brush vertically (the brush taps with the “heel”), make “poke” marks on top, placing them inside and along the edges of the animal’s silhouette.
3. When the paint dries, use the tip of a soft brush to paint the animal’s eyes, nose, mouth, mustache and other characteristic details.
Options for work: with a poke of a hard semi-dry brush you can paint a kitten, a dog, a sheep, a goat, a hedgehog, a lion's mane, a snowman, snow, a Christmas tree, a pine tree, a forest, the sun, flowers (dandelions, sunflowers) and much more.
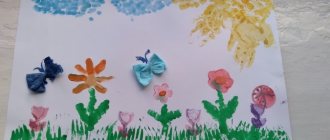
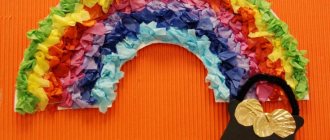
One of the very first tools with which you can create bright and original masterpieces is children's palms. Slap, and the print is ready! Now let’s look at what the trace left on the paper reminds us of? Add a few strokes and the handprint becomes an octopus, polar bear or hedgehog. Children love such exciting transformations. After all, palms familiar to a child can be transformed into completely recognizable objects.
For this lesson you will need: a landscape sheet or colored paper of any color; wide bowls (you can use disposable plates) with gouache or finger paints diluted with water; gouache; thin and wide brush; a bowl of water to wash your hands; cloth
1. At the beginning of the lesson, train your child to make a print with a dry palm.
2. There are two ways to put paint on your palm: a child dips his entire palm into a bowl of gouache, or an adult applies a layer of paint directly to the baby’s palm with a wide brush.
3. The child makes a print with the inside of his outstretched palm on the paper. If according to the plan you need your fingers to look down, turn the sheet of paper with the finished print upside down.
4. When the palm print on the paper is dry, we bring it to the desired image.
Little tricks: From palm prints you can get a swan, goose, dove, bird, hedgehog, elephant, pig, lamb, polar bear, octopus, tree, flower, maple leaf, etc. If you put your thumbs together and make an imprint of two palms at once, you get a crab or a butterfly. You can make prints with the back of your fingers (a seahorse), your thumb (the body of a fish, crab, or spider), or the side of your fist (a human footprint).
Required materials and tools:
Drawing paper, palette, watercolor paints, hand rag, brush, black pencil, newspaper.
“Rainbow Fish”. Dip the pad of your thumb into paint of different colors prepared on the palette. Let's make a print. Use the tip of your finger to draw a ponytail. We print the eye with the blunt end of a pencil, dipping it into black paint.
" Flower". We print the petals with our index finger and the middle with our little finger.
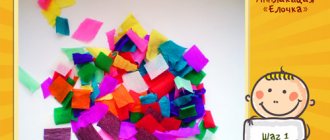
Imprint with crumpled paper
Means of expression: stain, texture, color.
Materials: saucer or plastic box containing a stamp pad made of thin foam rubber impregnated with gouache, thick paper of any color and size, crumpled paper.
Method of obtaining an image: a child presses crumpled paper onto a stamp pad with paint and makes an impression on the paper. To get a different color, both the saucer and the crumpled paper are changed.
Work options: fireworks, hedgehog, bear
Means of expression: color, line, spot, texture.
Materials: candle, thick paper, watercolor, brushes.
Method of obtaining an image: a child draws on paper with a candle. Then he paints the sheet with watercolors in one or more colors. The candle pattern remains white.
Options for work: snowman, footprints in the snow, clearing the path to the house, snowfall.
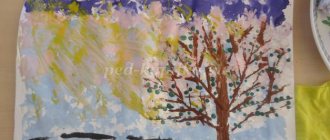
Means of expression: texture, color.
Materials: paper, gouache, leaves of various trees (preferably fallen ones), brushes.
Method of obtaining an image: the child covers a piece of wood with paints of different colors, then applies it with the painted side to the paper to make a print. Each time a new leaf is taken. The petioles of the leaves can be painted on with a brush.
Conducting a series of classes using a variety of techniques to identify children’s abilities over the course of time, it is clear that children have the ability to work with paints using non-traditional techniques. In children with poorly developed artistic and creative abilities, the indicators are slightly higher than at the beginning of the school year, but due to the use of non-traditional materials, the level of enthusiasm for the topic and technique and the ability to perceive color have improved.
Imprint with foam rubber (foam plastic
)
Means of expression: stain, texture, color.
Materials: a bowl or plastic box containing a stamp pad made of thin foam rubber impregnated with gouache, thick paper of any color and size, pieces of foam rubber.
Method of obtaining an image: the child presses the foam rubber onto a stamp pad with paint and makes an impression on the paper. To change the color, use another bowl and foam rubber.
Drawing with signets made from raw vegetables.
Material for work. Paper of any color and size, gouache, stamps made from raw vegetables, palette, napkin, brush, water.
Method of obtaining an image. Cut the vegetables lengthwise or crosswise, cover them with gouache, then place the painted side on a sheet of paper, press and remove, resulting in a neat color print.
This is a simple but amazing technique of painting with paints (watercolor, gouache, etc.). It consists in the fact that a design is drawn on one side of the surface and imprinted on the other. 1. Fold a sheet of paper in half and unfold it.
2. On one half of the sheet, draw half of the depicted object and again fold the sheet of paper to make a print.
3. Add details to the resulting image, if necessary.
The method is to teach children how to make blots (black and multi-colored). Then the child can look at them and see images, objects or individual details. “What does your or my blot look like?”, “Who or what does it remind you of?” – these questions are very useful, because... develop thinking and imagination. After this, without forcing the child, but by showing him, you can move on to the next stage - tracing or finishing the blots. The result can be a whole plot.
Parents learn with their children
✆ from 8:30 to 20:00
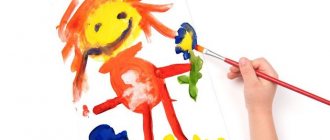
Every child, learning about the world around him, tries to reflect it in his activities: in play, in stories, in drawing, in modeling, etc. Fine creative activities provide excellent opportunities in this regard. The more diverse the conditions conducive to the formation of a creative environment, the brighter the child’s artistic abilities will manifest themselves.
Drawing with non-traditional techniques opens up wide scope for children's imagination, gives the child the opportunity to get carried away by creativity, develop imagination, show independence and initiative, and express his individuality.
Unconventional painting techniques are a wonderful way to create small masterpieces. It turns out that you can create a salty picture, and your palm can turn into a blue elephant. A gray blot can become a tree, and carrots and potatoes can surprise you with unusual patterns.
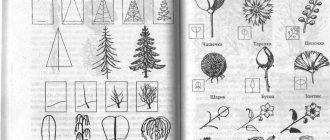
For example, with children of primary preschool age you can use:
— finger painting — palm painting — thread printing — potato or carrot printing.
With children of middle preschool age you can try:
— picture prints — plasticine printing — oil pastels + watercolors — leaf prints — palm drawings — drawing with cotton swabs — magic threads — monotype.
And with children of older preschool age, you can master more complex techniques:
- drawing with soap bubbles - drawing with crumpled paper - drawing with salt - blotography - plasticineography - grattage - frottage.
Each of these unconventional techniques is a little game for a child. Using these techniques allows children to feel more relaxed, bolder, and more spontaneous. These techniques develop imagination and give complete freedom for self-expression.
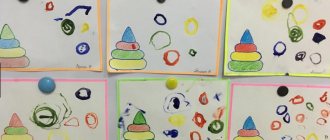
DRAWING WITH FUN PRINTS
1. Plasticine stamps
It is very simple and convenient to make stamps from plasticine. It is enough to give a piece of plasticine the desired shape, decorate it with patterns (lines, spots) and paint it in the required color. For painting, you can use a sponge moistened with paint, or a brush that can be used to apply paint to the surface of the stamp. It is better to use thick paint.
Materials: 1. Plasticine 2. Pencil 3. Paint 4. Sponge 5. Brush 6. Paper 7. Water jar
2. Thread stamps
To create “striped stamps” you can use threads tightly wound around an object. Using a thick layer of paint, the threads are painted in the required color. Then, using imagination, the “striped pattern” is applied to the surface to be decorated.
Materials: 1.Wool thread 2.Base 3.Paint 4.Brush 5.Paper 6.Jar for water
3. Picture-prints You can make prints using foam forms, on which it is convenient to create a drawing with a pointed object, leaving indentations in this form. Then you need to apply paint to the form. A sheet of paper is immediately placed on top of the form and ironed. After some time, you need to carefully remove the sheet of paper. A beautiful design will appear on its reverse side.
Materials: 1. Foam mold 2. Pencil 3. Paint 4. Brush 5. Paper 6. Water jar
4. Leaf prints This technique is familiar to many. To print a sheet, you can use any ink. Paint should be applied to the side with veins. Then the painted side of the sheet is applied to the paper and ironed. After a few seconds, you need to carefully lift the sheet. An imprint of the leaf will remain on the sheet of paper.
Materials: 1.Leaf 2.Paint 3.Brush 4.Paper 5.Jar for water
Easy and beautiful pictures for a sketchbook
A sketchbook is an album for sketches and sketches. Every self-respecting artist should have such an album. But even if you are just interested in drawing, then such an album is also a must.
In this album you can not only sketch something you like, but also make your own sketches under the influence of emotions.
Portraits are popular in such albums.
A simple drawing, for example, dandelions.
You can practice by drawing various talismans.
In addition to drawings, you can make logo pictures or sketches with text.
The sketchbook is thus a kind of artist’s portfolio.