Lesson summary on application for middle group children
Summary of a lesson on appliqué for children 4 – 5 years old “The Sun-Bell”
Author: Olga Eduardovna Pshenichnaya, senior teacher. Place of work: MDOBU No. 7 “Lastochka”, Prochnookopskaya village, Novokubansky district, Krasnodar region. Description of the material: I offer you a lesson summary on a spring theme.
The summary is designed for children aged 4 - 5 years. This material will be useful to kindergarten teachers, additional education teachers, as well as parents of preschool children. Summary of a lesson on application for children 4 - 5 years old “Sun-bell”
Purpose: To systematize children’s ideas about spring according to the main, essential features. Objectives: Educational:
- Teach children to roll napkin balls.
— Teach children to create a composition from different parts. Developmental:
- Develop speech, enrich vocabulary.
Educational:
- Cultivate interest in natural phenomena.
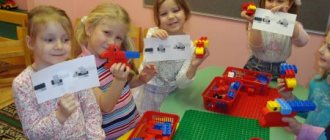
Handout: Blue cardboard 1/2 A4 with a drawn circle in the center of the sheet, halves of cotton swabs, the tips of which are painted yellow. Progress of the lesson: Educator: The days are fine, They look like holidays, And in the sky there is a warm sun, Cheerful and kind. All the rivers are overflowing, All the buds are opening, Winter has gone with the cold, The snowdrifts have become puddles. Having left the southern countries, the friendly birds returned. On each branch, starlings sit and clean their feathers. It's time for spring. It's time to bloom. And that means that all people are in a spring mood! The spring sun is very gentle. It warms up more than in winter. Educator: The sun is hot, bright, clear, spring, generous, clean, red, rising above a dense and dense forest, dark, shady, green, powerful. Educator: In what words does the poet describe the sun? Why do people say “red” about the sun? (Children's answers). Educator: Since ancient times, people have called all the most beautiful and kind things red. Let us make a beautiful portrait of our sun. The teacher distributes to the children material prepared in advance (cut cotton swabs, the tips of which are painted yellow, blue cardboard with a circle outline in the center of the sheet).
The teacher does the work together with the children, showing the children step-by-step implementation.
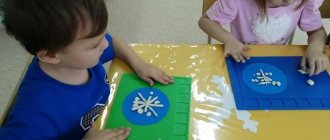
We tear the napkins into small pieces.
We roll the pieces of napkins into balls.
Apply PVA glue to part of the circle and glue napkin balls.
We also coat the remaining part of the circle with PVA glue and seal it with balls of napkins.
Glue the cotton swabs, starting with the long parts.
In the spaces between the long sticks we glue short sticks.
During the work process there is a dynamic pause. Educator: Coordination exercise “Sunshine”:
Sunshine, bell,
Children raise their arms above their heads.
You get up early,
they cross them.
Wake us up early.
They make rhythmic claps.
We have to run to the fields,
They run on the spot.
Let's welcome spring.
Stretch your arms forward to the sides.
What are you waiting for?
Don't wait, it's spring! They make rhythmic claps.
Come!
We need you! They walk in place. At the end of the work, the children take their work to the exhibition. Educator: There is a yellow circle in front of you, There are a lot of sticks around - This is the sun shining, Congratulations to the children on spring. Look how affectionately your suns look at you and smile cheerfully, wishing you a good, warm mood.
We recommend watching:
Summary of a lesson in the middle group on the works of Marshak Notes of the GCD in the middle group “Help the Cockerel” Summary of the GCD in the middle group on the topic: “Who lives in the little house?” Summary of a design lesson in the middle group "Tumbler"
Similar articles:
Math lesson “Rectangle” in the middle group of kindergarten
Pedagogical development
Author:
Olga Gennadievna Mitrofanova
Position:
teacher
Educational institution:
MBDOU "Kindergarten No. 256"
Settlement:
Barnaul city, Altai Territory
Name of material:
Summary of organized educational activities in the middle group "The Sun is Visiting"
Topic:
Summary of educational activities in the middle group " Visiting the Sun"
Date of publication:
09.12.2019
Section:
preschool education
Municipal budgetary preschool educational institution
"Kindergarten No. 256"
Summary of organized educational activities
"Visiting the Sun"
Age group:
average
Author, position:
Mitrofanova Olga Gennadievna, teacher
Summary of the final OOD in the middle group
"Visiting the Sun"
Target:
generalization and consolidation of children’s ideas received during
- create conditions for strengthening children’s ideas about the seasons,
parts of the day, wintering and migratory birds;
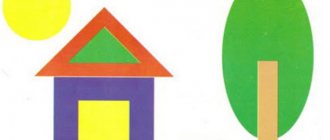
- promote the consolidation of ideas about geometric shapes;
- continue to encourage children to intonationally highlight the sound in a word and assign
this sound to the corresponding iconic image;
— contribute to the expansion and activation of children’s vocabulary.
- promote the development of visual attention, perception, speech hearing,
- create conditions for the development of the ability to generalize and draw conclusions.
contribute
FORMATION
in mutual understanding,
goodwill, independence, initiative;
- create conditions for stimulating creative imagination, accumulation
positive emotional experience.
depicts chickens, magpie, hare, duck and hedgehog); hats for children: snail,
magpie, hare, duck, hedgehog, month, sun; "garden"; ball; pictures “Wintering and
migratory birds"; cards with pictures of vegetables; cards with numbers;
"Creek"; "duck house"; geometric figures; "tree"; pictures in titles
which have the sounds “p” or “p”; starry sky and stars; "House of Sun";
pictures depicting the sun or clouds; musical accompaniment.
Preliminary work:
reading the fairy tale “Visiting the Sun”, talking about
seasons, a conversation about migratory and wintering birds, a conversation about vegetables and
Decorating the work
Ready-made compositions can be supplemented with decorative materials. Tasks can be different - in level of complexity, topic, scale and amount of materials. The broken applique in the older group will differ in execution from the younger one, so the process can be complicated.
To decorate their work, children can use a variety of available and purchased materials:
- shells, pebbles, pebbles (small);
- dried leaves and flowers;
- beads and seed beads, glass beads, small rhinestones (with precautions and under adult supervision);
- threads, ribbons, bows and wool;
- buttons, buttons;
- parts of old toys.
Children can frame the result of their efforts and present it to a competition or exhibition. But the main thing is that the kids enjoy the creative process. If the painting decorates the interior, the children will be very pleased.
Break appliqué technique
The essence of this type of creativity is visible in its name. The technique is very simple, even very young children can easily master it. The parts are not cut out, but rather torn off the sheet of paper. It is a great help that there is no need for scissors, although you can cut small strips from a large sheet and tear off pieces from them. So here's how it's done.
Option one. Suitable even for very small children. At the preparatory stage, the adult chooses a drawing - an outline, on the basis of which the craft will be made. You can draw it yourself or use templates from the Internet. The picture is applied to the background (cut and pasted). Note! Since there will be a lot of sticking on top, the thickness of the background must be significant, so we recommend choosing a dense base of a suitable color. Next, we connect the children. Choose the color of paper to fill the drawing. Then the child tears off pieces of arbitrary size from the desired sheet, as it turns out.
The next step is to fill the outline with pieces. Take a piece, smear it with glue (it’s more convenient to use glue - a pencil) and glue it to the base one to the other, gradually filling the space. When everything is filled in, the craft is ready. Usually this is a monochrome product, similar to a mosaic.
Option two. Suitable for children of senior kindergarten or primary school age. You choose an idea, something that you will implement with your child in the creative process. Here you can choose work of any level of complexity. Then the child does everything himself under your guidance. Take cardboard of the desired color and draw an image. You can draw it yourself, or use a stencil. Next we select the paper. We tear off pieces of the same color and fill the space in segments. When everything is filled in, the work is ready.
Example of a craft “Autumn Tree”
Let's look at a sample of a broken autumn tree applique. This is a simple and very beautiful option for children in the middle or senior kindergarten group.
For work you will need materials:
- glue stick;
- set of colored paper: yellow, orange, brown, green, blue;
- cardboard base (you can use white paper);
- additional decorations in autumn style: golden beads, small stones;
- a cloth for wiping off glue.
Work algorithm:
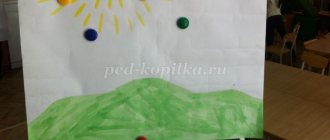
- Invite your child to apply the drawing to the base. Let it be a large tree with a lush crown. You can draw the sun and clouds in the sky, and bushes and paths on the ground.
- Next, select the main shade for the wood - yellow, orange, brown. The paper is torn into pieces and evenly pasted inside the contours of the tree. Dark colors are used for the trunk, light colors for the crown.
- They cover the sky with blue pieces, leaving space for clouds.
- The sun is decorated in yellow. Thin rays can be drawn with a pencil or felt-tip pen.
- The finishing touches are glued on – pebbles on the ground, beads on the tree as fruit.
The picture is ready, it can be framed. You can also wipe off any excess glue on the image before the glue dries completely.
“Fox” applique made using the cutting technique
You will need:
- White base
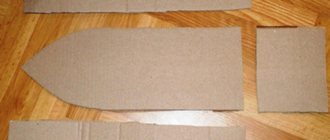
- Chanterelle pattern
- Paper in three colors: orange, black and white
- Glue
Execution stages. Trace the stencil or draw the fox yourself on a white base.
Take orange paper and tear it into random pieces.
Applying glue to each piece, we gradually fill the outline of the fox entirely. If the craft is being done by small children, it is better to cover the entire chanterelle - the base - with glue and stick the dry pieces from bottom to top.
Tear off two small, approximately identical pieces of black paper—the eyes—and glue them onto the fox. Another part will be needed for the spout. Tear off a small piece from a white sheet and make the tip of the fox's tail. Our fox is ready.
You can also not prepare pieces of paper in advance, but tear them off from the strip at the gluing site. Watch the video to see how this is done.