Summary of a drawing lesson for children 5-7 years old with presentation
Methodological development of an open lesson.
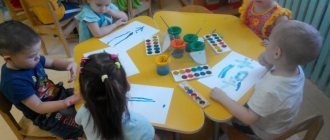
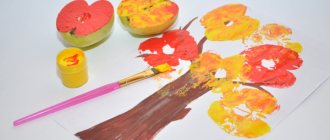
Author: Shchekoturova Natalya Gennadievna, teacher of additional education MAUDO TsRTDU city Buguruslan Topic : My plush friends Purpose of the lesson: Perform a drawing using foam rubber drawing. Objectives: Educational: teach children to convey in a drawing the image of a toy familiar from childhood; consolidate the ability to depict the shape of parts, their relative size, location, color. Continue learning to draw large, position the image in accordance with the size of the sheet. Educational: getting to know the history of the creation of the toy, expanding your understanding of the world around you. Educational: develop children's creative imagination, create conditions for the development of creative abilities. Educating : to cultivate love and thrift for toys and aesthetic taste. Children's age: 5-7 years. Equipment: presentation “What kinds of bears there are”, visual aids with the image of a bear, toys: dog, bear, hare, elephant, kitten; Literary range: poems about animals, riddles; “The toys ran away” by L. Gerasimov. Visual range: drawings made by children, illustrations depicting bears, methodological table for step-by-step execution of a drawing in pencil. Musical sequence: listening to a piece of music. Material for the lesson: - children's toys: dog, bear, hare, elephant, kitten; - album sheet; - a simple pencil; - a set of gouache paints; - 2 pieces of sponge; - thin brush; - a glass of water; - napkin; 1. Organizational moment. All the children gathered in a circle, I am your friend and you are my friend. Let's hold hands tightly and smile at each other! “Guys, let’s smile at each other so that we can be in a good mood all day.” 2. Updating knowledge. – Guys, today I brought this beautiful box to class. What do you think is in it? (children's answers) - Your favorite toys are in the box. And this one is the first! (takes out a kitten). This is a kitten. Do you like him? How do you play with him? (feed, put to bed). -I wonder what other toys are in this box? (takes out the Bunny). What a beautiful Bunny. Look how long his ears are. What's this about the bunny? (tail, paws). -Who else was hiding in the box? (takes out a toy elephant). Who is this? He is not at all like other animal toys. Look what his ears are like. Big or small? What do you call an elephant's nose? Do you think the elephant is kind or angry? Why do you think so? 3. Setting the goal of the lesson. -What else is in the box? (takes out Mishka). What do you think the lesson will be about today? (children must name the topic of the lesson). What goal would you set for yourself, what would you like to learn? - Who is this? Do you like this toy? And why? Isn't it a good toy? Why do you like him? Because the bear is soft, warm, big? (It is advisable for children to express themselves independently, and for the teacher to generalize and supplement their statements). 4. Explanation of new material. - What do you know about bears? (Children's answers) - Please note: the bear has shiny black... eyes, like beads, and a black shiny... nose, like a button. On the head... ears. Which? That's right, little ones. What about the paws? Yes, big and thick. The bear is also called clubfoot. What do bear cubs like to eat? That's right, honey, raspberries, fish. Do you know a poem about animals? (Reading a poem about animals.) - Well done! Misha, we love you very much. Let's pet Misha and say that we love him, praise him. (the teacher walks with Mishka to the children, giving him the opportunity to pet him and suggesting phrases for Mishka “I love you”, “Bear is very good”, “Bear is fluffy and kind”, “I will play with you” - What do you think, if Our Mishenka's paw was really torn off, would he smile? Of course not. But we didn't offend Mishka? Look, Mishka smiled at us. Let's smile back at him. (Place the toy next to the others). - And now, I would like to tell a little about the history of the teddy bear and what they are like? (presentation show) - That's how many new wonderful toys you have, you won't be bored. Guys, I would like to reveal one secret: when you go to bed in the evening, the toys come to life and share your impressions about how you played, who was kind, and who abandoned them, ruffled them. One day when I woke up in the evening, I heard a story about how the toys ran away from the boy Sasha. The toys ran away. The toys ran away from the boy Sasha: His catchy, funny little animals. He often threw them, didn’t know how to play, even managed to break the bear’s paw. And I met them at the circus: Smart, funny! He recognized the artists as his toys. The baby elephant skillfully plays with the ball, and the little bear was the first to become a strongman! Even though the rope is stretched very high, an acrobat cat walks along it. The bunnies in the stroller ring the bells, They command the team of horses themselves! And then Sasha realized who he had lost! He begged them all to come home! - I will love you, play with everyone, don’t give your toys to insult! And in the morning there were little animals on the shelf, His winding funny toys! They became inseparable friends. And friend, that's great! You know it yourself! L. Gerasimova - Guys, I think you wouldn’t want your toys to run away from you either. What needs to be done to prevent this from happening? -Play carefully, do not throw them, put them back in their places. -Right! — Do you know where toys come from in your home? - From the shop. - That's right, but first they are made in a toy factory, and then they go to the store where they are bought. The teacher invites the children to draw a portrait of a teddy bear during class. - You know, a problem happened, all the brushes were gone, we had nothing to paint with. - What should we do? (children's answers) - Let's draw a foam print in an interesting way. 5. Dynamic pause. Physical exercise. Now you and I will turn into bears. The bear crawled out of the den, looked around on the threshold, (turns left - right) He stretched from sleep - (stretching - arms up) Spring has come to us again. To quickly gain strength, the bear twisted its head. (head rotation) Leaned back and forth. (tilts forward and backward) Here he is walking through the forest, The bear is looking for roots and rotten stumps. (tilts: touch your left foot with your right hand, then vice versa) Finally, the bear had eaten and sat down on a log. (children sit down) 6. Practical part. (Calm music sounds). 1. Consider the toy, determine the parts of the object, their shape, relative size, location, color (round head, with semicircular ears, oval body with two upper and lower paws, fluffy brown surface) 2. Draw the outline of the bear cub with a simple pencil. 3. The teacher’s explanation of a new method of depiction - drawing with a sponge: - Guys, if you look at your teddy bears, you will notice that the outline of the toy is drawn with even, smooth lines, and our teddy bear is actually fluffy, even shaggy. In order for his portrait to look like a real bear cub, we use a depiction method: we will draw with a piece of foam sponge. If you dip a sponge in paint of the desired color (brown), then lightly press the painted side onto the line drawn with a pencil and immediately tear it off the surface, you will get an imprint that will give the line volume and fluffiness. The next print should be placed side by side, leaving no free space between the previous and subsequent ones. When the outline is ready, fill the space inside with prints. 4. Complete the drawing with details: with a thin brush draw the eyes, nose, mouth of the bear, draw claws on the paws, and if desired, decorate the drawn toy with a bow. 5. If desired, make a bright colored background around the teddy bear in the same way, using another, clean piece of foam rubber. During the work, the teacher monitors how the children draw: reminds them not to put a lot of paint on the foam rubber, but only lightly touch the surface of the paint so that the print has an air-colored surface; First complete one element to completion, only then proceed to the next. 7. Consolidation of learned material. -You have got wonderful portraits of cheerful bear cubs that can be inserted into a frame. — What bears did you meet? -Who did we draw today? - In what way? 8. Reflection. The teacher invites the children to place their drawings on the steps as they themselves evaluate their work.
Presentation on the topic: My plush friends
We recommend watching:
Summary of educational activities in the senior group “Northern Adventures” Summary of a conversation with children of senior preschool age Summary of educational activities in speech therapy for the senior group Methodological development of a summary of an excursion for children of senior preschool age
Similar articles:
Summary of a drawing lesson in the middle group
Drawing lesson for children 3-5 years old using geometric shapes
Summary of a mathematics lesson in the senior group of kindergarten. Geometric figures
Lesson summary, subject "Drawing".
6. Video clip 5 (min)
7.Poll 5 (min)
During the classes
Good afternoon, let me remind you that my name is Anastasia Petrovna. Today I will be drawing for you.
Drawing is a means of cognition and study of reality. Mastery of drawing is necessary for artists of all specialties: sculptors, painters, architects, designers. It is necessary for both the engineer and the geographer. A drawing is any image made by hand using graphic means - a contour line, a stroke, a spot.
The topic of our lesson is “Still life of 2 objects of simple shape.”
“Still life” - from French means “dead nature”. In artistic creativity, still life is an independent genre. Still life is a very interesting genre. The world of things is inseparable from man and his activities. Usually a still life is a group of objects that can tell us a story. For example, Chardin’s still lifes “Attributes of Art” are very interesting. Also very beautiful Dutch still lifes. (I show the works of old masters.)
It should be noted that we are learning from simple to complex, and first we should master drawing a simple still life.
Where should you start staging? From the analysis of the production. Right. Let's take a close look at nature; in front of us is a jar and an apple. Tell me what geometric shapes are the basis of the lid? Cylinder, ball, cone. Right. And the apple... definitely a ball.
What do we do next when we have analyzed the nature. Sketch. Right. A sketch is a drawing made quickly, without much elaboration of details. Before you start drawing, imagine the setting already drawn in the format of your sheet, determine the scale of the image.
You should think about what paper format to choose and how best to arrange a still life on a sheet - vertically or horizontally. (Vertical). Right. Alberti wrote: “Never take up a pencil or a brush until you have properly thought through what you have to do and how it should be done, for, truly, it is easier to correct mistakes in the mind than to scrape them from a picture.”
After the sketch is completed, we move on to the format. You should always start your drawing with the compositional placement of the image. It is very important to arrange the entire group of objects so that the sheet of paper is filled evenly. To do this, we mentally combine the entire group of objects into one whole and place them in accordance with the sheet format. At the same time, it is necessary to ensure that the depicted objects do not rest against the edges of the sheet of paper and, conversely, that there is not a lot of empty space left. It is also important to remember that you need to leave more space at the bottom of the sheet than at the top. Next, let's determine on what plan each of the objects is depicted and their proportions. To make it easier to understand the planned nature of objects, you need to look at them with faith. Camilla, please come to the production, we will decide together. Let's look from above, what we have in the background (Krynka) And in the first? (apple). That's right. Now let's decide on the proportions. What is the largest item? (Krynka). The smallest one is...an apple. Well done, have a seat. Let's start the layout. When the general layout is completed, we begin construction. (I walk around the class). Don't forget to mark the central axis when constructing. We are setting up a krynka, in order to build it beautifully we need to remember how to lay out ovals. The lower part under the horizontal line opens more, and the upper part less. Also, the lower the oval is at eye level, the more it opens. Accordingly, which oval will be opened more, where is the bottom or where is the neck?