Benefits of the lesson
Sand as an art material has several advantages. And most importantly – a relaxing, therapeutic effect. The child gets rid of the effects of stress, and emotional stability returns to him. Sand painting is used to treat sleep disorders, neurotic disorders, and anxiety in children. Sand art is also useful for healthy children; it allows them to calm down after failures, get rid of low self-esteem and the phobia of becoming a loser. The child sees that a bad drawing can be corrected at any time.
The second benefit of sand painting for children is a developmental activity. The technique improves finger motor skills, sensory perception and creative thinking. Drawing usually involves both hands, which has a positive effect on the development of both the right and left hemispheres of the brain. For schoolchildren, fiddling with sand improves writing skills. It is useful to use the technique with children for whom studying is a burden. In this case, sand painting becomes a good addition to homework and allows you to consolidate school knowledge through art.
The third benefit of drawing on sand is the revelation of artistic potential and the manifestation of imagination. The technique has no restrictions and strict rules. You can draw with your hands and various devices. The loose texture of the material allows you to create images of any complexity and degree of detail. Drawing with sand is available for toddlers, middle school preschoolers, and schoolchildren.
Educational and thematic plan
1 year of study.
| № | Tasks | Number of hours | Subjects of classes |
| Cycle “Great lines, interesting figures” | |||
| 1 | Introduce children to sand painting techniques. | 4 | “The magic of lines. Sand painting” |
| 2 | Teach children to draw curls with their fingers. | 4 | "Frost patterns. Patterns on glass" |
| Cycle “Story Drawing” | |||
| 1 | Learn to create images to music, develop creative imagination | 4 | "Music of the Forest" |
| 2 | Learn to draw with your fingers synchronously, develop your imagination | 3 | "Fairytale Birds" |
| 3 | Learn to draw with the back of your hand | 3 | "Winter forest" |
| 4 | Strengthen the skill of drawing curls | 4 | “Flowers are also different” (as planned) |
| 5 | Encourage creative ideas and solutions | 3 | "The Singing Silence of the Deep Sea" |
| 6 | Teach the technique of pinching and pouring sand | 3 | "Fun Zoo" |
| 7 | Develop imagination, consolidate familiar techniques | 2 | “Two Umbrellas of Ole Lukoje” (as planned) |
| 8 | Learn to creatively express your idea, consolidate drawing methods | 3 | "Fairy-tale heroes" |
| 9 | Develop a sense of composition, a sense of texture | 3 | "Rainbow over the city" |
| 10 | Develop the ability to convey the shape and size of objects | 4 | "City of Dreams" (as planned) |
| 11 | Develop tactile sensitivity and finger motor skills | 4 | "On Another Planet" |
| 12 | Develop compositional skills when depicting groups of objects | 4 | "A colorful fairy tale" |
| 13 | Consolidation of familiar drawing techniques, development of imagination | 4 | “Beauty is nearby” (as planned) |
| 14 | Strengthen the ability to perform movements synchronously | 3 | "Seaweed" |
| 15 | Strengthen technical skills and abilities | 3 | "Summer rain. Hurricane" |
| 16 | Learn to express your emotions in drawing through the perception of music | 2 | "Sounds of nature" |
| 17 | Develop creative independence through sand painting techniques | 2 | "In the land of elves" |
| 18 | To cultivate artistic taste in the knowledge of beauty | 2 | "Spring Fantasies" |
| Total: 64 hours | |||
2nd year of study.
| № p/p | Number of hours | Subjects of classes |
| 1 | 3 | Magic lines |
| 2 | 2 | Swans |
| 3 | 2 | Rainbow over the city |
| 1 | 1 | Orchard |
| 2 | 1 | Seascape |
| 3 | 2 | Still life |
| 4 | 2 | In the animal world |
| 5 | 2 | Fairytale birds (by design) |
| 6 | 2 | Christmas tree |
| 7 | 2 | Winter landscape |
| 8 | 2 | New Year |
| 9 | 2 | Frosty patterns on glass |
| 10 | 2 | City of Dreams (by design) |
| 11 | 2 | Winter forest |
| 12 | 2 | Seascape |
| 13 | 2 | Portrait |
| 14 | 2 | The beautiful is nearby (by design) |
| 15 | 1 | Flowers for mom |
| 16 | 2 | Spring drops |
| 17 | 3 | A colorful fairy tale |
| 18 | 2 | Desert Island |
| 19 | 2 | Planet Earth |
| 20 | 3 | Secrets of space |
| 21 | 2 | Summer rain, hurricane |
| 22 | 2 | City street |
| Total: 60 hours | ||
Sand painting materials
To learn to draw on sand, you need to purchase a list of materials and equipment. All of them are affordable, you won’t have to fork out a lot of money. Here's what the young artist will need:
- table with sides and a lighting device at the bottom;
- sand;
- antistatic agent in a can;
- additional equipment - art brushes, sticks, sieve, templates;
- a wide and flat brush for sweeping grains of sand from the corners of the table.
An antistatic agent is necessary to prevent sand grains from sticking together, which is inevitable when quartz material is used repeatedly. The spray should be sprayed before each lesson. A regular antistatic agent is suitable, preventing synthetic clothing from sticking to the body.
You can buy a table or make it yourself. Homemade design - sides connected in a rectangular shape with a bottom made of frosted glass or plastic up to 5 mm thick. It is necessary to fix the lamp from below so that diffused light is obtained. The lighting can be anything: in the warm and cold range, even colored. The legs of the table should not wobble, otherwise when drawing you will not be able to draw neat lines.
The finished table is a structure with sides and a bottom in the form of an illuminated tablet. The optimal format is 130x70 cm, but for a child 70x50 cm is enough. The height of the sides should be at least 6-7 cm, but from the side of the drawer it is only 3 cm, otherwise it will be inconvenient to draw the lower elements. It is necessary to leave indentations for sand 10-15 cm wide on the right and left sides. It is advisable that these areas be in the same plane as the space for drawing, this makes it more convenient to use many techniques. But some ready-made tables have tray recesses on both sides.
Any sand will do. You can buy an aquarium one at a pet store, and a special one for creativity at a supermarket in the children's section. You can contact a children's and adult creativity studio where sand animation is practiced, if there is such an institution in the locality. They probably won't refuse to sell a small amount of sand. The fraction of the material can also be any. It is advisable to get different ones, since fine sand is convenient for creating tones and halftones, and coarse sand is convenient for creating large image details.
If there is a river near your house, you can dig up sand on the shore. You just have to filter it through a fine-mesh sieve, then rinse. The washing procedure looks like this:
- Pour 4-5 kg of sand into a bucket. This is the standard amount for drawing.
- Fill with water to the edge of the bucket.
- Stir gently with your hand or a large spoon.
- When dust and dirt particles rise to the surface and heavier grains of sand settle to the bottom, carefully drain the water.
- Repeat the procedure until the drained water becomes crystal clear.
- Dry the cleaned material on the balcony if the weather is sunny, or on a radiator, or in the oven.
You can replace sand with semolina, finely ground salt, and to create darker and more contrasting elements of the image - ground coffee.
Bulk material should be renewed once every 3 months, and if the child draws every day, then once every 1.5 months. If this is not done, the sand will become less pliable, since with constant friction the grains of sand are destroyed and the structure of the material softens.
Sand painting technique
The technique of creating sand drawings is not difficult, but when teaching a child you will have to be patient. The main tool is the artist’s hands, but it is possible to use auxiliary devices.
Before your child starts drawing, introduce him to the art material. Offer to immerse your hands in the sand, pour it from one palm to the other, and talk about your feelings. After becoming familiar with the material, you can begin to learn drawing methods.
Fist rash
This is the first DIY sand painting method that a preschooler should master. Ask to take the material into your palm, clench it into a fist, and turn it along a vertical axis so that the grains of sand fall down. Explain to your child that the amount of sand spilled out is regulated by squeezing and relaxing the fist muscles. If more grains of sand spill out, the “mound” becomes denser and darker. This creates images with a smooth transition from light to shadow.
Lines of different sizes
Next, preschoolers master drawing lines of different thicknesses, lengths, and tortuosities. Teach your child to draw dotted lines, curls, and waves. This is the best method of getting used to the original drawing technique for a preschooler of the younger group.
To create a thin straight or curved line, you need to pour a strip of sand from your fist, then put two fingers together - your thumb and forefinger, and run them along the strip. You will get a line of the same thickness throughout. Explain to your child that you should not strain your fingers too much, otherwise the image may turn out uneven. If a thicker line is required, the fingers need to be connected diagonally.
Drawing with different parts of the hand
When drawing on sand, different parts of the hand are used. They move one or more fingers over the material, move them and spread them apart. Large elements and thick lines are depicted with a fist and the edge of the palm extending from the little finger. To create many small details, they poke the sand with their fingertips, and draw fine lines with their nails.
Drawing on dark and light
When the above-described drawing methods have been mastered, you can begin to select a compositional basis. You can draw “in the dark”: fill the background with sand to make light lines on it. Or “in light”, that is, create a dark sandy image on an empty background. Typically, professional artists combine these methods. At the initial stage, it is enough for a child to master them separately.
Drawing with aids
To make sand drawing more fun in kindergarten, let children use not only their fingers and palms, but also additional devices. What you can draw:
- Artistic brushes of different hardness. They are convenient to depict hair and wool.
- Toothpicks, hashi sushi sticks, cooking skewers. Optimal for creating thin and graceful lines, fancy patterns, and detailed drawing. It is advisable to use wooden products; they will not scratch the plastic bottom of the drawing table.
- Comb, small rake. With their help, you get neat waves.
- Colored paper. It is placed on the table and sand is poured on top. Uncovered areas of the design are multi-colored. The method is applicable for creating floral motifs and abstract patterns.
- Funnel. Pour sand through it, create slides, paths, patterns - a fascinating activity.
- Fine mesh sieve. With its help, the table is covered with a thin layer of sand, which can become the background basis for the drawing.
- Stencils. You can use ready-made ones. Or cut them out of plastic lids or cardboard for practice. Or use different flat objects for this purpose. You need to place them on a clean table surface, sprinkle them with sand, and then carefully remove them.
- Pendulum. Attach a round-shaped weight to the thread and give it to the child. Let the pendulum swing over the sandy surface, creating patterns of different depths. This is a wonderful method of strengthening the skill of correct pressure and speed of movement when creating a drawing.
- Cylinder with patterns. You can use a toilet sleeve. Apply patterns on it with a thick layer of glue. Wait until it dries, then give it to your child. Let the cylinder roll on the sand, creating patterned paths.
APPLICATIONS
Exercises to develop fine motor skills
"Storm"
Children perform movements with their fingers in accordance with the text: The first drops fell, (lightly tap two fingers of each hand on the table)
The spiders were scared. (the inner side of the palm is lowered down; bend the fingers slightly and, moving them, you should show how the spiders scatter)
The rain began to pound harder. (knock on the table with all fingers of both hands)
The birds disappeared among the branches. (cross your arms, place your palms together with the backs of your hands; wave your fingers clenched together)
The rain poured down like buckets, (knock on the table harder with all the fingers of both hands)
The kids ran away. (the index and middle fingers of both hands run across the table, depicting little men; the remaining fingers are pressed to the palm)
Lightning flashes in the sky,
Thunder breaks the whole sky. (draw lightning in the air with your finger) (drum with your fists and then clap your hands)
And then the sun comes out of the cloud (raise both hands up with fingers open)
He'll look out the window for us again!
"Flowers"
Children perform movements with their fingers in accordance with the text:
In our group on the window, (clench and unclench their fists)
In a green country, (show “pots” with palms)
In painted pots (palms raised vertically)
The flowers have grown.
Here is rosean, geranium, crassula,
Family of spiny cacti. (bend the fingers on both hands, starting with the thumb)
We will water them early in the morning (water from an imaginary watering can) (fold the palms of both hands)
Me and all my friends!
"Bell"
Children perform movements with their fingers in accordance with the text: - Don-don-don, -
The bell is ringing. (move the fingers of both hands)
- La-la-la, -
He says something. (raise the index fingers of both hands to your mouth)
Ding-ding-ding, -
Tilts his head. (put your palms down)
Bom-bom-bom, -
I messed up my whole hair. (run your hands through your hair)
Ding-ding-ding, -
He smiled at the sun. (smile and clap your hands)
Finally woke up. (tap the fingers of one hand on the fingers of the other)
Developmental kinesiological exercises
"Ring"
The child alternately and as quickly as possible moves his fingers, connecting the index finger, middle finger, etc. in a ring with the thumb. The test is performed in the forward (from the index finger to the little finger) and in the reverse (from the little finger to the index finger) order. First, the exercise is performed with each hand separately, then together.
"Fist - rib - palm"
The child is shown three positions of the hand on the plane of the table, successively replacing each other. The palm is on a plane, the palm is clenched into a fist, the palm is edged on the table plane, the palm is straightened on the table plane. The child performs the test together with the teacher, then from memory for 8-10 repetitions of the motor program. The test is performed first with the right hand, then with the left, then with both hands together. When mastering the program or if there are difficulties in performing the exercise, the teacher invites the child to help himself with commands (“fist - rib - palm”), pronounced out loud or silently.
"Mirror drawing"
The child is asked to take pencils or felt-tip pens in both hands and simultaneously draw mirror-symmetrical drawings and letters on a blank sheet of paper with both hands. When performing this exercise, your eyes and hands relax. When the activity of both hemispheres is synchronized, the efficiency of the brain significantly increases.
"Ear - Nose"
The child, as shown by an adult, then independently grabs the tip of his nose with his left hand, and the opposite ear with his right hand. Simultaneously releasing his ear and nose, he claps his hands and changes the position of his hands “exactly the opposite.” The exercise is repeated several times.
"Horizontal Eight"
The teacher asks the child to draw the number eight in the air in a horizontal plane three times: first with one hand, then with the other, then with both hands at the same time.
"Symmetrical drawings"
The teacher invites the child to draw mirror-symmetrical designs in the air with both hands at the same time: a flower, a spruce, etc.
"Bear Jiggle"
The teacher invites the child to sway from side to side, imitating a bear. Then connect your hands and come up with a plot.
"Snowman"
The exercise is performed standing. The teacher invites the children to imagine that each of them is a just made snowman. His body should be tense, like frozen snow. But then spring came, the sun warmed up, and the snowman began to melt. First, the head “melts” and hangs, then the shoulders drop, the arms relax, etc. At the end of the exercise, the children gently fall to the floor and lie down.
"Let's pump up the muscles"
While sitting, children bend their elbows, clench and unclench their hands, gradually speeding up the pace. The exercise is performed until the hands are maximally tired. Then you need to relax your hands and shake them.
"Watch"
Children perform free eye movements from side to side and rotation.
"Faces"
The teacher invites children to show various faces, performing facial movements: puffing out their cheeks, sticking out their tongue, stretching out their lips with a tube, opening their mouth.
"Juggler"
Children try rolling nuts or balls first in each palm and then between their fingers.
"Water bicycle"
The exercise is performed in pairs: children stand opposite each other, touch their palms to their partner’s palms and make movements similar to riding a bicycle.
"Pianist"
The teacher invites the child to play the piano. To do this, he asks him to press his palm to the surface of the table and, first in order, and then randomly raise his fingers one at a time and name them.
Psychogymnastics for the development of the emotional sphere
Game "Shadow"
The game is aimed at developing attention, memory and observation skills. Two children are walking along the road: one in front, the other two or three steps behind. The second child is a “shadow” of the first. “Shadow” must exactly repeat all the actions of the first child, who will either pick a flower on the side of the road, or bend over for a beautiful pebble, or jump on one leg, etc.
Game "Forbidden Number"
The game is aimed at developing attention, memory and observation skills. Children stand in a circle. A number is chosen that cannot be pronounced.
Preschoolers take turns counting and clap their hands instead of the forbidden number.
Game "Here He Is"
The game is aimed at developing attention, memory and observation skills. The child, without words, using expressive gestures, “tells” about the sizes and shapes of objects well known to him: small, large, pointed, round, quadrangular, small, long, short.
Exercise “How are you feeling?”
The exercise is aimed at developing attentiveness, empathy and the ability to feel the mood of another. Performed in a circle. Each child carefully looks at his neighbor on the left, tries to guess how he feels, and talks about it. The preschooler, whose state is being described, listens and then agrees or disagrees with what was said, complements.
Exercise “My mood”
The exercise is aimed at developing empathy, the ability to describe one’s mood and recognize the mood of others. The child is asked to tell others about his mood: it can be drawn, it can be compared with some color, or shown in motion - it all depends on the imagination and desire of the preschooler.
Exercise “Communication in pairs”
The exercise is aimed at developing attention and memory. Children are divided into pairs and sit back to back. One whispers about something, then asks the other what he was talking about. While telling the story, the child should try to describe his feelings.
Exercise "Sitting - Standing"
The exercise is aimed at developing the emotional sphere. The child, standing and looking at the person sitting, says a phrase suggested by the teacher or composed independently with different feelings: cheerfully, with fear, angrily, calmly.
Exercise "Face Study"
The exercise is aimed at developing tactile memory. Children stand in two lines, facing each other. Preschoolers in one line close their eyes, in the other they change places (at random) and come closer to the first line. Children with closed eyes feel the face and hair of the person who comes up and call their names. Condition: do not touch clothes.
Exercise "Mirror"
The exercise is aimed at developing the ability to understand and convey other people's emotions. Children are divided into pairs, face each other and look into each other's eyes. One begins to perform some movement, the other repeats it in a mirror image. Then the teacher invites children to convey different emotional states in gestures and facial expressions: sadness, joy, fear, pain, disgust, etc.
Exercises "Animals"
The exercise is aimed at developing imagination. The teacher invites the children to depict some animal: a nimble child - a bear, a slow one - a hare, a squirrel, a cowardly one - a tiger, a lion, etc.
Exercise “Dance to Music”
The exercise is aimed at overcoming timidity and strengthening self-confidence. Children sit in a circle, the most withdrawn one is placed in the center. The music turns on - the children stand up, the child dances in a circle. Preschoolers can also dance while standing still.
Exercise “Drawing on the back”
The exercise develops sensitivity and imagination. Children are divided into pairs: the child draws geometric shapes, simple images with his finger on the other’s back: a house, a Christmas tree, the sun, a ladder, etc., block letters; the other child must guess what it is.
Finger games and exercises.
"ORANGE"
We shared an orange. (Children “break” an orange.) There are many of us, (Show 10 fingers.) And he is alone. (Show 1 finger.)
This slice is for the hedgehog. (Bend the fingers of the left hand.) This slice is for the swift. This slice is for ducklings. This slice is for kittens. This slice is for the beaver. And for the wolf - the peel. (Throwing movement with the right hand.)
He is angry with us - (They clench their fists and press Trouble!!! them to their chest.) Run away - ("Run" with their fingers on the table.) Who goes where!
"MACHINE PORRIDGE"
Masha cooked porridge, (The children stir with the index finger of their right hand in their left palm.) Masha fed everyone porridge. Masha put porridge for the cat in a cup, (Bend the fingers of the left hand.) For the bug in a bowl, and for the cat in a large spoon.
In a bowl for hens, chicks And in a trough for piglets. I took up all the dishes, (They unclench their fist.) I gave away everything to the crumbs. (Blow the “crumbs” off the palm.)
“WHERE DID THE SPARROW DINNER?”
-Where did you have lunch, sparrow? (Children wave their palms.) - In the zoo with the animals. (Palms depict an opening mouth.) First I had lunch (For each name of the animal, alternately on the left, then on the right hand.) Behind bars by the lion.
I refreshed myself from the fox, drank some water from the walrus, ate carrots from the elephant. I ate millet with the crane.
I stayed with the rhinoceros and ate a little bran. I attended a feast of tailed kangaroos.
I was at a festive dinner at the Shaggy Bear. And the toothy crocodile almost swallowed me. (The animal’s mouth opens again.)
“EVERYONE HAS THEIR OWN HOME”
A fox in a remote forest (Children bend the fingers on both hands.) There is a hole - a reliable home. Winter snowstorms are not scary for a squirrel in a hollow in a spruce tree.
Under the bushes a prickly hedgehog rakes leaves into a heap. Beavers make huts from branches, roots, and bark.
The clubfoot sleeps in the den, sucks his paw there until spring. Everyone has their own home, (Strikes with palms and fists alternately.) Everyone is warm and comfortable in it.
"BIRDS"
This bird is a nightingale, (Bend the fingers on both hands.) This bird is a sparrow, This bird is an owl, a sleepy little head. This bird is a waxwing, This bird is a corncrake. This bird is an angry eagle. (Waving their palms folded crosswise.) Birds, birds, go home. (They wave both hands like wings.
Author: Marina Vladimirovna Lvova Position: teacher Place of work: MBDOU “Kindergarten No. 69” Location: Komi Republic, Syktyvkar
Modified date: 11/16/2017 Published date: 11/16/2017
Exercises
Here are some popular sand painting exercises on light tables for children:
- Letters. The lesson is useful for older preschoolers and younger schoolchildren who are learning to write. Spread sand on the table in a dense layer. Let your child learn to write letters beautifully and develop finger motor skills.
- Water landscape. To create it, walk with your outstretched fingers along the sandy surface, imitating waves. At the top of the composition, make thin strokes with your nail - these will be distant ripples. Draw the horizon with the edge of your palm, remove the excess in the upper part - this is the sky above the reservoir.
- Clouds. Take sand into your fist. Pour it out in a thin stream, making circular, non-sweeping movements.
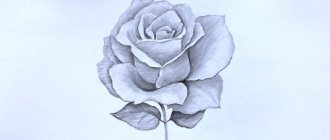
- Maple Leaf. Draw lines that form the outline and veins of the leaf. Sharpen the outline by running your finger along the outer edge of the line, moving the sand inward. Use your fingernail to follow the veins. Outline the border of the petiole.
- Sun. Take sand into your fist and lift it 20-30 cm above the table surface. Pour out evenly, trying not to move your hand. Grains of sand, falling from a height, bounce off the plastic surface, form a ring, and the middle remains empty. And its diameter is wider, the higher the hand is raised.
- Mountain landscape. Spread the sand in a horizontal direction using quick zigzag movements. Use the edge of your little finger to walk along the upper part, removing the excess to create a relief.
Sand animation for preschool children
The highest skill is shooting sand animation, in which the artist continuously creates images that smoothly flow into each other. And he does this by making the minimum possible number of movements. This is a complex art that requires the master to act quickly and have impeccable artistic skills.
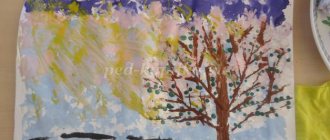
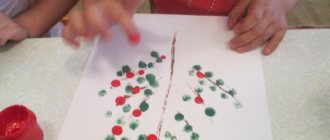
Real animation is unlikely to be within the capabilities of a preschooler, but something simple, for example, a tree that is bare in winter and blooms in summer, he can easily depict after practicing for 3-4 lessons.
Introducing a sand painting master class for children:
- Spread the material evenly.
- Place the pad of your finger on the sandy surface and move upward. Thin the line by gradually raising the pad. You will get a tree trunk.
- Draw branches with your little finger. Make them curved rather than straight so they look natural. It will turn out to be a tree in winter.
- Now make it summer. Sprinkle sand in a wide layer on the ends of the branches - this is the crown. Also sprinkle horizontally under the tree - this is grass.
- Randomly poke your fingers along the crown, pressing to different depths, to make leaves. Draw blades of grass by running your fingernail vertically under the tree.
- Adjust the contour of the tree crown and remove excess sand.
- The animation can be continued by making it autumn. To do this, place a few spots under the tree with your fingers - these will be fallen leaves.
Sand therapy for children: educational and creative games
Sand therapy for children makes a significant contribution to the development of cognitive and creative abilities, speech, fine motor skills and tactile sensitivity. Sand helps a child get rid of negative emotions, relax and relieve stress. Joint play and creativity with parents have a beneficial effect on family relationships.