Basis for stucco painting
You can paint pictures with plasticine on completely different bases! Often, ordinary cardboard is used, which can tolerate all the options for a child’s creative self-expression. For older children, glass is suitable as a basis for a plasticine picture, to which the plasticine is securely fixed and lasts a long time. Glass is especially good for “reverse paintings”, when the plot is stuck from bottom to top, from light to dark tones, from the main elements to the background.
Kids will be interested in plasticine painting on improvised materials, for example, an old mp3 disc, a boring white cup or an ordinary plastic plate. This “picture” does not require additional decoration and can be an ideal gift for your beloved adults on any occasion.
Plasticineography for children - step-by-step master class and photos
There are three flowers here. The first was made using the mosaic technique, for the second the contour technique was used, and for the third, mixing was used. Look how the children created such a beautiful picture. You can use ready-made templates for plasticine printing. Parents will print out such blanks by choosing the design they like on the Internet. Now let the child divide the plasticine into small pieces and roll balls from these blanks. In this way, the children will develop their tactile sensations and fine motor skills. Let the child now place balls of the same color on the first petal, filling it all in this way.
Then you can move on to the next petal. This way the child will decorate the entire flower. Decorating the second flower should begin by making sausages, and then filling its petals, drawn in the shape of hearts, with them. The flagellum is located clockwise.
If the length of the plasticine flagellum is not enough, then the child will make the same one, fasten the ends of these two sausages and continue his work.
For the next flower, you need to mix plasticine of different colors and attach it without going beyond the outline. You can first make the background of the flower using plasticine, then attach a lot of other flowers here, smearing it. The child will make sausages from green plasticine and fill the leaves of the flower with them.
Plasticineography methods
The most commonly used of them are:
- Strokes. A small amount of plasticine is placed on the pad of the index finger or a special plastic spatula, after which it is applied to the work surface in the right place with sharp, randomly directed movements.
- Plasticine balls. Typically used when placing accents on a flat image (for example, the middle of a flower) or as basic shapes to fill the inner surface of an object schematically depicted on the working plane.
- Flattening the rolled balls. It is not recommended to use a lot of force when flattening the balls. Otherwise, the resulting figure will be deformed, thus losing its clear rounded shape.
- Smearing on the surface. This technique is used to create a background or fill the inside of a figure with colored material.
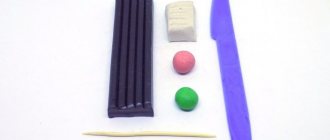
- Scratching patterns on plasticine. Patterns are created on a flattened piece of plasticine using a special plastic knife or tools with already formed threads.
- Rolling plasticine sausages. You can roll sausages both for placing them on the final image, and for the purpose of using them as a blank.
- Squeezing plasticine out of a syringe. For extrusion, it is recommended to use a special syringe, which allows you not only to easily extrude thin strips of plasticine, but also to remove the remaining working material from the main body of the tool.
General recommendations
Correctly organizing plasticineography classes for children can only be done taking into account general recommendations:
the total time for modeling from plasticine should be no more than 30 minutes
(otherwise the child’s attention will be distracted, and productivity will accordingly decrease); https://www.youtube.com/embed/3Nw5VSfr8F8
- It is necessary to create pictures from plasticine in a well-lit place, a comfortable environment for the child, excluding the presence of distracting objects nearby, for example, a smartphone, computer, tablet, TV or toys;
- in classes with children 7-8 years old, it is recommended to use thick cardboard, since plain paper will be deformed when using the techniques of smearing, rolling and smoothing plasticine;
- It is recommended to cover the working surface with transparent tape before starting modeling (this will eliminate the possibility of greasy stains and streaks from plasticine);
- In order for the final image to retain its original appearance for as long as possible, it is recommended to cover it with colorless varnish in 2-3 layers;
- During the creative process, not only the basic working tools for plasticine printing, but also wet wipes, a knife or scissors, as well as sheets of thick paper (you can use it to correct the plasticine image) should be within reach of the child.
