How to draw the sky
The world around us is full of sources of inspiration for artists. One of them is a sky dome with clouds.
This is interesting!
The sky is the space above the surface of the Earth or any other astronomical object. In general, it is a panorama that opens when looking from this object in the direction of space. The brightness of the sky depends on the time of day, altitude, direction, position of the Sun, humidity, dust and aerosol content, and is subject to significant fluctuations. If the sky is covered with clouds, clouds, haze, fog and other phenomena, then with height the brightness as a whole decreases unevenly, in steps, and in certain areas it can increase, for example, at the exit from the cloud.
The sky can be so different - clear and cloudless, gloomy with thunderclouds, day and night, sunset and pre-dawn. Each state of the sky and clouds is attractive in its own way and can set the atmosphere and determine the mood of the depicted landscape.
To create a picture, they use the entire palette of colors, from white, yellow and red to dark purple and black. Learning to draw a sky with clouds means learning to convey the character of a celestial object, weather and mood.
The firmament can be depicted in different versions:
- in light shades with fluffy clouds illuminated by bright sunlight.
- evening with splashes of red and orange, conveying the sunset;
- before the rain with heavy cumulus clouds in dark colors;
- starry at night.
It is better for the child to start with an option that is easier and more familiar to him - the night or day sky with or without clouds.
Optical fiber and light generator
This method is much more difficult to implement than the previous one. Installation is labor-intensive and responsible. But the result will exceed all your expectations. Ordering services for arranging such a system from a specialized company will cost you approximately five times more than the cost of the materials themselves. Therefore, it is much more reasonable to independently understand the technology of installing a starry sky system and carry out all the work yourself.
The light source will be a projector or light generator. Its box is hidden behind a suspended ceiling or in a special niche made of plasterboard. In this case, the light rays are directed parallel to the canvas and perpendicular to the fiber optic threads.
Halogen projectors are equipped with a lamp with a power of 50 to 100 W. The service life of such a lamp is relatively short - only 4 thousand hours. Therefore, the projector is mounted in an easily accessible place. In addition, it is necessary to ensure proper air ventilation in the space around the light generator.
The connection head can accommodate up to 765 threads with a thickness of 0.75 mm. Such projectors allow you to organize equal illumination of the end parts of the optical fiber threads, as well as create a flickering effect (achieved through the use of a perforated filter).
What is required for drawing
For this fascinating process, you need to prepare in advance the place and everything that is required to depict the sky and clouds. In the room where the child will draw, there must be natural lighting so that the young artist can comfortably depict small details and there is no distortion of the color scheme.
To create a drawing you will need:
- Paper - it is advisable to choose a special one - for watercolor, gouache or pencil drawing.
- Paints (gouache, watercolor), pencils. A child draws better with soft colored or simple pencils.
- Brushes - when choosing brushes, you should pay attention not only to the material they are made of, but also to the number - the thicker the tool, the larger the digital value printed on it. For gouache, thick (No. 18-20) brushes, flat or round, are more suitable. For watercolors, prepare flat, thick brushes for filling in the background, and thin brushes for drawing small elements.
- Palette - for mixing different colors and obtaining any shades.
It is also worth preparing a jar of water for washing brushes, rag or paper napkins to remove excess moisture from brushes. It would not be a bad idea to take care of a stand for tools so that the child can set them aside without staining the drawing and the table if he decides to postpone the process.
Using Swarovski crystals for the Starry Sky ceiling
Swarovski crystals for the starry sky on the ceiling
For luxury lovers, there is a way to decorate the ceiling and give it an extraordinary starry glow using Swarovski crystals. They perfectly scatter the light coming from fiber optic threads. The crystals are attached to the canvas using reinforced rings. Bundles of fiber optic threads with LEDs are inserted into the crystals. This complex of elements provides a very beautiful and natural glow of the constellations on the ceiling. The diameter of the light spot from a Swarovski crystal ranges from 10 to 30 cm. In the daytime, they also look very impressive and original. The ideal fabric for decorating such a ceiling is suede.
Drawing techniques and techniques
To depict the sky and clouds, you can use many techniques and techniques, depending on the paints used:
- Watercolor - most often this method is used on a wet sheet. The peculiarity of this technique is to quickly depict (no more than 3-4 minutes) all objects before the paper dries. The main tone is applied to a sheet moistened with water using wide flat brushes, then shades of the sky are added. On top of the tone, without waiting for the sheet to dry completely, clouds are drawn using the glazing method - applying several layers of paint. To blur the boundaries, use a clean brush moistened with water.
- Gouache - gouache is denser than watercolor, it allows you to quickly depict the night sky with stars. To do this, the sheet is thickly coated with paint of dark blue, purple and dark green colors and allowed to dry. After this, dip a flat, wide brush (flute) into white paint and, using your fingers, you need to make several movements along the bristles, splashing drops over the surface of the design. This technique is called “blotography” - small blots on paper turn into stars.
- With a pencil - the main method used when depicting the sky is shading, when graphite chips are smeared over the surface of the sheet. The technique of shading is also used - frequent and short parallel lines, due to the frequency and thickness of the stroke, are able to convey the volume and saturation of the cloud and the background of a celestial object. A simple pencil is also used for preliminary drawing of small details in a watercolor drawing.
They also use various techniques when depicting the sky - gradient stretching of the color gamut, mirror image, scratching dark-colored paper with a sharp object, etc. For clarity of each technique and various drawing techniques, it is recommended to watch the instructional video.
On the topic: methodological developments, presentations and notes
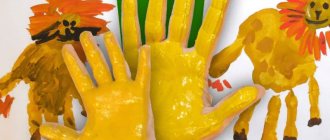
Software Content: Teach children to lightly press a finger on a small ball of plasticine and smear it in different directions on the cardboard. Develop fine motor skills of the hands. Demonstration.
· Expansion of vocabulary · Introduce children to the symbolism of constellations accepted by astronomers, cultivate a love of nature.
Dear colleagues, educational psychologists working in sensory rooms! I would like to share with you an idea on how to make a “Starry Sky” sensory panel for a relaxation area using available materials.
Summary of a correctional lesson on orientation in space on the topic “Starry Sky”.
The presentation contains photographs of elements of the solar system.
Drawing using the wet technique.
Non-traditional technique: candle + watercolor. Purpose: to cultivate an aesthetic perception of nature and its images using non-traditional artistic techniques; develop color perception and visual movement.
Source
At what age can you start?
- From the age of 3-4 years, a child develops his first visual language, which is formed by the age of 5 years. Thanks to picture books and cartoons, children learn that all the figures depicted have a name.
- However, the visual perception system expands from 5 to 10 years. It is at this age that it is recommended to start showing your child how to gradually depict the sky with clouds. From 5 to 10 years old, the young artist consciously adds details to his drawings and understands the pattern of their arrangement. In the process, the child can tell what he is trying to portray, ask for help and respond correctly to it.
Summary of a drawing lesson in the early age group “Starry Sky”
Natalya Nikitina
Summary of a drawing lesson in the early age group “Starry Sky”
Goal : Teaching children non-traditional drawing techniques.
Tasks:
Introduce the technique of drawing with a cotton swab.
Develop fine motor skills. Cultivate curiosity and accuracy.
Progress of the lesson:
Educator: “Guys, do you like watching cartoons? Who has seen the fairy tale about Luntik? Today he came to visit us (the toy Luntik is brought in). Let's say hello to him. He was born on a planet called the Moon. Luntik has not been home for a long time, and he is sad. Let's draw him a starry sky as a gift. And he won't be sad.
Educator: (shows a picture on the board “Starry Sky”)
Guys, look how many stars there are in the sky? (many) what color are the stars? (yellow).
Finger gymnastics “Cosmos” is carried out:
One, two, three, four, five (Bend the fingers on both hands one at a time)
A squad flew into space (Put their palms together, raise their hands up)
The commander looks through binoculars (The fingers of both hands are connected to the thumbs, forming “binoculars”)
What does he see ahead?
Sun, planet, satellites, comets (Bend the fingers of both hands)
And the big yellow planet (Show the circle)
Educator: And now we will draw the starry sky together - stars. We will draw with cotton swabs.
Look, I'll dip a cotton swab in yellow paint and put a star in the sky.
(Children dip sticks in gouache and begin to draw stars)
Educator: Guys, let's look at how many stars we have. We got it. Let's give our starry sky to Luntik so that he doesn't feel sad for home.
Educator: Luntik says thank you, now he is not sad at all. And for this Luntik wants to play with us.
Tips for parents
The child’s drawings reflect the experience gained in this world.
By the kind of sky he wants to draw, you can understand what interests the child. The main thing is not to disturb his presentation and not to prevent him from expressing his thoughts on the sheet of paper. Therefore, parents should be patient and listen to some advice:
- Don't expect a masterpiece from him - often parents expect instant excellent results from their offspring. Lessons on drawing clouds are a long process during which you need to try various techniques and techniques for transferring an image on paper. Only in practice can parents determine which technique, paints and colors the child likes best. Too high demands can lead to rejection of fine art by a novice artist. Patience and sensitivity, on the contrary, will allow natural abilities to blossom into talent.
- Learn to listen and see through the eyes of a child - you need to look at the world only in a positive way. A child cannot draw in a bad mood, so it is the parents’ task to create a good creative mood in a young artist. It is necessary to interest the artist with interesting stories about the sky and clouds, about its different states. The main thing is to do this in a language understandable to the child. And for this you need to be able to listen and see the world through his eyes.
- Don't scold for failures - don't impose your own drawing rules. Perhaps what you consider a mistake is for a child an original, original way to express his thoughts on paper. Fine art for children is the territory of true freedom. Offer them opportunities and options rather than imposing rules. Learn to be guided by the child’s interests and abilities. Praise him for his perseverance and attempt (even if unsuccessful) to depict clouds and sky. Discuss the bad points and decide together what needs to be improved. Give the initiative to the little master.
During a lesson on drawing the sky, clouds and stars, the child develops spatial thinking, eye, and hand-eye coordination. Help him start a beautiful drawing correctly - to do this, watch a video tutorial with a novice artist, which tells you how to draw a sky with clouds step by step.
Wondering how to draw the sky or other objects? Our video lessons and video courses will help you with this!
Notes on drawing "Starry Sky" in the second group of early age
Yulia Gik
Notes on drawing "Starry Sky" in the second group of early age
Summary of a drawing lesson in the second early age group
«Starry sky»
Prepared by Gik Yulia Yurievna,
teacher of MBDOU d/s No. 46 “Firefly”
Pskov
Goal: introducing children to the unconventional finger painting .
1. Teach children to draw dots and round objects with their fingers.
2. Develop fine motor skills of the hands, attentiveness and accuracy when working.
3. Cultivate kindness and responsiveness.
Demonstration material. Toy – Luntik, foil star , pictures of the starry sky.
Handouts: black cardboard, small stars made of golden cardboard, glue stick, yellow gouache, rags.
Give the concept of parts of the day (morning, afternoon, evening, night)
.
Looking at pictures depicting the night starry sky , reading thematic poems and fairy tales, talking about the daily routine, introducing children to the fairy tale about Luntik.