Curiosity is the natural state of any child. “Mom, why is it raining?” Why is the sky blue? Why is the candle burning? And so on endlessly. Is this a familiar story? Naturally, the child wants to know everything. We offer you interesting experiments with air that will satisfy children's curiosity and explain the laws of nature at a level accessible to kids.
1. We breathe air
Tell your child that we breathe air. He is around us, but invisible. Suggest an experiment: fill a glass with water, take a cocktail straw and blow into it. There will be air bubbles in the glass.
2. Parachute
Make a small parachute with your child. Take a handkerchief and attach threads of the same length to each corner of the handkerchief using a needle. Attach all ends to the toy. Tell your child why the parachute descends smoothly: the air under the canopy expands and supports it.
3. Weigh the air
Everything has its own weight, air too. Invite your child to weigh it. Take a ruler, find its center and tie a string to it. Inflate balloons of the same size and tie with threads of the same length. Now we hang the balls along the edges of our “scales”. The scales are balanced. We pierce one balloon - the inflated balloon goes down - it is heavier.
4. Does the air have a smell?
Let's check if the air has a smell. Invite your baby to smell the air - you can’t hear the smell. Now spray the room with eau de toilette or orange. Tell your child that air can transmit odors.
5. Cold or hot?
Teach your child that air can heat up and cool down. Take a plastic bottle and place it open in the refrigerator for a while. Take it out and put a balloon on the neck. Now put the bottle in a plate with hot water. What's happening? The balloon began to inflate on its own. Why? Because air expands when heated. And if you put the bottle in the refrigerator again, the ball will deflate.
6. Why doesn't it burst?
Surely your child knows what will happen if the ball is punctured. It will burst. Offer your little one an experiment. Place a piece of tape on both sides of the ball. Pierce the tape with a needle. What's happening? The ball doesn't burst.
7. Inflate a balloon in a bottle
For this experiment you will need two plastic bottles. In one of them we make a hole slightly higher than the bottom. We put a balloon in each bottle, pull the edges over the neck and try to inflate the balloon. Who will succeed - the dad or the baby?
8. Flight into space
We make a rocket - we roll the paper into a tube, glue one end and attach three triangular supports. Place a rocket on any support, insert the tube with one end into the rocket and the other into an empty plastic bottle. Seal the neck tightly with tape. Install the rocket. Place the bottle on the ground and position the rocket at the length of the elongated tube.
- On your marks! Attention! March!
Have your child run and step on the bottle as hard as he can. The rocket must fly into space.
9. Will he fall or not?
Take the funnel and turn it wide side down. Place a ping pong ball in it and hold it with your finger. Now blow into the narrow end of the funnel and stop supporting the ball. It will not fall, but will remain in the funnel.
This is explained by the fact that the air pressure under the ball is much greater than above it. And the harder you blow, the less air puts pressure on the ball, and the greater the lifting force. Give it a try.
Card index of experiments with air in the senior group
CATALOG OF EXPERIMENTS WITH AIR
Experiment 1. Air in a glass
Turn the glass upside down and slowly lower it into the jar. Draw children's attention to the fact that the glass must be held very level. What happens? Does water get into the glass? Why not?
Conclusion: there is air in the glass, it does not let water in.
Experiment 2. Air is invisible and transparent
.
Children are asked to lower the glass into the jar of water again, but now they are asked to hold the glass not straight, but tilt it slightly. What appears in the water? (Air bubbles are visible). Where did they come from? The air leaves the glass and water takes its place.
Conclusion: The air is transparent, invisible.
Experiment 3. Storm in a teacup.
Children are asked to place a straw in a glass of water and blow into it. What happens?
(It turns out to be a storm in a teacup).
Experiment 4. Lock the air into a ball.
Children are asked to think about where they can find a lot of air at once? (In balloons). How do we inflate the balloons? (With air) The teacher invites the children to inflate balloons and explains: we, as it were, catch the air and lock it in a balloon. If the balloon is inflated too much, it may burst. Why?
All the air won't fit. So the main thing is not to overdo it (invites the children to play with the balls).
Experiment 5. Air pushes objects
.
After the game, you can invite the children to release the air from one balloon. Is there any sound? Children are invited to place their palm under the stream of air. How do they feel?
We draw the attention of children: if the air leaves the ball very quickly, it seems to push the ball, and it moves forward. If you release such a ball, it will move until all the air comes out of it.
Experiment 6. The more air in the ball, the higher it jumps.
The teacher asks the children which toy they know well has a lot of air in it. This toy is round, can jump, roll, and can be thrown. But if a hole appears in it, even a very small one, then the air will come out of it and it will not be able to jump. (Children's answers are listened to, balls are distributed). Children are asked to knock on the floor first with a deflated ball, then with a regular one. Is there a difference? What is the reason that one ball easily bounces off the floor, while the other barely bounces?
Conclusion: the more air in the ball, the better it bounces.
Experiment 7. Air is lighter than water.
Children are encouraged to “drown” toys filled with air, including lifebuoys. Why don't they drown?
Conclusion: Air is lighter than water.
Experience 8. Air has weight.
Let's try to weigh the air. Take a stick about 60 cm long. Attach a string to its middle, and tie two identical balloons to both ends. Hang the stick by a string. The stick hangs horizontally. Invite the children to think about what would happen if you pierced one of the balls with a sharp object. Poke a needle into one of the inflated balloons. Air will come out of the ball, and the end of the stick to which it is attached will rise up. Why? The balloon without air became lighter. What happens when we puncture the second ball? Check it out in practice. Your balance will be restored again. Balloons without air weigh the same as inflated ones.
Experiment 9. Warm air at the top, cold at the bottom.
To carry it out you need two candles. It is better to conduct research in cool or cold weather. Open the door to the street slightly. Light the candles. Hold one candle at the bottom and the other at the top of the resulting gap. Let the children determine where the flame of the candles is inclined (the flame of the lower one will be directed into the room, the upper one will be directed outward). Why is this happening? There is warm air in our room. He travels easily and loves to fly. In the room, such air rises and escapes through the gap at the top. He wants to quickly get out and walk in freedom.
And cold air creeps in from the street. He is cold and wants to warm up. Cold air is heavy and clumsy (it’s frozen!), so it prefers to stay near the ground. Where will he enter our room from above or below? This means that at the top of the door crack the candle flame is “bent” by warm air (it runs away from the room, flies into the street), and below by cold air (it crawls towards us).
Conclusion: It turns out that one air, warm, moves above, and “other”, cold, creeps towards it, below. Where warm and cold air move and meet, wind appears. Wind is the movement of air.
Experience 10. The stronger the wind, the larger the waves.
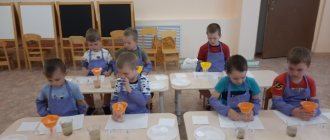
Prepare bowls of water for each child on the tables. Each bowl has its own sea - Red, Black, Yellow. Children are the winds. They blow on the water. What happens? Waves.
Conclusion: The harder you blow, the bigger the waves.
Experiment 11. The wind moves ships
.
Lower the boats into the water. Children blow on the boats, they float. This is how real ships move thanks to the wind. What happens to a ship if there is no wind? What if the wind is very strong? A storm begins, and the boat may suffer a real wreck (the children can demonstrate all this).
Experiment 12. Waves.
For this experiment, use fans made in advance by the children themselves. Children wave a fan over the water. Why did the waves appear? The fan moves and seems to push the air. The air also begins to move. And the children already know that wind is the movement of air (try to get children to draw as many independent conclusions as possible, because the question of where the wind comes from has already been discussed).
Experiment 13. Fan.
Now let's wave the fan in front of our faces. How do we feel? Why did people invent the fan? What has replaced the fan in our lives?
(Fan, air conditioner)
Experiment 14. How dunes are formed.
To conduct this experiment, select an illustration of a sandy desert that depicts dunes. Please review it before starting work. Where do you think such sand slides come from in the desert? (Listen to the answers, but do not comment; the children themselves will answer this question again after the end of the experiment).
Place a glass jar with dry sand and a rubber hose in front of each child. Sand in a jar is each child’s personal desert. We turn into the winds again: we blow the sand slightly, but for quite a long time. What's happening to him? First, waves appear, similar to waves in a bowl of water. If you blow longer, the sand will move from one place to another. The most “conscientious” wind will have a sandy mound. These are the same sand hills, only larger, that can be found in a real desert. They are created by the wind. These sandy hills are called dunes. When the wind blows from different directions, sand hills appear in different places. This is how sand travels in the desert with the help of the wind.
Return to the desert illustration. There are either no plants growing on the dunes at all, or very few of them. Why? They probably don't like something. And what exactly, now we will try to find out. “Plant” (stick) a stick or dry grass into the sand. Now the children must blow on the sand so that it moves towards the stick. If they do this correctly, over time the sand will almost cover your entire plant. Dig it up so that the top half is visible. Now the wind blows directly on the plant (the children quietly blow sand from under the stick). In the end, there will be almost no sand left near the plant, it will fall.
Return again to the question of why there are few plants on the dunes.
Conclusion: The wind either covers them with sand or blows it out, and the roots have nothing to hold on to. Plus, the sand in the desert can be very hot! Only the hardiest plants can survive in such conditions, but there are very few of them.
Experiment 15. “Wind is the movement of air.”
The teacher suggests looking out the window - is there any wind? Is it possible to invite the wind to visit you right now? (If there is a strong wind outside, just open the window and the children will see the curtain swaying. If the weather is calm, the teacher creates a draft, and then the wind “comes to visit”). You can say hello to him. Then the teacher asks you to think about where the wind comes from? (As a rule, children say that the wind blows because the trees sway). Wind is created by the movement of air. The teacher distributes strings with butterflies and ladybugs cut out of paper attached to the ends. The teacher suggests taking a deep breath, taking air into your mouth and blowing on the strings. What's happening? (Butterflies and ladybugs fly away). Yes, butterflies and ladybugs fly away thanks to the trickle of wind coming from the mouth. We made the air in the mouth move, and it, in turn, moves the strings with the figures.
Conclusion: What did we learn today? Wind is the movement of air. How can you depict the wind? Take a deep breath and blow.
Experiment 16. “The air is not visible in the room. To see him, you have to catch him."
Children are invited to look at the group room. What do you see? (Toys, tables, etc.) There is also a lot of air in the room, but it is not visible, because it is transparent, colorless. To see the air, you need to catch it. The teacher offers to look into the plastic bag. What's there? (It's empty). It can be folded several times. Look how thin he is. Now we fill the bag with air and tie it. Our package is full of air and looks like a pillow. Now let's untie the bag and let the air out of it. The package became thin again. Why? (There is no air in it.) Again, fill the bag with air and release it again (2-3 times).
Conclusion: What did we learn today? The air is transparent. To see him, you have to catch him.
Experiment 17. “The ball jumps high because there is a lot of air in it.”
Which toy has a lot of air? This toy is round, can jump, roll, but cannot be thrown. What it is? (Ball). Look how big and elastic he is, how high he jumps. But if a hole appears in the ball, even a very small one, then the air will come out of the ball and it will no longer be able to jump. The teacher hits the ball on the floor. He offers to knock different balls on the floor. Which ball bounces better? (Big, where there is a lot of air).
Conclusion: What did we learn today? The ball bounces high because there is a lot of air in it.
Experiment 18. “The wind blows, the boat floats.”
The teacher lowers the boat into the water. He suggests taking in more air and blowing on it. What's going on with the boat? (She floats). Why is she swimming? (Because we blow on it). Likewise, real boats can also float thanks to the wind.
Conclusion: What did we learn today? Who pushes the boat? (Wind).
Personal website of Valentina Nikolaevna Bulygina
Dear parents!
You have a unique opportunity to participate in the creation of our mini-museum.
Think about how and where people use air and its properties? With your children, look for objects in your environment that use air. All of them can become exhibits of our mini-museum. We will be glad to accept any help in creating the mini-museum “Invisible Air”!
In addition, we offer the following game exercises and mini-experiments that help determine the properties of air. You can use them as a fun and, most importantly, useful way to spend time with your children at home. This will help consolidate the knowledge acquired in kindergarten and increase interest in the mini-museum:
“Come on, blow it”
Using a cocktail straw, blow a paper ball off the table or from your palm. You can offer to play the game “Football”. All with the same paper balls, just set up a goal.
We will take air into our mouths and begin to blow on the ball. The ball seems to come to life, kicking along the table.
"Looking for the invisible man"
Tell your child that we are surrounded by air. It is everywhere, but we don't see it. How can you be sure that it really exists? Let's hang strips of paper or ribbon in the middle of the room (for example, on a chandelier). They will begin to move in a draft. So we saw you, invisible air!
"The Invisible Man's Trap"
Is it possible to catch this elusive trickster? It turns out yes! Let's make a trap from an ordinary plastic bag or rubber glove (it will be funnier this way). First, open the bag (or glove) wide. The air, suspecting nothing, will climb inside...
This is where we quickly twist the edges of the bag and tie it tightly with an elastic band. Look how the bag is swollen! It is immediately clear that there is something there. Gotcha, invisible! Well, shall we let him go?
Then we untie the package. He immediately deflated. But we now know that our invisible man is still here.
"Storm in a Teacup"
Invite your child to inhale through his nose and exhale into a tube, the end of which is in a glass half filled with water.
"Rescue Bubbles"
Pour plain water into one glass and mineral water with gas into the other. Ask your child to throw them there, and throw pieces of plasticine the size of grains of rice there.
Watch what happens: in plain water the plasticine will sink to the bottom, but in mineral water it will first sink and then float to the surface. Why did it happen? Because air bubbles raise the plasticine to the surface. When the gas is exhausted, the plasticine will sink.
"Ships"
Invite your child to blow on paper boats floating in a basin of water, sometimes smoothly, for a long time, sometimes quickly, and watch the movement of the boats.
"Butterfly (bird)"
Attach a paper butterfly (bird) to a string. Invite the child to blow smoothly with his mouth, without puffing out his cheeks, and the butterfly will fly.
"Snowflake"
Invite the child to blow cotton wool or tissue paper from his palm with a light, long mouth exhalation.
"The Wind and the Leaves"
Cut out several strips (7-10) from thin paper and attach them to a stick, invite the child to blow with the wind and the “leaves” will sway.
Do not forget that the child should not take convulsive, sharp breaths with raised shoulders and tension. The inhalation should also be calm.
07/05/2021 at 22:11. Categories: Consultations for parents.


