Features of paper layouts
A DIY paper Kremlin helps parents develop their child’s imagination and fine motor skills, and teaches them how to work with cardboard, scissors and other tools. If you are just doing activities with children, it is enough to choose an easy-to-make craft in the form of a flashlight, flower or animal.
A do-it-yourself model of the Kremlin is made only in the following cases:
- The family collects handmade items. It can be not only paper products. Matches, Chinese sticks, cotton wool, fabrics, plastic, etc. are used.
- The family collects building crafts made from paper. Often these are landmarks of the World, so the Kremlin will always be added to the collection.
- It is required to make a model to form a stage for a mini-theater. Perhaps it will be a shadow theater, but the shape of the building in question has to be created for the surroundings.
Regardless of where the Kremlin model will be used in the future, it must be assembled from paper according to the instructions.
On the topic: methodological developments, presentations and notes
Quiz on the topic “Moscow Kremlin”.
Objectives: To consolidate children’s knowledge about the history of the creation of Moscow and the construction of the Kremlin. To provide knowledge about the layout of the Kremlin, the names of its towers, and their purpose. To instill in children a love for their hometown.
The purpose of this project: to introduce children to the sights of the Moscow Kremlin, to develop children’s speech, to evoke respect and love for their hometown, to cultivate patriotic feelings in children, knowledge.
Here I would like to give a presentation about the history of the Moscow Kremlin. It will be useful for teachers who want to introduce children to the Moscow Kremlin.
The presentation contains material on the history of the Moscow Kremlin.
Objectives of the lesson: will expand children’s understanding of the history of the Moscow Kremlin, the construction of the Kremlin; introduce the layout of the Kremlin, talk about the names of its towers and their purpose; cultivate feeling.
Goal: To give children knowledge about the history of the Moscow Kremlin and its attractions. Cultivate an interest in learning about the history of our state. Develop patriotic feelings.
Drawing lesson in the preparatory group "Spasskaya Tower of the Kremlin"
GCD for drawing and speech development according to the Federal State Educational Standard of Education
on the topic “Spasskaya Tower of the Kremlin” in the preparatory group.
Teacher 1st category Mytishchi
Preschool educational institution No. 76 “Scarlet Sails”
Nikiforova Nina Valerievna
Tasks:
Cognitive development:
Expand children's knowledge about Moscow - the capital of our Russia.
Introduce the historical past of Moscow. Expand children's knowledge about the Kremlin and its attractions.
Social and communicative development:
To form patriotic feelings in children: love for their hometown, pride in the people living in it - Muscovites.
Speech development:
Enrich the vocabulary with the concepts: “Kremlin”, “fortress”, “chimes”, “Spasskaya Tower”, “white stone”, “landmark”, “wooden”, “brick”.
Artistic and aesthetic development:
To develop the ability to convey in a drawing the architecture of the main Kremlin tower - Spasskaya, conveying its shape. To promote mastery of compositional skills: arrange an object on a sheet, taking into account its proportions. Strengthen children's ability to draw with a brush in different ways: wide lines - with the whole brush, thin lines - with the tip of the brush; apply strokes - when drawing individual details.
Teach children to analyze their work by comparing it with a model.
Preliminary work:
A conversation about the capital of our Motherland, Moscow. Reading poems about Moscow and the Spasskaya Tower to children.
Material used:
Magnetic board with photographs and illustrations of the Kremlin's Spasskaya Tower, gouache, a sheet of A4 paper, a small model of the Kremlin, palette, napkins, jars of water, plastic trays for gouache.
Progress of the lesson:
1 part
Educator: Guys, we live in a big country! What is it called? (Russia)
Educator: - Name the capital of Russia? (Moscow)
Poem reading:
Such a big old city,
My country is proud of him!
He is the head of all cities,
The capital of the Motherland is Moscow!
-Moscow is a big and beautiful city. There are many museums, theaters, stadiums, parks, squares. Beautiful, tall buildings.
Educator: Children, why is it located in the center of Moscow? (Kremlin)
Educator: Children, look at the picture of the Kremlin!!! Who can tell me where the Kremlin is in Moscow?
Children: On Red Square.
Educator: Why is the square called red?
Children: Because the Kremlin is red and the buildings are made of red bricks,
Educator: What did the word red mean in the old days?
Children: Previously in Rus' the word red meant “beautiful”, “chief”
Educator: That's right, guys.
Educator: The Kremlin was made of wood and the walls around it were also made of wood. Wooden high fence, wooden towers, bell towers, houses inside
The Kremlin - everything was made of wood. Tell me what kind of wood was used to build the fortress wall and most of the internal buildings.
Educator: Yes, that's true. Guys, the word Kremlin means fortress. Previously, in Rus', people built a fortress in order to fence their home, and
also to protect yourself. Who do you think the Kremlin residents were protecting themselves from?
Children: from enemies, from wild animals.
Educator: Well done! Since the Kremlin is based on a high hill, enemies could be seen from a greater distance, and the rivers served
a natural obstacle in their path.
Educator: The walls of the Kremlin are jagged, powerful, which end with brick battlements, also called “swallow tails”. Who should I
will he say why they built battlements on the wall, why didn’t they make it level?
Children: The battlements helped warriors defend themselves from the enemy. Narrow slits helped to aim at enemies.
Educator: There are many towers outside the walls of the Kremlin, we looked at them and said that each tower has its own history. Who can tell me which one?
the most important tower of the Kremlin?
Guys, guess the riddle and you will find out what is installed on this tower.
Two hundred years pass, and everything is in place. They walk like that! Teak! - So! Teak! - So! /Watch/
- Well done. The main clock of our country, the chimes, is installed on this tower. They strike every fifteen minutes. And the new year begins as soon as the chimes strike twelve times on the night of December 31 to January 1.
And the top of the Spasskaya Tower is decorated with a five-pointed ruby star.
The clock of the Kremlin tower is striking,
The stars are fading, the day is melting...
Goodbye, yesterday,
Hello, new bright day! (Yu. Entin, excerpt from the song “Song of the Bells”)
Educator: Children, would you like to draw this most beautiful tower of our Moscow?
Children: Yes!!!
Educator: Now let’s rest a little:
Tick-tock, tick-tock, who in the house can do that? This is a pendulum in a clock, Beats every beat (Tilts left and right.) And in the clock sits a cuckoo, She has her own hut. (Children sit down in a deep squat.) The bird will spend time, hide behind the door again, (Squats.) The arrows move in a circle. They don't touch each other. (Rotate your body to the right.) You and I will turn counterclockwise. (Rotate your body to the left.) And the clock goes and goes, (Walks in place.) Sometimes it suddenly lags behind. (Slow down the pace of walking.) And sometimes they are in a hurry, As if they want to run away! (Running in place.) If they are not turned on, then they completely stand up. (Children stop.)
Educator: I invite you to draw the Spasskaya Tower.
part 2
In the group, everything is laid out on the tables for drawing, and on easels there are drawings, a photo of the Spasskaya Tower, and a model
Spasskaya Tower.
Educator: Before we start drawing, answer the question, what will we use for the children to draw?
Children: Gouache.
Educator: Please note that the tower and the Kremlin wall are red. And who can say why you have two brushes on your table, one thin and the other thick?
Children: We paint everything with a thick brush, and with a thin brush, whoever has time to draw before others, we draw small details.
Educator. And now we will proceed to the image of the Spasskaya Tower. Place the sheet horizontally. Find the middle of the sheet, draw a rectangle there. On it, exactly in the middle, we will draw a square in which there will be a clock - chimes. Now we draw a triangle with a star on it. All that remains is to finish drawing the walls and decorate them, draw the Spassky Gate in the middle. Let's get to work.
Children sit down and draw.
Educator: Do not allow excess water to get into the gouache, and also do not allow painting with a dry brush. Rinse the brush well to prevent mixing of several colors. We do not leave the brush in a jar of water even for a short time, but place it on the palette to avoid bending the brush.
Part 3
RESULT OF THE LESSON
At the end of the lesson, the teacher analyzes the finished children's work.
infourok.ru
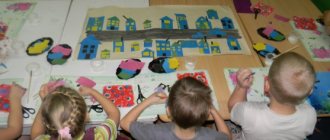
Summary of a lesson on applique for children of the preparatory group on the topic: “Towers on the Kremlin”
Municipal budgetary preschool educational institution kindergarten No. 21, Novocherkassk
Summary of an appliqué lesson for preparatory group children on the topic: “Towers on the Kremlin.”
Author: Dolmat Ekaterina Vladimirovna
Goals:
learn to work independently and in a team; create a bright, harmonious composition. Develop color perception and color perception. Improve the technique of making mosaics - appliqué using the tearing method, skills in working with glue and a brush.
- continue to teach children how to make compositions from colored paper;
- consolidate the ability to cut paper in various ways (along the contour, diagonally, by folding); tearing pieces of paper.
- strengthen skills in working with scissors and glue.
- develop attention and creativity;
- cultivate patriotic feelings, develop moral feelings of empathy and gratitude to all those who participated in the Great Patriotic War.
Equipment:
Demonstration material: photographs of the Kremlin towers in Moscow, fireworks on Red Square, CD player.
Handouts: colored paper blanks; colored napkins, rags, scissors, wax crayons, oilcloths, glue, simple pencils.
Progress of the lesson:
Educator: Today, we will talk about the main attraction of Moscow (the Moscow Kremlin).
Children read poetry:
In Moscow on Red Square the crowd is black and black. The Kremlin wall is humming from heavy footsteps.
The Kremlin on a winter night over Moscow - The river and the city of Moscow - With the steep head of Ivan And with the shadow of the guard walls.
The Kremlin on a winter night under the moon, You are wonderful with the lofty antiquity And glorious with it along with the cruel recent memory.
Educator: The Kremlin is considered a symbol of the protection of our people from enemies at all times. The Kremlin is a fortress. Through narrow loopholes in the Kremlin walls, the defenders of the fortress shot at the enemies attacking them. There are 20 towers in the Kremlin. The most famous: called Vodovzvodnaya, Corner Arsenalnaya and Middle Arsenalnaya, Armory, Borovitskaya, Tainitskaya tower.
Spasskaya Tower is the most beautiful tower of the Kremlin. It is easy to recognize by its chimes. And today we will try to make an application on the theme: “Moscow Kremlin”.
Children sit on chairs at tables.
Educator: Find a dial without arrows, draw arrows on them so that your watch shows 10 pm.
Gymnastics for the eyes:
Movement of the Russian flag in different directions.
Now see how the application will be done.
The background of the application will be thick blue or black paper (cardboard).
1. A large red piece of paper, we bend it on both sides, 2 times, this will be the voluminous lower part of our Spasskaya Tower.
We will glue a white openwork strip to it on top (previously bend a strip of white paper into 4 parts, draw a pattern on it, and cut it out).
Glue the prepared blank onto the bottom of the background.
2. Glue a red rectangle above it. We will glue a clock we made onto it, showing the time when the fireworks are fired.
3. Take a green rectangle, cut it diagonally - we create a triangular roof of our tower.
4. At the top of our tower, a five-pointed star is glued.
5. Fireworks are drawn with wax pencils.
6. Fireworks sparks are made from colored napkins (tear off small pieces and roll into small balls) and stick them on the work
When the guys have completed the first stage, the
Physical education minute
:
One two three four five. Children walk in a circle.
We're going for a walk around Moscow.
They came to Red Square and spread their hands wide. Wide, beautiful.
And on that square - Turn your face in a circle. The Kremlin is tall and large. Raise 2 arms above your head. Oh, what a height! They lift it up one by one. Oh, what a beauty! Left and right hand. One two three four five. They walk in a circle. Then we go for a walk. Turn their faces in a circle. Pokrovsky Cathedral, mausoleum, Alternately, they take their left and right hands to the side of the Historical Museum. We were at the wonderful skating rink,
We didn’t forget to go to GUM
The sun began to set, hands on the belt, squats. It's time for us to return home.
Then the guys carry out the subsequent stages of work. (While children are working, songs from the war years are heard).
Result: At the end, an exhibition of works is held and the best works are evaluated.
Asking children what they did, what they learned.
Fireworks sound in honor of all winners.
The finished application can be placed in a frame. You can buy a frame in a store, or you can make it yourself from paper or from a box of chocolates.
Text of the book “Modeling and applique with children 6-7 years old. Class notes"
Theme of the week: “Animals of cold countries”
Lesson 20. Penguins
(Modeling from plasticine. Team work)
Program content.
Continue teaching children how to sculpt from plasticine using the techniques previously learned. Develop the ability to convey the proportional relationship of parts. Strengthen the ability to connect parts by pressing them together. Continue to teach how to bring the product to match the intended image, giving it expressiveness. Learn to create a collective scene from crafts made. Continue to teach to understand and analyze the content of the poem.
Demonstration material.
Picture with penguins.
Handout.
Ash or maple lionfish, plasticine, blue cardboard (or computer disk), pieces of white tracing paper or foam plastic, stacks, cardboard stands, modeling boards.
Progress of the lesson
Look at the picture with penguins with your children and read M. Glazkov’s poem “Penguins”:
The penguin people have Antarctic fashion: And at any time of the year All penguins walk like this: They wear white shirtfronts, They wear black pants, They wear a very short ponytail, They wear a very long tailcoat.
Divide the children into groups of 5-6 people.
Invite the children to make one penguin each and combine them into a common scene. You need to roll up a round black head and attach it to an oval body. Penguin wings can be made from maple (ash) wings or plasticine and attached to the sides of the body, then rolled up and attached small brown balls - paws.
The made penguins need to be combined into a common plot, placing them on a piece of foam plastic or pieces of white tracing paper glued to blue cardboard. Penguins can also be attached to a computer disk - then you get penguins on ice. You can stick cotton wool, white fluff or pieces of foam onto the disc.
Topic of the week: “My Home”
Lesson 21. Building a house
(Modeling from plasticine)
Program content.
To develop in children the ability to sculpt a house from rolled up columns, placing them on top of each other and firmly connecting them together. Strengthen the ability to use a stack. Develop imagination and creativity when creating crafts. Continue to teach children to understand and analyze the content of the poem.
Handout.
Plasticine, stacks, cardboard stands, PVA glue, modeling boards.
Progress of the lesson
Read E. Blaginina’s poem to the children:
In order to build a New House, they stock up on Oak Plank, Bricks, Iron, Paint, Nails, Tow and Putty, and then, Then, Then They begin to Build the House!
Ask the children:
– What is needed to build a house?
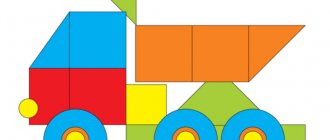
Invite the children to build a house out of plasticine. You need to roll a lot of columns, aligning them along the length using a stack. Then assemble the walls of the house on a cardboard stand, placing the posts horizontally on top of each other. The roof is also made of columns located at an angle to the walls. Then the children independently decorate the house with windows and doors. Near the house, you can make a garden on a cardboard stand - plant flowers.
Theme of the week: “My City”
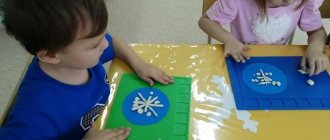
Lesson 22. Kremlin
(Eggshells. Imitation of frescoes)
Program content.
Introduce children to the history of the creation of the Kremlin. Continue to teach yourself how to come up with the content of your work. Learn to outline silhouettes with a simple pencil. Continue to teach the technique of imitating a fresco: evenly apply liquid glue to part of the surface and cover it with eggshells.
Demonstration material.
Illustrations of the Kremlin and Spasskaya Tower.
Handout.
Sheets of blue cardboard, crushed eggshells, bowls, pencils, gouache, felt-tip pens, soft brushes, jars of water, PVA glue, glue brushes, rags, oilcloth linings.
Progress of the lesson
Read to the children an excerpt from N. Konchalovskaya’s poem:
The great-grandson of Dmitry Donskoy rebuilt the Ancient Kremlin again. Muscovites began to make bricks for buildings. Nineteen formidable towers Stood for five centuries, They are not afraid of any enemy, no matter how many enemies there are.
Tell your children about the history of the Kremlin:
“At first the Kremlin was a wooden fortress, then the wooden walls were replaced by fortifications made of white stone. When the white stone walls began to collapse, it was decided to build a new Kremlin of red brick. Several towers were built. There were wells inside these towers, and inside one (Taynitskaya) there was even a secret passage to the river. Strong walls with loopholes were erected between the towers through which they could shoot at enemies (show the children the corresponding illustration). And deep ditches were dug around the Kremlin.”
Tell the children about the Spasskaya Tower and that it has a striking clock - chimes. Show the children an illustration of this tower and look at it with the children: “The Spasskaya Tower is tall, at the bottom is the largest rectangular part, then the square part on which the round clock is located. At the top of the tower is a star. There are battlements running in different directions from the tower.”
Invite the children to mark the silhouette of the Kremlin (towers and walls) or the silhouette of the Spasskaya Tower on cardboard with a simple pencil. The background of the painting can be painted over with gouache rather than covered with shells. You should not saturate the drawing too much with details, otherwise the child will have too much work.
Next, children apply glue to a small piece of cardboard inside the outline and sprinkle a thin layer of eggshell on top. The watch dial can be left uncovered and arrows and numbers can be drawn on it with felt-tip pens.
In their free time after class, children can paint the fresco with gouache.
Topic of the week: “Our Defenders”
Lesson 23. Postcard with a sailing ship
(Magazine and colored paper, cardboard. Three-dimensional applique from cut out objects)
Program content.
Teach children to create a three-dimensional greeting card. Strengthen the ability to perform work in the exact sequence to realize the intended image. Develop precision of movements and coordination. Strengthen the ability to use scissors carefully. Develop creativity, imagination and independence. Cultivate love for parents.
Handout.
Sheets of cardboard, ships cut out from a magazine sheet measuring 17x10 cm, album sheets measuring 17x12 cm, colored paper, wax crayons, scissors, glue, rags, oilcloth linings.
Progress of the lesson
Read to the children the beginning of S. Marshak’s poem “Good Day”:
Here is the briefcase, coat and hat. It's Dad's Day off. Dad didn't leave today. So, he will be with me. What are we going to do today? We will discuss this together. I’ll sit with dad on the bed - Let’s discuss it together.
Talk to your children about their fathers, ask what each child likes to do with their dad.
Invite the children to make a card - a gift for dad.
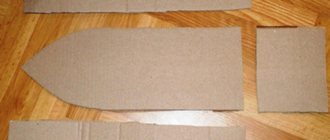
To seal it, a ship cut out of magazine paper is glued onto a prepared album sheet so that a strip of 1–2 cm remains on the bottom of the sheet. The glued ship must be cut along the contour on top, leaving an uncut strip of the sheet at the bottom; this strip will then need to be folded, to make the ship stable.
Next, you need to place a sheet of cardboard vertically in front of you, fold it in half and open it back. This inner part of the cardboard will be the sea and the sky. On the top of the cardboard (in the sky) with wax crayons we draw the sun, soaring seagulls and color the sky. On the lower part (at sea) we make waves using the breaking method. The ship is glued with a folded strip to the bottom of the cardboard. This way it will turn out to be floating on the waves and will be located perpendicular to the bottom of the postcard. It will make a good gift for dad.
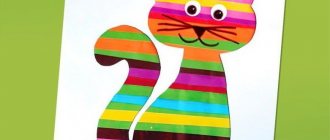
Theme of the week: “Professions”
Lesson 24. Rocking toy “Circus Clown”
(Colored cardboard. Volumetric product)
Program content.
Continue teaching children to trace the outline of the toy according to the template and carefully cut it out. Learn to paste cut-out silhouettes onto round boxes. Strengthen the ability to use previously learned techniques when decorating crafts.
Handout.
Halves of cut cardboard round boxes for processed cheese with lids, two squares of colored cardboard 10x10 cm for each child, circus clown templates, colored and white paper, pencils, scissors, PVA glue, glue brushes, rags, oilcloth linings.
Progress of the lesson
Read E. Blaginina’s poem to the children:
The circus performer knows how to prance, train animals and birds, and spin on a trapeze, and dance on a rope. I love the circus!
Ask the children what a circus performer can do and invite them to make a circus clown.
First you need to attach the clown template to the wrong side of one of the cardboard squares, trace the outline with a simple pencil and cut it out. The same thing needs to be done with the second square, only attach the template with the reverse side. Then the halves of the clown are decorated. You need to make a face from a white circle, decorate clothes with pieces of colored paper, etc. When the halves of the clown are ready, their legs are glued to different sides of half the box, and the halves of the head are glued together.
It turns out to be a rocking toy.
Theme of the week: “Craftsmen”
Lesson 25. Filimonovsky cockerel
(Clay modeling)
Program content.
Continue to introduce children to the features of Filimonov modeling. Teach them to sculpt a figure from a whole piece of clay, pulling out and pinching small parts. Develop the ability to smooth out the unevenness of a sculpted figure. Continue to strengthen the ability to decorate a product using stacks.
Demonstration material.
Filimonovsky clay toys: cockerels, chickens, deer, horses, cows, lambs.
Handout.
Clay, bowls of water, stacks, modeling boards.
Progress of the lesson
Tell the children about the Filimonov toy:
“The art of making such a toy originated in the village of Filimonovo. Near the village there were deposits of white clay, and they began to make toys from it (show the clay products). Filimonov toys can be immediately recognized by the long and elongated necks and small heads of the animals.”
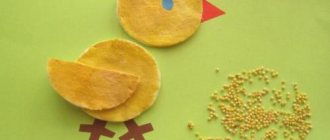
Consider the Filimonovsky cockerel with your children. Invite them to sculpt such a cockerel, then paint it with gouache paints. You need to roll the column, thicker towards the middle, thinner towards the ends. Bend it in an arc. Bend the ends down slightly. Flatten the tail with your fingers. Select the ridge - a little back. Pinch the beak and the beard on each side of it. Having dipped your fingers in water, smooth out the unevenness of the sculpted figure with wet fingers. Place the rooster on a cone-shaped stand. Select the wings and feathers using a stack.
When the clay dries, the sculpted cockerel needs to be covered with yellow water-based paint or gouache mixed with a drop of PVA glue.
During the drawing lesson, children will paint a figurine with red and green gouache.
Theme of the week “March Eighth”
Lesson 26. Flower for mom
(Clay modeling)
Program content.
Continue teaching children to sculpt decorative objects from clay. Introduce a new method of sculpting using the overlay method. Learn to construct a flower from individual clay parts. Develop the ability to complete a task in precise sequence. Develop the ability to wet the joints of parts of an object by dipping your fingers in water. Continue to strengthen the ability to decorate a product using stacks and paints.
Demonstration material.
Sample of a sculpted flower.
Handout.
Cardboard templates: circle with a diameter of 7 cm and 4 cm, petals 5 cm long and 3 cm wide; clay, bowls of water, stacks, boards for modeling.
Progress of the lesson
Read to the children an excerpt from A. Kondratieva’s poem “Mom is Near” and ask them to guess who the poem is about:
In autumn, spring, summer and winter Who is next to you, Next to you? In any joy, in any sorrow, Who is next to you, Next to you?
Invite the children to make a gift for their mother - a clay flower.
You need to put a well-kneaded, homogeneous piece of clay on a board, flatten it with your hands and roll it out with a rolling pin to a thickness of about 1 cm. Place the templates of two circles on the resulting cake and trace, and then cut them out using a stick. In the same way, you need to cut out 6-7 petals (this is similar to cutting out dough for dumplings). Then attach the petals in a circle onto a large circle so that a little less than half of the petal hangs down. Cover the top with a small circle - the core. (Remind children to dip their fingers in water to moisten the joints!) Then make many small balls of clay and decorate the center of the flower with them. Balls can be decorated with pierced dots.
Then the clay flower needs to be dried and painted.
Theme of the week: “My family”
Lesson 27. Filimonovsky and Dymkovo ladies
(Clay modeling)
Program content.
Continue to introduce children to the features of Filimonov and Dymkovo modeling. Teach them to compare and sculpt the Filimonovskaya and Dymkovo ladies from life. Strengthen the ability to smooth out the unevenness of a sculpted image when this is necessary to convey the image of an object.
Demonstration material.
Filimonovsky and Dymkovo clay ladies.
Handout.
Clay, bowls of water, modeling boards.
Progress of the lesson
Tell the children about how clay toys used to be made: “In the villages, women and girls made toys, then dried them, fired them in a kiln, and after firing, painted them.”
Consider the Filimonovskaya lady - she has a high bell-shaped skirt, a small upper body and a small head in a hat. The skirt for the Filimonovskaya lady is molded in the shape of a hollow bell - the clay is patted into a cake and the cake is rolled up into a funnel. The head, neck and jacket are sculpted from one piece of clay. Hands and details are depicted separately and attached to the surface of the figure.
Consider the Dymkovo lady. It is sculpted from separate parts: the skirt is sculpted in the form of a wide and hollow cone at the base, the torso is placed on it, the neck is pulled back and the round head is secured. Arms in puffy sleeves are attached to the shoulders and secured at the waist. Then they decorate the lady with curly hair, put a brimmed hat, bonnet or kokoshnik on her head, and cover her shoulders with a cape. There is a frill at the bottom of the skirt, and the lady usually holds a handbag, umbrella or other item in her hands. Compare the Filimonovskaya lady with the Dymkovo lady. Invite the children to make any lady.
When the toys are dry, let the children cover them with yellow or white water-based paint or gouache mixed with a drop of PVA glue. And in the drawing class you can paint the ladies.
Theme of the week: “My friends”
Lesson 28. Cipollino
(Modeling from plasticine in combination with natural material)
Program content.
Continue to teach children to sculpt the figure of a fairy-tale character using a combined method, conveying the shape of the head, torso, legs, arms and observing the proportional ratio of the parts. Learn to tightly fasten parts and create a stable figure. Develop fantasy and imagination in the embodiment of the conceived image.
Demonstration material.
A book with illustrations where Cipollino is drawn.
Handout.
Plasticine, small bulbs, stacks, cardboard stands, modeling boards.
Progress of the lesson
Read to the children an excerpt from “Cipollino’s Song” by S. Marshak:
I am the cheerful Cipollino. I grew up in Italy - Where oranges and lemons and olives ripen, Figs and so on.
Look at the image of Cipollino in the book and invite the children to sculpt a cheerful hero, combining sculpting from one piece and sculpting from separate parts. From a large piece of plasticine you need to roll a thick roller, cut one end of it in a stack to the middle (you get legs) and bend small feet-stands forward. The head needs to be made from a small onion, the arms from posts and attached to the body (the upper part of the roller). Then decorate Cipollino’s face - make eyes, nose and mouth. Place the fairy-tale hero on a stand, spreading his legs for stability.
Theme of the week: “Spring mood”
Lesson 29. Flowering branch
(Corrugated paper, fabric, ribbons, foam plastic. Ikebana)
Program content.
Continue to introduce children to the possibilities of ikebana. Encourage children to create their own flowers from various materials. Develop the ability to beautifully arrange flowers on a branch. Strengthen the ability to understand and analyze the content of a poem.
Handout.
Strips of soft colored paper 20x5 cm, corrugated paper, pieces of fabric, ribbons, polystyrene foam, wood twigs; scissors, PVA glue, brushes, adhesive tape, rags, oilcloth linings.
Progress of the lesson
Read the poem “Spring is Red” to the children by E. Gaia and F. Lev:
Spring is red outside. Why is spring red? The hot sun, the bright light, the sticky bud, the first leaf, the tractor in the field, the bird in the wild, the clear sky, the red flag!
Ask the children:
– What signs of spring are described in the poem?
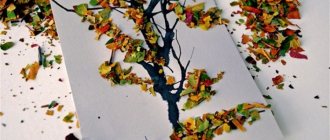
Invite the children to create beautiful spring branches. To do this, you need to fold a long strip of colored paper like an accordion and lightly cut the edges at intervals of 0.5 cm. When the children unfold the strip, you will get a ribbon with fringe. This tape should be carefully wrapped around the tree branches. Next, children need to create their own flowers from corrugated paper, ribbons, pieces of fabric and secure them to the branches using adhesive tape. The polystyrene foam needs to be crumbled into small balls and glued to the branches using PVA glue, imitating snow residues. You will get several fluffy flowering spring branches with which you can decorate the room.
Theme of the week: “Cosmonautics Day”
Lesson 30. In space
(Colored paper. Applique from cut out parts of objects)
Program content.
Teach children to independently reflect the theme in the application. Learn to use symmetrical cutting techniques. Develop creativity, imagination, and imaginative thinking with the help of riddles.
Handout.
Sheets of dark cardboard, colored paper, pencils, scissors, PVA glue, glue brushes, rags, oilcloth linings.
Progress of the lesson
Start the lesson with a riddle:
Not a feather, not a wing, But faster than an eagle. As soon as it releases its tail, it will rush to the stars.
(Rocket)
Invite the children to think about what can be depicted on a space theme (astronauts, flying space rockets and ships, stars, etc.). Children need to independently make applique parts from colored paper and glue them onto cardboard.
Theme of the week: “The Vanished World”
Lesson 31. Country of dinosaurs
(Modeling from plasticine. Team work)
Program content.
Introduce children to the appearance and living conditions of prehistoric animals. Learn to sculpt dinosaurs using previously learned sculpting techniques. Continue to strengthen the ability to compose a collective composition and sculpt additional landscape elements.
Demonstration material.
Pictures or books with illustrations of dinosaurs.
Handout.
One shoebox lid, the inside of which is covered with green paper, for a group of 5-6 children; plasticine, stones, straws, stacks, modeling boards.
Progress of the lesson
Look at illustrations of dinosaurs with your children, paying attention to the size and appearance: they all have a powerful, strong body, long necks, thick skin of brown (or green, orange, sand, greenish-brown) color. Some dinosaurs walked on four legs, others on two. According to their feeding method, there were both herbivores and predators.
Divide the children into groups of 5-6 and ask them to think about what kind of dinosaur they would like to make. Depending on this, they need to choose the most suitable sculpting method.
To sculpt a dinosaur with four legs, you need to roll up an oval body, separately sculpt a long tail, a head with a neck in the form of a curved column and a paw, and attach it to the body. A dinosaur on two legs is sculpted a little differently: you need to extend the neck, head and tail from the oval. The front short legs-columns and the hind legs in the form of large ovals need to be sculpted separately. Give the dinosaur stability.
Each subgroup places sculpted dinosaurs on its own box lid. Complements the plot composition: separately makes palm trees and ferns from plasticine and straws. You can make mountains using stones of different sizes, connected using plasticine.
Theme of the week: “Creation of the World”
Lesson 32. How Tog sculpted animals
(Modeling from plasticine. Team work)
Program content.
Introduce children to a fairy tale that tells about the creation of animals. Encourage children to create collective work by thinking through and implementing a plot on a given topic. Develop fantasy and imagination.
Demonstration material.
Subject pictures depicting animals: crocodile, armadillo, anteater, jaguar, frog, raccoon, hummingbird, etc.
Handout.
One shoebox lid, the inside of which is covered with green paper, for a group of 5-6 children; plasticine, stacks, modeling boards.
Progress of the lesson
Look at pictures of animals with your children, pay attention to the features of their appearance.
Then tell the children a fairy tale:
“It was a long time ago. In those days, the day lasted so long that by the evening you would forget what you did in the morning. It was such a long day, just like human life is now.
Orange and apple trees, grapevines, date and banana palms grew on the ground. And there were many other amazing trees and flowers. Cool rivers gurgled, ripe fruits fell into the thick grass. Flowers bloomed in the morning. It was beautiful in the wonderful garden, but empty. There were no animals or people.
Then Tog decided (since this is a fairy tale - it will not be GOD, but TOG) to make animals - let them run. He collected some good red clay and began to sculpt. At first he didn’t do a very good job: the body was large, the head was small, and the mouth was very large and toothy. The hind legs are long and strong, while the front legs are thin and weak. Nothing worked for Toga - the animals turned out to be terrible - huge, ferocious, with large horns, huge fangs. Simply terrible. The last of these monsters was the crocodile - you saw how scary it was!
But gradually Tog got the hang of it, and he began to create quite nice animals. I made an armadillo and it turned out well. Then an anteater, a jaguar. The frog turned out best - smooth, pop-eyed. Gorgeous!
By the end of the day, Tog was very tired. Sculpt each one so that everything is still in place - paws, tail, eyes, and nose. And how much wool! Go ahead and sculpt every hair! And color it later! Well, okay, the crocodile - Then he put it on the sand, poured green paint on top, so the crocodile became green on top, and yellow below, where the belly is. But there’s a raccoon, you have to draw so many stripes on it – you’ll be tortured! And the hummingbirds? Have you seen how bright they are? Shimmering in the sun! So, not only do you need to sculpt each little feather, you also need to paint each one in its own color and attach it in place! Tog is very tired for the day! He doesn’t have the strength to sculpt anymore!”
Invite the children to help Toga. Divide the children into groups of 5-6 people. Children in each subgroup need to independently come up with a plot and distribute the work. Some will sculpt unusual trees, some will sculpt fabulous flowers, and someone will help Tog sculpt animals. Plasticine animals can be not only those that exist on earth, but also those that existed a very long time ago and no one knows anything about them.