Positive aspects of creating applications
This type of crafts has a very beneficial effect on the development of the child. The main advantages of creating applications:
- Development of fine motor skills of the hands;
- Development of creative and logical thinking;
- Trains perseverance and accuracy;
- While working, the baby remembers what objects look like and what they are called.
Also, in this way, a child can create not just a simple standard craft, but also present the work as a gift or interior decor.
Applications fruits and vegetables
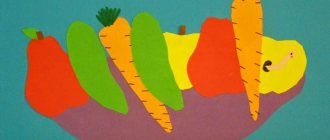
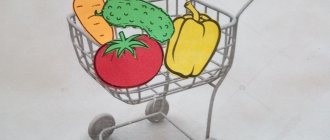
Applications in the form of fruits and vegetables are quite popular; they are created by both younger and older children. Using them you can glue real compositions, and from different materials.
The depiction of fruits and vegetables using the appliqué technique facilitates their quick learning and memorization, which is very important for a small child.
Materials for their manufacture
To make applications depicting fruits and berries, you can use not only the usual material - colored paper, but also others:
- corrugated paper;
- felt;
- some types of fabrics;
- dried tree leaves and berries;
- seeds;
- cereals and pasta;
- beads;
- eggshells;
- threads
An application on this topic with several types of materials turns out to be quite interesting and original.
Technicians
As a rule, fruits and vegetables are depicted in the form of standard applications, but they also look very interesting in 3D volume. If desired, you can make the applique using the origami technique or by twisting narrow strips of paper.
They also often do work using the mosaic technique, that is, they tear paper or break eggshells into small pieces, and then fill them with the required image.
Lesson notes on appliqué “Striped rug”
1 — qishi tobynda o ku kyzmetіnde
ұ yimdastyrylgan sabaktyn notes
Summary of the lesson of organized educational activity
in the first junior group
The lesson summary of organized educational activity
in the first younger group
Otkіzіlіn kүnі: Date: The date:
Tarbieshi: Educator: Educator:
Popova E. N.
Bіlim take salas:
Educational area : Educational area :
“Creativity”
Type of OAM: Type of OAM:
"Applique".
Takyryby:
Theme: Theme:
“Striped rug”.
Maksats:
Purpose: Aim :
Teach children to lay out strips, alternating them by color.
To develop children's sense of color when laying out strips ( alternating by color
).
Mindetteri: Tasks:
teach how to create a harmonious composition from paper strips alternating in color. Develop finger motor skills.
Bilingual component: Bilingual component: Bilingual component:
Kural – Zhabdyktar: Equipment: Equipment:
handouts, picture for display, parts cut out of paper.
Aldyn - ala zhumys: Preliminary work: Preliminary work:
looking at pictures.
Sozdik zhumys: Dictionary work: Dictionary work:
rug, stripes.
Progress of the lesson: Introductory part: Kirispe: Circle of joy.
"Good morning" I'm happy
you are happy
We rejoice
The sun that has risen. They greet each other. The doll Aigerim comes to visit and asks the guys to help her. Make rugs for friends for the holiday. They greet the doll and agree to help her. Offers to get into the car
and go to the workshop to make a gift for the doll - a carpet. They get into the car and go to the workshop. Main part: Negіzgі bolіm:
Game situation.
He offers to sit on the chairs and see what is on their table.
He picks up the strips and names what color they are: yellow, red, blue.
Offers to repeat the colors, shows a finished sample of the application
suggests considering the rug. They sit on chairs and look at what is on their table. They pick up the stripes and repeat the colors yellow, red, blue.
look at the finished rug sample. offers to rest:
logorhythmics:
The mouse ran quickly
The mouse was wagging its tail, oh, it dropped an egg,
Look, it's broken. They warm up emotionally and recite the text along with the movements. Shows the sequence of making the mat and laying out the finished forms. Observe the sequence of laying out the finished forms. Final part: Korytyndy bolim
. Encourages children for completed work. Admire what beautiful rugs you have made. The Aigerim doll praises and thanks the children for the rugs and gifts. They rejoice in praise.
For the little ones
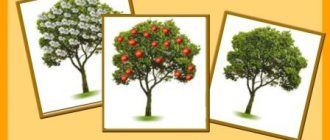
You can start making your first applications from about 2 years old, you just have to choose the easiest and simplest options. As a rule, appliques of vegetables and fruits in a preparatory group or nursery are done in the form of a single work, rather than a composition.
This way it is easier for children to glue them and also to remember them. To make it as easy as possible for your child, you can use already prepared templates of fruits and vegetables for appliqué.
Cherry
Cherry is an excellent applique option for the youngest children on this topic. To make it you will need:
- white sheet of cardboard;
- pencil;
- scissors;
- glue;
- colored markers;
- red colored paper.
Work plan:
- Draw 2 small circles on colored paper and cut them out.
- Glue the circles onto the cardboard so that they are on the same level and not far from each other.
- Using a brown felt-tip pen, draw 2 stripes, connecting the circles to create a design in the form of a pair of cherries.
- Draw a leaf with a green felt-tip pen.
A pineapple
Almost every child likes this exotic fruit, and of course it makes them want to portray it. For a more beautiful and interesting look, you can make it voluminous from simple colored paper. All you need for this craft:
- yellow, green paper;
- sheet of cardboard;
- glue;
- scissors;
- pencil.
Step-by-step work plan:
- Draw a pineapple on a piece of cardboard.
- Cut the yellow paper into strips, approximately 5 cm long and 1.5-2 cm wide.
- Take one strip and fasten its ends to make a ring, glue the ends together.
- Press down a small part of the ring a little and glue it to the upper contour of the pineapple.
- Glue another ring next to it and fill the entire top row.
- Take a ring of paper and also glue it, but just below the top row of the pineapple, while the glued part should be under the free edge of the upper rings.
- Follow the previous step until the entire pineapple is filled.
- Cut out small long leaves from green paper and glue them to the top of the pineapple.
Self-execution
Let's try to create a chair together. To do this we need colored paper (blue, yellow and red), a button without a needle, glue and scissors. We start from the back of the chair. Draw a shape resembling a crown on a blue sheet. We do the same on yellow, but smaller in size. Draw two orange slices on a red piece of paper. Let's move on to the legs and seat. Cut out 4 red pieces measuring 2 x 4 cm (3 pieces) and 2 x 5 cm (1 piece). We twist them into tubes and secure them with glue. We assemble a chair from the resulting material. We decorate the back with a button.
As you can see, such products look much brighter and neater. Let's look at a few sketches, having learned to draw which, you will be able to create creations with smooth, clear contours.
Let's create a TV and a sofa. We redraw them or translate them using carbon paper.
After you have drawn a sketch, color and cut out. We paste it onto the sheet in the required shape and complete the interior elements.
If you want to create a large room, then you need to draw a lot of furniture. We take a large sheet of paper or several small ones, draw a lot of different home furnishings, paint them with the necessary colors (for example, orange, blue and green). Carefully cut out with curly scissors and paste in the order we need.
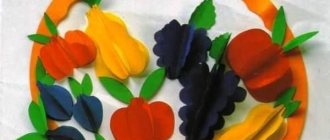
Fruit basket
Quite an interesting way to create a fruit applique from felt. This material is sold in a wide range of colors and is easy to work with. Also for this craft you will need: a sheet of cardboard, brown paper, scissors, a glue gun and sticks for it, a pencil, a newspaper.
Action plan.
- Draw a basket on a sheet of cardboard.
- Cut the sheets of paper into strips about 2 cm wide and roll them into thin tubes, seal the edges well.
- Lay out the outline of the basket from newspaper tubes, cutting them to the desired size.
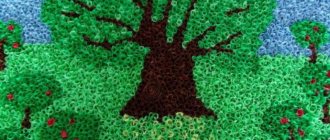
- Tear the brown paper into small pieces and roll them into tight balls.
- Glue the balls over the entire area of the basket, so that there is no gap between them.
- Cut out the desired fruits from felt, attach them to the basket in a happy order and glue them.
In principle, for such a volumetric application of fruits and vegetables, you can use seeds and cereals, as well as eggshells.
Applications depicting fruits and berries allow you to create colorful works from a variety of materials and using different techniques. Even the smallest creative hands can begin their acquaintance with appliques with vegetables, berries, fruits, and older children can create entire compositions.