The presence of a brightly decorated stand in itself attracts attention. In addition, it allows you to obtain important information in an accessible form.
These devices are often used in administrative, educational, children's and other institutions. In addition, they can complement the interior of any home.
In this article we will tell you how to make a stand with your own hands using available materials and a simple set of tools.
Do-it-yourself art corner.
Larisa Savchuk
Do-it-yourself art corner.
Corner of fine arts “Country of Creativity”
with your own hands for children of the fourth year of life .
The most important condition for the implementation of tasks is the creation of a developmental, subject-rich, emotionally comfortable, aesthetically attractive, accessible, safe and other educational environment in accordance with the needs, interests, age and individual characteristics of children.
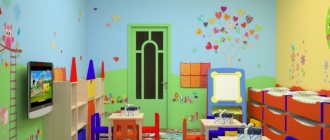
In our group, we try to create all the necessary conditions for the development of creative expressions by all available means that encourage self-expression.
We placed a desk on the right and placed pencil cups on it, also made by us.
Also on the table is a box with stencils made of thin, colored plastic.
Pencil holder made from 6 identical cream boxes, glued together and covered with self-adhesive paper
Covered boxes for coloring books, papers for free drawing
Next to the table, on the wall there is a small stand for children's work. To make it, we used a mosquito net for plastic windows, stretching colored ribbons over it.
On the left side they placed a small cabinet with shelves and decorated it.
On the top shelf were placed pencils made of thick cardboard and covered with colored self-adhesive wallpaper.
We pasted over different boxes containing a variety of materials for visual arts with children.
On the wall are our irreplaceable voluminous pencils, which are restored year after year.
Caterpillar placed on the wall of the cabinet
we have such a bright and attractive
And for parents in the reception area we have a large stand “Our Creativity ” made of ceiling slabs
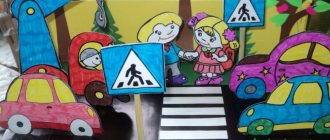
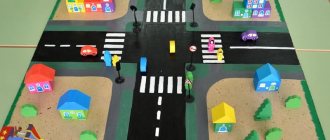
Do-it-yourself musical corner The musical development of a child comes down not only to classes with a teacher, but also to the opportunity to play independently and play music freely. Master class “Duty Corner” with your own hands To decorate the group, we needed a duty corner. Of course, now you can buy different designs for corners, but I wanted to make it. Decorating a creativity corner with your own hands Dear colleagues and friends, I want to share the design of a creativity corner in our kindergarten in my group, made by myself. Often. Do-It-Yourself Mummering Corner Children really like the Mummering Corner. I made a dressing corner in the shape of a matryoshka doll. We also sewed all the outfits ourselves. Here is the princess outfit. Modern theater corner with your own hands To ensure an optimal balance of joint and independent theatrical activities of children in the group, a theater should be equipped. Do-it-yourself stencils for free creativity of children In our MAAM spaces there have already been many publications with different types of stencils. I also want to share the making of stencils that... Do-it-yourself theatrical corner for the younger group. I invite you to see our new corner! Let me start with the fact that the work of a teacher is creative work. And creativity is a must.
Source
Federal State Educational Standards requirements for creation and design in preschool educational institutions
According to the requirements of the educational standard, an activity corner must be provided in a well-lit place. Furniture and materials must be of high quality. The content of the corner should correspond to the age of preschool children, and creative materials must be changed from time to time or supplemented with new ones.
The most optimal furniture for a corner is a cabinet with open shelves on which you can place inspiring items (albums, reproductions of paintings), and isolate the materials necessary for creativity (paper, glue, scissors) from children and store them in a closed bedside table or drawers. Or it could be a table combined with a shelving unit.
For your information! For organized storage of all necessary materials (cardboard, paints, plasticine), you can use boxes of different colors or plain ones with bright symbols of the contents.
To maintain a creative mood, you can add an easel, on which it is useful to mount a painting by a famous artist for inspiration or the best work done by the children.
For storing pencils, brushes, as well as natural (cones, shells, grain, etc.) and waste (buttons, sequins, beads, etc.) materials, plastic or tin glasses of the same size and bowls are suitable.
Master class on designing the “Our Creativity” stand
The master class is intended for preschool teachers. Children are also very actively involved in the stand design process. They are very fascinated by watching how their toys, pencils, long-abandoned construction parts, which they considered no longer needed and broken, take on a new life.
To make it you will need:
5. And give free rein to your imagination.
This unusual stand adorns our group.
Technological map of outdoor play with older children
Technological map of outdoor play with children of the senior group Educational areas: “Physical development.” Integration of activities: Social-communicative, physical, speech development. Type of activity: gaming.
Circle work “Mushrooms for a squirrel”
Circle work “Mushrooms for a squirrel” Applique classes in kindergarten are one of the main methods of studying and consolidating new material. At.
How to teach preschool children with speech impairments to use prepositions
How to teach preschool children with speech impairments to use prepositions It has now been established that children have writing and reading disorders.
Master class on making a stand “Our Creativity”
Evgenia Nemtseva
Master class on making a stand “Our Creativity”
Master class on making a stand “Our Creativity”
Purpose: Decoration of the reception area.
Goal: to decorate the reception area beautifully.
Objectives: To arouse interest in creating a beautiful corner.
Develop aesthetic taste.
2. Colored paper, colored cardboard.
8. Brush, glue bottle.
Materials and tools
Materials must be selected taking into account the purpose and location of the structure. Humidity, cleanliness and indoor microclimate play an important role here. Most often, to make an information panel you need:
- plywood sheets;
- cork board or veneer;
- plexiglass or PVC sheets;
- hacksaw for wood or metal;
- PVA glue or its equivalent;
- files for storing documents;
- metal ruler;
- pencil or thin marker;
- compass and square.
In addition, you can use any available materials. Only attentiveness and accuracy will ensure the achievement of the desired result.
Progress:
1. Cut out two blanks in the shape of pencils from thick cardboard. I used cardboard that is used for re-arranging furniture.
2. Then we paste over the blank pencils with colored paper. I have green and orange.
3. Cut out elements to create an image from colored paper - eyes, eyebrows, noses, lips, stripes. This is how I got a boy pencil and a girl pencil.
4. Then cover the surface of the pencils with tape. Add pens, scissors, glue, palette and brush.
5. Let's proceed to the final stage. Using a glue gun, glue satin ribbons of the same length to the back side.
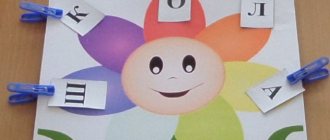
6. We print the letters on a color printer for the inscription “ Our creativity ”
. Glue the letters onto the colored circles. We attach the inscription to the top tape.
The stand is ready . Now, using stationery clips, we place children’s works on satin ribbons.
Photo report “Our creativity!” The joint creativity of teachers, parents and children plays a large role in the educational process. To organize the child's free time. Photo report “Our summer creativity” (part 1) This year the summer was not very good, there were many rainy days, but this did not stop us from creating both in the group and on the street. I want to introduce. Photo report “Our summer creativity” (part 2) I bring to your attention the second part of our summer work. As I already wrote, due to the fact that only up to 20 can be placed in a publication. Master class with children of the middle group “Oral folk art” BDOU Kindergarten “Solnyshko”. Onokhoy village. Master class with children in the middle group “Oral folk art”. Quiz “Travel.