Application “Autumn tree” made of autumn leaves
To work you will need:
- autumn leaves,
- cardboard with a silhouette of a tree,
- glue.
It is advisable to use bright colors of cardboard, so the tree will be more noticeable.
For work, you need to choose beautiful and undamaged dry leaves. They are cut into strips. To continue the task of appliquing autumn leaves, you need to prepare glue and a brush. The branches of the tree are coated with a brush. Dry leaves are placed on these branches. All that remains is to let the work dry.
Autumn forest made from rolled strips of paper
Prepare an autumn background for the application and determine the location of the trees on the sheet.
Three-dimensional trees can be made in three ways.
The first method: cut strips of 1x5 centimeters from colored paper in autumn shades. We glue each strip into a ring, the colored side out. Glue the resulting rings sideways onto the trunk in a chaotic manner. Try to glue so that the joint line is hidden at the bottom.
Second method: Cut a strip of paper 1.5x20 centimeters and wind it in a spiral around a pencil. Make 10 spirals in this way and glue them to the paper, placing them like rays from one point in the center of the trunk.
Glue smaller leaves on top of each spiral. Leaves can be cut out using a template or punched out with a hole punch.
Third method: willow or birch. Cut out many strips of 0.5 x 20 centimeters and screw them very tightly onto a toothpick so that you almost get a tube. Draw a willow or birch trunk with drooping branches. Glue the resulting spirals to the ends of the branches.
Application options
Many people believe that such a craft can be made exclusively from colored paper, but there are other methods. You can stick it on cotton wool, cotton pads or any other elements. In this case, the result will be completely different. Therefore, we recommend experimenting, introducing your child to creativity and developing his original approach to creating things.
Flat paper applique
The standard way to create an autumn forest. To do this you need:
- Take a piece of paper of any color that seems most suitable - white, blue, green.
- Glue a strip of paper along the bottom to imitate the ground. More often they choose brown or green. Just choose this color that is contrasting with the background.
- Make several trees of different colors. It can be yellow, orange, dark green, brown, mustard. Here the child must draw the outline of the future tree on the back of the sheet, and then carefully cut it out.
- Don’t forget to cut additional trunks for each tree.
- Carefully, lubricating the back side of each blank, stick them onto the prepared sheet so that the trunks stand on the ground.
- Then suggest using a black or dark brown felt-tip pen to draw branches directly on top of the colored paper.
The technique is easy and accessible, even for small children. It is used in kindergartens.
Volumetric techniques
By working not only on a given theme, but also on texture, you can achieve a certain effect when creating an appliqué. There are several techniques for creating volumetric applications. Let's try to analyze the main and most effective of them.
Working with cotton wool
This method involves molding pieces of cotton wool into the required volumes. Fixing them to the main sheet. And then carefully painting the entire surface to create a specific color scheme for the entire composition.
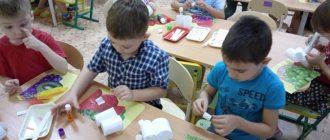
This is done as follows in class:
- A piece of cotton comes off.
- It is necessary to prepare a small container of water to make it easier to mold the cotton wool.
- By dipping your fingers in water, give the cotton a certain look and shape.
- Lubricating or dipping one part of the cotton wool into glue, then fix it on the paper in the right place, while creating a tree crown.
- Take a brush with a fairly voluminous and thick bristle, dilute the paint of the appropriate color quite thinly, and with precise movements paint the cotton wool in the desired color. It is not necessary to achieve a continuous tone creation. It will be enough to apply it pointwise.
- Cut out trunks from paper and glue them under the cotton wool.
Application with cotton pads
It is necessary to invite the child to take cotton pads and color them in the desired color. Take into account and prompt the child that the final application will look most impressive if the cotton pads are painted with several shades of the same color at once.
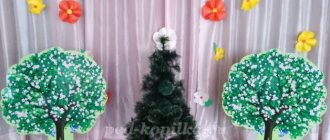
Cut out a trunk from colored paper and glue it to the main sheet. Now start gluing cotton pads around the trunk and on top of it, forming the crown of the tree. Keep in mind that if they are placed one on top of the other, with a slight overlap, you can achieve greater volume of the composition and its effectiveness.
Make several of these trees, preferably painting cotton pads in different colors.
Composition of rolled strips of paper
In this case, a colored sheet of paper needs to be cut into thin strips of short length and glued into rings. Cut out the trunk and glue it to the base.
Drop a drop of glue onto the rings, preferably in the place where there is a seam on the paper. And fix it around the trunk in this way so that a crown is formed.
Please note that the rings can be glued both vertically and horizontally. This will result in completely different wood looks. Therefore, you can combine several methods on one application to get more texture.
Using methods for creating an autumn forest appliqué, you can arrange a real master class for your child, both at home and in classes in the garden or at school. Although, there are other ways that the teacher must also take into account when drawing up notes for the relevant classes.
Application “Autumn tree” made of colored paper
To prepare such a fun applique, you need the following materials:
- colored paper
- cardboard
- glue
- disposable cardboard plate
First you need to take colored paper and tear it into small pieces. If you perform a cutting appliqué on an autumn tree, this significantly improves fine motor skills. Next, a disposable cardboard plate is greased with glue. Colored paper should be glued randomly onto it. This will be the crown of the tree.
Now you need to cut a rectangular piece of colored paper. This will create a tree trunk.
To make the work more beautiful, you can draw dark stripes on the tree trunk with a marker. After this, the finished parts are glued onto cardboard. This kind of work turns out to be voluminous and quite interesting.
Sources
- https://metodbv.ru/applikatsiya-derevo-iz-tsvetnoj-bumagi/
- https://gidrukodeliya.ru/applikaciya-osenniy-les
- https://academy-of-curiosity.ru/tvorchestvo/podelka-zimnij-les/
- https://podelunchik.ru/applikacziya-osennij-les
- https://masterimrukami.ru/applikatsii-osennee-derevo/
[collapse]
