An educational panel will help in a playful way to introduce a child to the seasons, numbers, days of the week, months, and also to learn concepts such as “today,” “tomorrow,” “yesterday,” “more” and “less.” Filling out a children's weather calendar every day promotes the development of speech, visual perception of letters and numbers, and if the parts are made of multi-colored felt, it will help to learn colors and shades. All parts of the educational panel for children are removable; as the child grows up, new elements can be added. In addition, a useful educational panel “children's weather calendar” is easy to make with your own hands.
GCD for children of the senior group “Golden Autumn”. Nature calendar
ECD for children of senior preschool age “Golden Autumn”. Filling out the nature calendar.
Program objectives: 1. Continue to develop knowledge about autumn, autumn phenomena; 2. Pay attention to changes in nature; 3. Develop the ability to select pictures for the nature calendar, correlating them with the natural features of autumn; 4. Develop observation skills; 5. Activate mental activity; 6. Help to remember the autumn months; 7. Foster interest and respect for nature. Required material: - nature calendar, illustrations for it. Progress of the lesson: Educator: Guys, what time of year is it now? Children: Autumn Teacher: How did you guess? Children's answers. Educator: What has changed with the arrival of autumn? Children's answers. Educator: Today we will fill out the nature calendar.
Educator: First, let's remember the autumn months. Name them. Children: September, October, November. Educator: What month is it now? Children: October Teacher: That's right! September is the first month of autumn. Then October and then November. Let's look at the pictures and determine where the previous month is. Children: September.
Children take the picture and attach it to the nature calendar. Educator: And now the real month is October
Children take a picture, explain why this particular picture is attached to the nature calendar. Educator: And the last month is... Children: November.
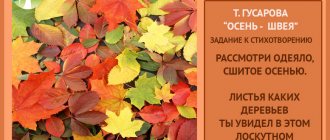
Children take a picture, explain why this particular picture is attached to the nature calendar. Educator: look at the pictures. All pictures show birch. What tree do you think we should put on the nature calendar and why?
Children show the desired picture and explain: This is a tree with yellow leaves, it is autumn, a tree with buds is spring, bare is winter. We need to place an autumn birch tree.
Educator: Now let's look out the window and determine what the weather is like outside? Children: it’s windy because the trees are swaying. Cloudy because the sky is gloomy. Children select the necessary pictures and attach them to the nature calendar. Educator: What autumn phenomena did you observe this morning? Children: Leaf fall Educator: Let us be autumn leaves today. I invite everyone to the group center
Physical exercise “Leaf fall” Educator: What phenomenon have we now depicted? Children: Leaf fall.
Children select the desired picture and attach it to the nature calendar. Educator: Well done! What other autumn phenomena do you know? Children: Frost, fog. Educator: What other changes occur in the fall? Children: It often rains and snows, the grass turns yellow and becomes dry
Children select the necessary pictures and attach them to the nature calendar. Educator: What happens to birds and animals with the arrival of autumn? Children: Birds fly away to warmer climes, animals prepare for winter.
Children select the necessary pictures and attach them to the nature calendar. Educator: how does people’s appearance change in the fall? Children: People change clothes for warmer ones
Children select the desired picture and attach it to the nature calendar. Educator: What happens to the sun? Children: The sun does not send direct rays and heats less
Children select the desired picture and attach it to the nature calendar.
Educator: Correct. Now our nature calendar is full, and we will promise to protect nature? Children: We promise! Using this GCD summary as a basis, you can use your nature calendar in the same way! Good luck to you!
We recommend watching:
Summary of a lesson on speech development in the senior group on the topic: Autumn GCD for the senior group with a presentation on the topic: Gifts of Autumn Summary of a lesson in the senior group on the museum program on the topic: Autumn Summary of a lesson in mathematics in the senior group for children with mental retardation. Journey to the autumn forest
Similar articles:
Lesson summary - traveling in kindergarten for the International Day for Older Persons
Entertainment “Visiting Autumn”. Senior group
Types of calendars
Calendars vary in location.
They are:
- Tabletop
- Wall mounted
- Kitchen
Desk calendars are either triangular or placed on a stand. They are most often placed on a desk. Although small calendars can be placed on a bookshelf.
The name of the wall calendars speaks for itself. They hang on the wall. Such calendars can be either multi-page or single-page.
Kitchen calendars are a type of single wall calendar. The difference is that kitchen calendars are attached to the refrigerator using magnetic tape.
By type, calendars are divided into:
- Reversible (on rings or springs)
- Tear-off
- Advent calendars
- Perpetual calendars
Where to begin
If you have never done anything like this before, you should definitely start by looking for detailed instructions on how to make calendars correctly. To do this, you first need to decide what kind of calendar you want to make.
Then stock up on the necessary tools and materials.
The set of tools for any type of calendar is approximately the same:
- Pencil
- Ruler
- Scissors
- Glue, glue gun or double-sided tape
For the kitchen calendar you will also need magnetic tape. And for the reversible one - springs or rings.
- And, of course, you need to prepare a calendar grid: monthly or for the entire year.
- It can be drawn by hand or printed on a computer.
- After this, all that remains is to make the calendar step by step with your own hands.
Advent calendar
Since the very essence of the advent calendar is daily small surprises and gifts, it is usually made voluminous.
- And for each day from December 1 to 24, there is a box with the image of the corresponding number.
- Instead of a box, you can use a cup, a fabric pocket, etc.
- All these capacities are united by one common storage.
- These can be sections connected to each other like a multi-story building, a common large square made of fabric with sewn pockets, etc.
The decor of such a calendar, of course, should be New Year's and Christmas.
Desk calendar
Take thin cardboard or thick A4 paper. Place the sheet vertically and, using a pencil and ruler, draw horizontal lines at the following distance:
- From the bottom edge 1 cm
- From this line upward 2 cm
- From the top edge 2 cm
- In the middle of the remaining central part
Now you need to make folds along the outlined lines.
- Next, you need to decide where the calendar sheets and, accordingly, the rings will be located: on the left, on the right or in the middle.
- Monthly calendar grids need to be cut out and pasted onto thicker paper, the size of which is 3-5 mm larger on the sides and bottom edge, and 1-2 cm larger on the top edge.
- On these sheets in the upper part you need to make holes for the rings. The same holes should be made on both halves of the calendar closer to the central fold.
- Insert the rings into the holes.
- Before attaching calendar sheets to them, you need to decorate the base.
- You can stick colored or scrap paper on it, decorate it with lace, an interesting picture, and various decorative elements.
- Then the calendar sheets are attached to the rings.
After this, to give it stability, a 2 cm wide strip is glued onto a 1 cm strip. Thus, the calendar has a dense bottom, and it itself takes on the shape of a triangle.
Wall calendar
Wall calendars are usually made in large format. The numbers and inscriptions on it are larger.
- For the base you will need cardboard onto which decorative paper is glued. And on top of it a calendar grid and decor are attached.
- For decorating such calendars, for example, family photographs, children's drawings or pictures characterizing the seasons are well suited.
- If the calendar is made for a children's room, then you can place images of the child's favorite cartoon characters on it.
- A wall calendar can be made without fastenings and simply glued to the wall. Or make fasteners (for example, from wire) to hang it on a hook or nail.
When making a one-page calendar from felt or thick fabric, you can make a 3-4 cm fold at the top, stitch it, and insert a stick into this fold.
Attach a rope or cord to its edges. And hang the calendar on a nail using this rope.