Making pictures from parts
There is a lot of literature on this topic, I use these manuals:
- Children's health kit;
- A set of pictures on social development
- Illustrations on children's speech activity.
I also use homemade materials in my work, download pictures from the Internet and make games. So, that was a small digression, let's get back to the topic of conversation.
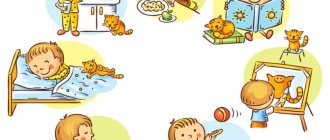
A drawing that is divided along straight lines into several parts is split. A preschooler should not think about the shape of a detail in a drawing; he concentrates on the full image.
When a child collects a drawing, he must imagine what he is collecting, what image he will get. In this case, he must correlate the pieces with the image so that the correct place is allocated to it. Otherwise the illustration will not work. This requires concentration, seriousness, and attentiveness from children.
When folding cut images, the baby begins to realize the objective integrity and compose an illustration from parts. He trains his memory, develops thinking, and spatial orientation. Drawings are great for improving fine motor skills. By consolidating knowledge about objects and phenomena, assembling a whole from pieces, the goal of the cut-out pictures game is formed.
Preparing to print a poster
Before printing a picture on 4 A4 sheets or another quantity, be sure to enlarge the picture, since when divided into several pages, the image is stretched and the quality deteriorates. If the image is initially very small, then the output will be a poster with a noticeable decrease in quality. Sometimes it is difficult to make out what is depicted on the poster. Ideally, if the picture is immediately in good quality, since enlargement does not always give a good final result.
The higher the image resolution, the better quality the poster will look on several A4.
The printer type doesn't matter. The brand doesn’t matter either; you can transfer a large image onto paper with printers from Canon, Epson, HP, Brother, Kyocera, Samsung and devices from other popular brands.
The only thing to consider is the ability to print borderless. That is, so that the design is applied to the paper to the edges of the sheet, without leaving white stripes. If your printer does not support borderless printing, the finished portions of the poster will need to be trimmed around the edges to remove excess. The end result will be a slightly smaller poster.
From simple to complex
At first it is better to use the simplest designs with a small number of individual pieces. The image should be familiar to the baby. A good option is two similar pictures, one of which is divided into 2 parts. In this case, one can be a sample.
After the child masters this fun, he will not need an example picture. For this game, drawings from coloring books or old books will be useful. It will be much more interesting if you draw them yourself. Use bright, but not irritating colors.
First, cut the images into two, then into three parts. Then increase the number of pieces gradually when the child folds the previous drawing on his own. You should know that the number of elements collected increases, and their size decreases. There are times when a baby puts together pictures with large pieces easier.
The number of items should be selected in accordance with the age and special qualities of your child.
Standard image viewer
There is no need to install and configure any programs when you can print photographs and other graphic files using standard image viewing software. You don't even need to launch the application. You can print the poster immediately through the context menu of the graphic document.
Right-click on the file and click on “Print”.
In the lower right corner, click on the “Options” link.
In the window that appears, click on the “Printer Properties” link.
Further settings are similar to those in Word. You need to customize the layout, lay out the image on several sheets, save all the changes made and click “Print”.
Cutting pictures for kindergarten
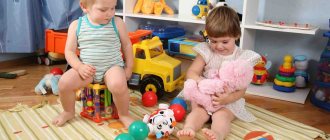
Very often in kindergarten I involve older children in making such games for younger children, and preschoolers are happy to help me. But at the same time, I am pursuing my goals, my task is not only to attract a child to artistic work, but also to teach how to cut paper, while developing children’s hands and fingers.
Pay attention to the “Games” section, where you will find a lot of useful material.
The game of cut pictures is widely used in speech therapy activities with preschool children of the middle and senior groups. A speech therapist works with them and uses these games in his work.
At every age, starting from 1.5 - 3 and continuing up to 7 years, the child is very interested in this fun, because with the help of it he learns the alphabet, toys, professions, transport, etc.
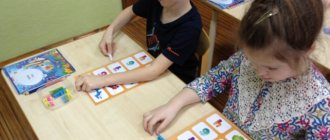
For preschoolers in the preparatory group, it is interesting to conduct such fun activities in mathematics. When compiling examples, I use the following pictures: in the upper part, for example, animals, toys or any objects, and in the lower part there is a number with the number of objects depicted in the picture. Such cut-out pictures for preschoolers can also be used to compose problems. An important indicator for assessing intellectual development in children is the success of putting together pictures from parts.
Method of playing the game
Having carried out the technique with cut-out drawings, for example, according to the seasons, you must first select pictures on this topic. The purpose of this method is to identify the skills of composing a whole image from parts. The task is to orientate by shape, color, size, identify visual figurative thinking, coordinate hand movements, as well as fine motor skills. How to do this fun?
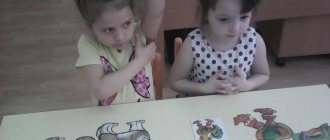
Before playing the game, the speech therapist lays out parts of the illustration, which consist of 4 parts, on tables for children. Then he invites the children to assemble the object, asks them to put the parts on the sample, remember the location of the parts in order to assemble the illustration themselves. After which the drawings are scattered, the sample is removed, inviting the children to collect them again. The child must name the object that is cut.
If a child puts the images together correctly on the first try, this means that his visual and figurative effective thinking is well formed. If a small child completed the task on the second attempt, then we can assume that his attention and imagination are poorly formed.
In a word, this technique helps the baby develop logic, memory, attention, imagination, thinking, activates speech and sensory perception.
Service Rasterbator.net
This method will allow you to divide the image into 4 parts online as quickly as possible without any problems. This is a convenient online service, free, and as a result you receive a multi-page document in PDF format.
- Follow the link https://rasterbator.net/.
- Click “Create your poster”.
- Next, upload an image for your future poster. Click on “Select file” or “Browse” and click just below “Upload”. Depending on the size of the picture, it may take some time to load. Afterwards you will have to make paper settings and markings.
- The sheet size remains standard - A4. Next you determine the orientation: Landscape – landscape (wide), Portrait – portrait (tall).
- The “Add marginof” setting is intended for setting margins.
- The “Output size” item is responsible for the division. Set the value and at the same time change the previous settings to get a satisfactory result. The result will be visible on the right in the preview. Look carefully at the dividing lines and the “Paper consumption” line. The example shows that the picture will fit on 4 sheets.
- After completing the settings, click “Continue”.
- In the next step, select “No effects” and click on “Continue” again.
- You don’t need to do anything in steps 4 and 5, at the end just click “Complete 4 page poster”. The number on the button will differ from the breakdown.
- After that, file creation will begin and after a few seconds the service will offer to save the PDF file to your computer.
- Open the document and immediately print in standard mode. No further settings are required.
Recommendations for parents
Cutting pictures for children develop their sensory abilities.
The tasks for adult groups are:
- development of the baby’s sensory abilities: restoration of the whole in parts;
- development of coordinated actions of hands and eyes through the ability to trace an image along a contour;
- knowledge of the object depicted in the illustration, its name and finding identical drawings;
- speech development, enrichment of the active vocabulary with the help of new words, as well as repetitions of familiar words.
The materials are object drawings from two sets. Two identical images are selected from each set. One picture is cut in half, and the other, as an example for selection, remains intact.
Tip #1
Use pictures that, when cut, form identical parts, connecting them, they will be like one whole, for example, a hare, a pyramid, a car, a chicken.
How to conduct classes? Use a surprise moment, let a fairy-tale character come to visit your son or daughter who does not know the names of the toys. For example: a clown drew toys and brought them to your baby so that he could tell what they are and how to play with them. Parents show entire illustrations and ask what is depicted on them. If the children answer correctly, you praise him. It will be good if you use a poem or beautiful figures of speech on the topic of the image.
Don’t forget that children get tired quickly, spend some physical exercise in a playful way, fortunately there are a great many of them on the Internet.
When a preschooler looks at the drawings, an adult teaches him the ability to trace an object along the contour. Thus, sensory actions of the hands and eyes are developed, which help to recognize objects when examining their shape.
Next, the parent shows the same illustrations, which consist of two identical halves. Then he explains that the picture must be folded correctly, then you will get a whole pyramid, matryoshka or car. Then he shows how to add two identical halves, and also compares the created illustration with a similar image in the whole drawing that the clown brought them.
Then the task becomes a little more complicated, the parent gives the child 2 drawings, for example, a pyramid and a hare, a car and a chicken, a tomato and a cucumber. The child chooses images from two options that differ in color and shape. When classes are over, the adult praises the little one for the actions done.
Tip #2
Dear parents, to consolidate the material, you need to systematically repeat the lessons and further complicate them, i.e. cut illustrations into three, four, eight parts.
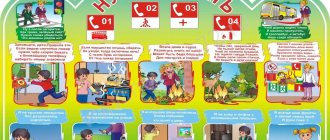
The game cut pictures for preschoolers allows them to get acquainted with their hometown, learn the names of domestic and wild animals, migratory birds and insects, indoor plants, flowers, trees, vegetables, fruits. It also helps to improve cognitive interests in fire safety and military equipment.
5/5 — (3 votes)
How to split and print in Word
- Launch the program, open the desired document in which the picture is placed.
- Open the window for printing settings via the “File” menu or the “Ctrl+P” key combination. Basic printing options will appear on the right. You should immediately make sure that the correct printer is assigned for printing. If not, please select a different printing device. Afterwards, click on “Printer Properties”.
- A new window will open with several tabs, the number of which depends on the brand and model of the printer. Immediately go to the Page Layout tab.
- In the “Output Size” or “Output Size” item, select the “Adjust Page Format” or “Fit to Page Size” option, respectively.
- The next step in the item below called “Page Layout” is to set the desired value to break the document into separate parts. If you need to divide it into 4 parts, then choose the “2 x 2” option. When dividing into 9 parts, set the parameter “3 x 3”, for 16 fragments you should select the option “4 x 4”.
Use the preview on the left to make sure you have selected the appropriate staking method. Print, use scissors to remove excess margins, and glue the parts together with tape on the back side. Thus, you will get a full-fledged poster from A4 sheets, which, if executed carefully, will not differ from a solid Whatman paper.
The first printing method is one of the easiest and fastest. Many people are familiar with the MS Office office suite and are well versed in Word, so there shouldn’t be any problems.
By the way, it’s not Word that will separate the drawing, but the printer. All modern and even a significant part of technically outdated printers can cut documents.