Ecological experiments in preschool educational institutions
Thus, in order to develop experimental abilities, it is necessary to form a new type of child with new ecological thinking, capable of realizing the consequences of his actions in relation to the environment and able to live in relative harmony with nature.
II. Practical part.
But in practice, sometimes you come across the intellectual passivity of children, the reasons for which lie in the limited impressions and interests of the child. Sometimes they are not able to cope with the simplest task, but they quickly complete it if it is translated into practical activities or games.
(Participants go to the “laboratory”).
I bring to your attention a fairy tale with problematic questions that need to be answered with the help of experiments. (During the course of the story, the teachers walk with the presenter and perform experiments and see what happens.
).
The tale is called:
"The Journey of a Chicken, or the World Beyond the Fence of the Poultry Yard."
In a village, in a poultry yard, there lived a very curious chicken. His brothers and sisters were very obedient, and he stuck his nose in everywhere. One day he wanted to know what was behind the fence of the poultry yard, and he went to discover the world.
Having gone beyond the fence, he went along the path and suddenly he noticed a small fly on the ground. He wanted to take a closer look. How can this be done? Guys, who has a magnifying glass? Let's do it ourselves.
Experience No. 1
.
( You need to take a three-liter jar. Cover the neck with cling film, but do not pull it, but rather push it through so that a small container is formed. Tie the film with a rope or elastic band, and pour water into the recess. Conclusion: if you look at the water through the cling film , then we get the effect of a magnifying glass. The same effect will be obtained if you look at an object through a jar of water, securing it to the back wall of the jar with transparent tape.
) So we saw a fly.
Nearby, the chicken saw a small lake, many mysterious flowers floated in it, these were water lilies. Then the chicken saw that the fish appeared on the surface of the water and then disappeared again. Explain how they do this?
Experiment No. 3
( Take a glass of fresh sparkling water or lemonade, and throw a grape into it. It is slightly heavier than water and will sink to the bottom. But gas bubbles, like small balloons, will immediately begin to settle on it. Soon there will be so many of them, that the grape will float. Why does this happen? Conclusion: the bubbles on the surface will burst, the gas will fly away. The heavy grape will sink to the bottom again. Here it will again be covered with gas bubbles and float up again. This will continue several times until the water “fizzles out.” In fish there is a swim bladder, when it needs to dive, the muscles contract, compress the bubble, the volume decreases, the fish sinks down. But it needs to rise to the surface - the muscles relax, the bubble dissolves. It increases and the fish floats up.)
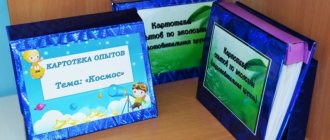
Card index of experiences and experiments in ecology
Card index of experiences and experiments in ecology
(in the older group)
Card index
of experiences and experiments
for older preschoolers.
Experiment No. 1 “Magic devices”
Goal: familiarization with devices that help experimentation.
Objectives: introduce children to observation instruments: microscope, magnifying glass, telescope, telescope, binoculars;
give the opportunity, with the help of an adult, to find out the purpose of these devices, explain that they help determine the condition of natural objects, so that people know what measures need to be taken to save them;
develop children's interest in experimental activities; cultivate a sense of respect for nature.
Material: magnifying glasses, microscopes, various small objects, small seeds of fruits, vegetables, leaves of trees, plants, tree bark; binoculars, pictures of a spyglass, a telescope, pictures of a bird's beak, the eyes of a frog under a magnifying glass.
Move.
There are microscopes and magnifying glasses on the table. It is explained to the children that people have always wanted to look at some things closer - better than what can be seen with the eye. People learned to make glass thousands of years ago. But even the glass masters at first turned out to be cloudy. And they replaced glass... with stone. Yes, yes, a transparent stone - polished rock crystal. The result was a round piece of glass - a lens. And later they learned to make lenses from glass. First came the magnifying glass. Using a magnifying glass, scientists saw what they could not see before: the structure of a plant flower, legs, antennae and eyes of insects, and much more. Children are invited to look at the leaves through a magnifying glass. . After that, they are asked to look at the pictures and guess what the scientists looked at with a magnifying glass.
Bottom line. Optical instruments make it possible to study objects invisible to the eye.
Experiment No. 2 “What does a plant need to feed?”
Goal: to establish how the plant seeks light.
Objectives: to establish how a plant seeks light; without light, plant nutrition cannot be formed;
make it clear to children that plants need to be looked after and help nature develop;
clarify that to nourish plants, not only light is needed, but also moisture in the soil and air; cultivate a caring attitude towards plants.
Material. Indoor plants with hard leaves (ficus, sansevieria), adhesive plaster.
Move. An adult offers the children a riddle letter: what will happen if light does not fall on part of the sheet (part of the sheet will be lighter). Children's assumptions are tested by experience; part of the leaf is sealed with a plaster, the plant is placed near a light source for a week. After a week, the patch is removed.
Bottom line. Without light, plant nutrition cannot be produced.
Experiment No. 3 “What does the plant secrete?”
Goal: to establish that the plant produces oxygen.
Objectives: to enable children to understand the need for respiration for plants;
develop a sense of belonging to nature in relation to the plant world;
cultivate an ecological culture.
Material. A large glass container with an airtight lid, a cutting of a plant in water or a small pot with a plant, a splinter, matches.
Move. The adult invites the children to find out why it is so pleasant to breathe in the forest. Children assume that plants produce oxygen for human respiration. The assumption is proven by experience: a pot with a plant (or cutting) is placed inside a tall transparent container with an airtight lid. Place in a warm, bright place (if the plant provides oxygen, there should be more of it in the jar). After 1-2 days, the adult asks the children how to find out whether oxygen has accumulated in the jar (oxygen is burning). Observe the bright flash of flame from a splinter brought into the container immediately after removing the lid.
Bottom line. Plants release oxygen.
Experiment No. 4 “How to see the movement of water through the roots?”
Goal: to prove that the roots of the plant absorb water.
Objectives: to clarify the function of plant roots, to establish the relationship between structure and function;
enable children, with the help of an adult, to learn that plants, along with water, also absorb other substances found in the soil;
develop thinking, the ability to independently draw conclusions;
cultivate a caring attitude towards plants.
Material. Balsam cuttings with roots, water with food coloring.
Move. Children examine cuttings of geranium or balsam with roots, clarify the functions of the roots (they strengthen the plant in the soil, take moisture from it). What else can roots take from the ground? Children's assumptions are discussed. Consider dry food coloring - “food”, add it to water, stir. Find out what should happen if the roots can take up more than just water (the root should turn a different color). After a few days, the children sketch the results of the experiment in the form of an observation diary. They clarify what will happen to the plant if there are substances harmful to it in the ground (the plant will die, taking away harmful substances along with the water).
Bottom line. The root of the plant absorbs, along with water, other substances found in the soil.
Experiment No. 5 “Growing plants from carrot tops
»
Purpose: to consolidate what is necessary for growing plants.
Objectives: to give children the opportunity to see, using carrots as an example, that vegetation can also grow in sand;
convince children that the plant will grow if there is enough moisture and light;
cultivate interest in experimental activities.
Material:
sand, shallow container, carrot tops.
Move. Fill the container with sand. Water generously. Plant the tops of the carrots in the sand, cut side down. Put it in the light. Water throughout the week. Green stems and leaves will grow on the tops.
Bottom line. To grow plants you need light and moisture.
Experiment No. 6 “In the light and in the dark”
Target:
determine the environmental factors necessary for the growth and development of plants.
Objectives: to give children the opportunity, with the help of an adult, to find out by growing onions whether light is needed for plant life;
give children the opportunity to independently draw the conclusion that since the onion turned green in the light, it means that food has formed in it and, therefore, light is necessary for the growth and development of plants;
lay the beginnings of environmental thinking in children.
Material. Onion, a box made of durable cardboard, two containers with soil.
Move. An adult suggests finding out by growing onions whether light is needed for plant life. Cover part of the onion with a cap made of thick dark cardboard. Draw the result of the experiment after 7 - 10 days (the onion under the hood has become light). Remove the cap.
Bottom line. After 7–10 days, draw the result again (the onion turns green in the light, which means nutrition has formed in it).
Experiment No. 7 “Labyrinth”
Goal: to establish how the plant seeks light.
Objectives: to provide children with the opportunity to independently establish that if there is a lot of light, the plant is good, it turns green, if there is little light, the plant is bad;
consolidate the concept of “light”, knowledge of its meaning for all living things;
cultivate inquisitive consciousness and logical thinking.
Material. A cardboard box with a lid and partitions inside in the form of a labyrinth: in one corner there is a potato tuber, in the opposite there is a hole.
Move. Place the tuber in the box, close it, place it in a warm, but not hot place, with the hole facing the light source. Open the box after potato sprouts emerge from the hole. They examine, noting their directions, color (the sprouts are pale, white, curved in search of light in one direction). Leaving the box open, they continue to observe the change in color and direction of the sprouts for a week (the sprouts are now stretching in different directions, they have turned green).
Bottom line. A lot of light - the plant is good, it is green; little light - the plant is bad.
Experiment No. 8 “The sun gives us warmth and light”
Purpose: to give children an idea that the Sun is a source of heat and light.
Objectives: to introduce children to the concept of “light energy”, to show the degree of its absorption by various objects and materials;
give children the opportunity, with the help of an adult, to learn on a scientific basis that the Sun is a hot celestial body, the sun's rays heat the surface of the Earth, and from it the air heats up;
remember that warm air is lighter than cold air, so it rises;
develop in children the ability to reason and connect natural phenomena from an environmental point of view.
Material:
desk lamp; a set of objects made from different materials: paper, plastic, wood, metal; paper, scissors, thread, white and black scraps of fabric, light and dark stones, sand, needles.
Move. Children are asked to imagine that the light bulb is the Sun. Place your palm. (Warm, hot.) The palm became warm. Check whether different objects heat up from the light of a light bulb. What did you find? All objects heat up when light shines on them. The sun is a hot celestial body. Dark objects heat up more and absorb more sun - light energy.
Bottom line. The more heat rays a body absorbs, the higher its temperature becomes.
Experience No. 9
1. “The influence of sunlight on life on Earth
»,
2. “What colors does a sunbeam actually consist of?”
Goal: expanding children's knowledge about the Sun.
Objectives: to clarify children’s knowledge that on the sunny side the vegetation is lush, bright, green, and in the shade there is less vegetation;
bring children to understand that the sun's rays warm the Earth, warm soil is favorable for plant roots, mushrooms and other vegetation;
clarify how the children themselves feel in the sun;
introduce children to what colors a sunbeam actually consists of;
cultivate a love for nature.
1.Material: 2 stones.
Move. Place two pebbles: one in the sun, the other in the shade. Cover it with a thick wooden box to keep it dark. After some time, they check which pebble is warmer.
2.Material:
baking sheet, flat pocket mirror, sheet of white paper.
Move. The experiment should be carried out on a clear sunny day. Do not look directly at the sun or reflect the sun's rays into people's eyes. Fill a baking tray with water. Place it on a table near a window so that the light of the morning sun falls on it. Place the mirror inside the baking sheet, placing its top edge on the edge of the baking sheet and the bottom edge in the water at an angle so that it reflects the sunlight. Take a piece of paper with one hand and hold it in front of the mirror. With your other hand, move the mirror slightly. Adjust the position of the mirror and paper until a rainbow appears on it. Shake the mirror slightly. Sparkling multi-colored lights appear on the paper. The water splashes and changes the direction of the light, causing the colors to resemble lights.
Bottom line. The sun provides light and warmth necessary for life. The sunbeam is made up of colors that resemble lights. This is how it is reflected on the Earth.
Experiment No. 10 "Rostock"
Goal: to consolidate and generalize children’s knowledge about water, air, soil.
Objectives: to consolidate children’s knowledge about the need for water, air and soil for the growth and development of plants;
give children the opportunity to independently conduct an experiment from beginning to end, to feel their participation in experiments with natural objects; cultivate respect for the scientific profession.
Material. Tray of any shape, sand, clay, rotted leaves.
Move. Prepare the soil from sand, clay and rotted leaves; fill the tray. Then plant the seed of a quickly germinating plant (vegetable or flower) there. Pour water and place in a warm place. Take care of the sowing together with your children, and after a while you will have a sprout.
Bottom line.
Soil, water, air are necessary for the growth and development of plants.
Experiment No. 29 “Life cycle of flies
»
Goal: to introduce children to the life cycle of flies"
Objectives: to give children the opportunity to feel like real experimenters in the process of observing the life cycle of flies;
give children the opportunity, with the help of an adult, to learn about how Drosophila flies appear and how to avoid their appearance;
cultivate neatness in eating fruits, wash them thoroughly, do not leave cores or peels after eating, and observe the ecological cleanliness of fruits.
Material:
banana, liter jar, nylon stocking, pharmaceutical elastic band (ring).
Move. Peel the banana and put it in a jar. Leave the jar open for several days. Check the jar daily. When the fruit flies appear, cover the jar with a nylon stocking and tie it with an elastic band. Leave the flies in the jar for three days, and after this period, release them all. Close the jar again with the stocking. Monitor the jar for two weeks.
After a few days you will see larvae crawling along the bottom. Later, the larvae will develop into pupae, from which flies will eventually emerge.
Bottom line. Flies appear quickly if fruit is left open and warm, so fruit should be kept in the refrigerator.
Experiment No. 31 “How bird feathers are arranged”
Goal: to establish a connection between the structure and lifestyle of birds in the ecosystem.
Objectives: to enable children, with the help of an adult, to learn to reason why birds need flight and down feathers;
develop curiosity;
cultivate a love for birds.
Material: chicken feathers, goose feathers, magnifying glass, zipper lock, candle, hair, tweezers.
Move. Children examine the bird's flight feather, paying attention to the shaft and the fan attached to it. They find out why it falls slowly, spinning smoothly (the feather is light, since there is emptiness inside the rod). An adult suggests waving the feather, observing what happens to it when the bird flaps its wings (the feather springs elastically, without unraveling the hairs, maintaining its surface). Examine the fan through a strong magnifying glass (on the grooves of the feather there are protrusions and hooks that can be firmly and easily combined with each other, as if fastening the surface of the feather). Examining the down feather of a bird, they find out how it differs from the flight feather (the down feather is soft, the hairs are not interlocked, the shaft is thin, the feather is much smaller in size); children discuss why birds need such feathers (they serve to retain heat).
Bottom line. Birds need wings to fly.
Experiment No. 32 “Rainbow in the sky”
Goal: to introduce children to the property of light turning into a rainbow spectrum.
Objectives: to expand children’s knowledge about the natural phenomenon - the rainbow: why there is a rainbow in the sky, in what weather, what shape it is...
give children the opportunity, with the help of an adult, to learn about the scientist Isaac Newton, who discovered the color white;
give children the opportunity to make soap bubbles on their own and explain how they did it and what they resemble;
develop intelligence.
Materials: glass prism, Rainbow picture, bar soap, liquid soap, teaspoons, plastic glasses, sticks with a ring at the end, bowls, mirrors.
Move. Show the picture "Rainbow". The teacher invites the children to take small bowls and pour water into a little more than half the bowl. Place the mirror in the water at an angle. Catch a ray of sunlight with a mirror and direct it to the wall. Turn the mirror until all seven colors appear. Children perform an experiment. Game "Let's make soap bubbles." Children independently select the necessary materials. The teacher observes and provides individual assistance if necessary. Children play with bubbles.
Bottom line. Rainbow is the property of light to transform a ray of sun into multi-colored lights - a rainbow.
