A little history
History indicates that the development of wood studies led to its application on the most unexpected subjects, which included:
- furniture;
- chests;
- sled;
- utensils used indoors.
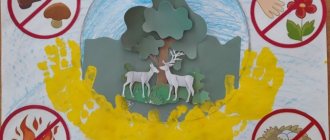
Most often there was a symbolic character, and the background tones were: green, blue and sometimes black. Particularly popular were and are drawings with specific themes, showing people and animals.
After World War I, art fell into decline, forcing specialists to look for other sources of income. The revival of the popularity of the direction is associated with the name of I.I. Oveshkov, who opened the workshop to the public.
It organized the training of appropriate personnel, which resulted in an increase in those able to process the source code. Involving a new generation in recreating images develops a sense of belonging to the culture of their country and develops artistic thinking on different levels.
Where to start
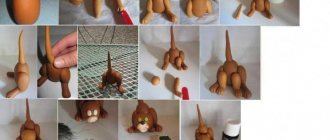
If you decide to exercise yourself or your son or daughter wants to learn it, it is not necessary to attend any courses. It’s enough to start small - find online lessons in a form convenient for you - this can be a text with illustrations, which shows how the work canvas takes on its own shape.
Other modifications are videos, coloring books, stencils, which allow you to clearly understand everything, and ultimately understand it along the way.
When doing work, it is not advisable to rush, trying to apply shades to the surface as quickly as possible - this will only lead to streaks. Use a pencil to outline the outline, but do not apply pressure.
Patchwork - technique and master class for sewing stylish and beautiful sewing with your own hands (80 photos)- Tilda doll - a master class in sewing toys with your own hands. 125 photos of the best toy models
How to make a car out of paper: step-by-step description of how to quickly and easily build a high-quality car (75 photos + video)
Another feature of the operation is the concentration of dark spots on top of light ones. All you have to do is choose the direction in which you are going to create, and therefore you will master Gorodets painting. To improve your skills, you can first select paintings online, and then reproduce your own textures or leitmotifs.
Initially, it is far from perfect, but with constant repetition and honing of the skill, the result will become better, giving the right to trade professionally and on a permanent basis.
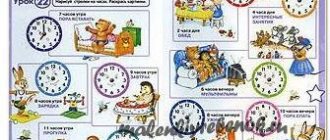
Schemes for working on Gorodets patterns
In drawing classes, simple plots are used to master the elements of painting. But each job must be done in a certain order.
"Bud"
Work on this variety of flowers is carried out in accordance with the instructions.
The color of the buds can be varied, but only within the color scheme of Gorodets painting
- We start with the underpainting. We take red paint with a wet brush, remove the excess and dip it in water again so that the color is washed out.
- Draw a circle - apply pressure with the brush, then draw a semicircle and lower the brush down.
- Next, we do the shading - we take concentrated red and draw half-arcs on the buds, draw dots. Don't forget to hold the brush strictly vertically.
- We use green paint to spice things up - green leaves.
This work can be spiced up, that is, elements can be added.
"Chamomile and Kupavka"
Instructions:
- First we work with daisies.
- We do the underpainting with pink paint (we blur the red paint).
- Using rich red we create a shade - strokes located along the diameter of the daisy. Don't forget to hold the brush perpendicularly downwards.
- Let's start reviving. Making the red core of the flower.
- To brighten it up, use white paint to dilute the shade - alternate black strokes with white ones, and also make dots in the middle.
- We create the underpainting of the kupavka - draw a circle.
- Shading is a drawing of the middle.
- Let's make a preparation - draw white veins-petals in the form of two semi-arcs with jumpers.
Children should learn to draw circles without a rough outline, straight away “cleanly”
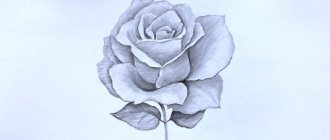
"Rozan"
Now we will describe the instructions for working on the “rosan” variety:
- For the underpainting we make a red circle and two leaves on the left and right.
- Using white paint we draw semi-arcs in the upper third of the rose.
- We connect them with strokes.
- We make petals emanating from the lower semi-arc.
- We make vertical strokes in each petal.
- We draw vein lines on the leaves.
Sometimes the shading is done with the color of the bait